
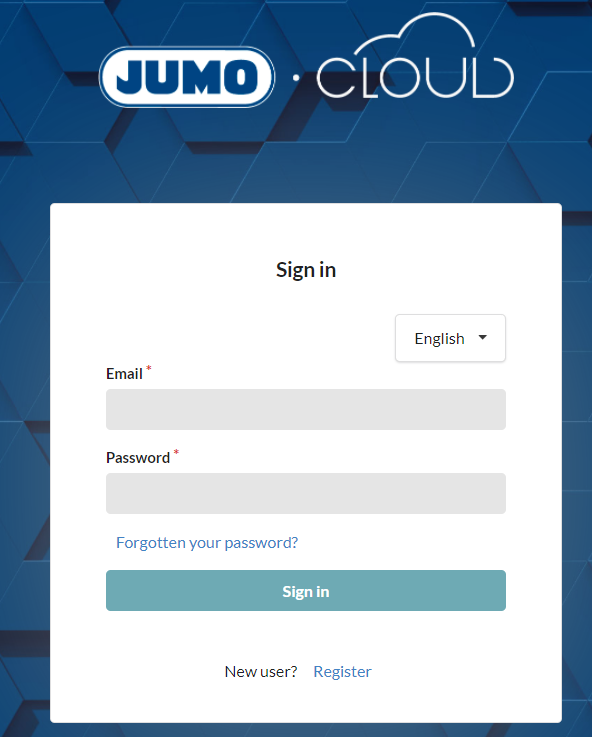
Log in or Register
The preferred browser for login purposes is Google Chrome.
-
Enter the login data via the input mask and select the "Login" button.
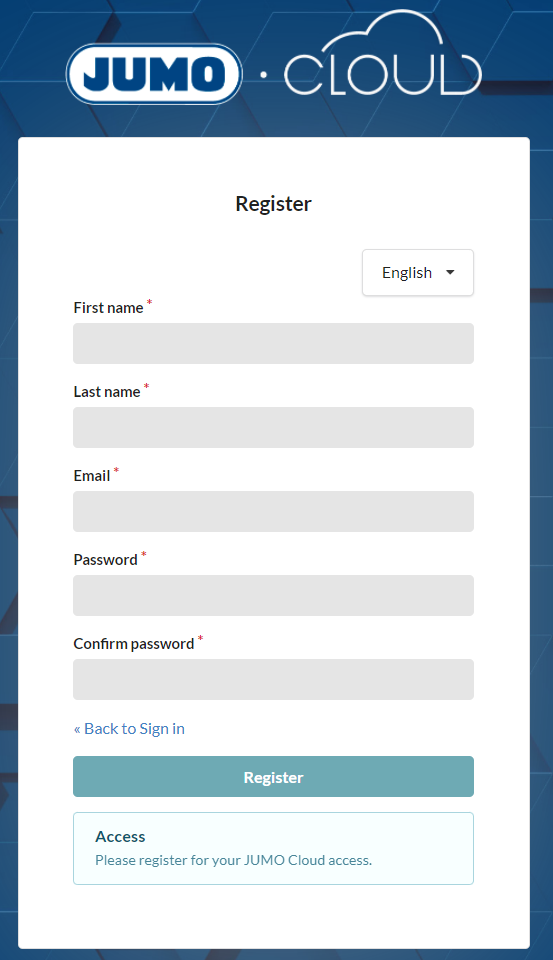
If an account has not yet been created, select the "Register" button. Once the next window has opened, fill in the required mandatory fields. Clicking the "Register" button again creates access to the Cloud.
Once registered as a JUMO Cloud user, you can view public DEMO Tenants. To do this, you just need to click the lock icon. A JUMO administrator then activates your account and gives you read access to all Dashboards.
Select Language
Clicking Select Language opens another menu with the following languages to choose from:
-
German
-
English
-
French
-
Spanish
Color Scheme
You can adjust the color scheme to suit your personal preferences.
Customize Color Scheme
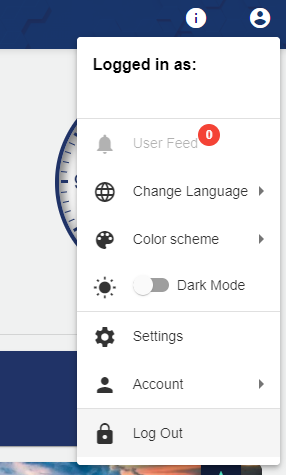
To do this, click the header icon in the upper right corner and select the "Color Scheme" menu item. There you can choose between a light or dark mode.
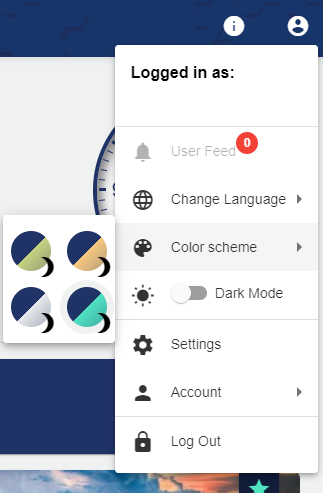
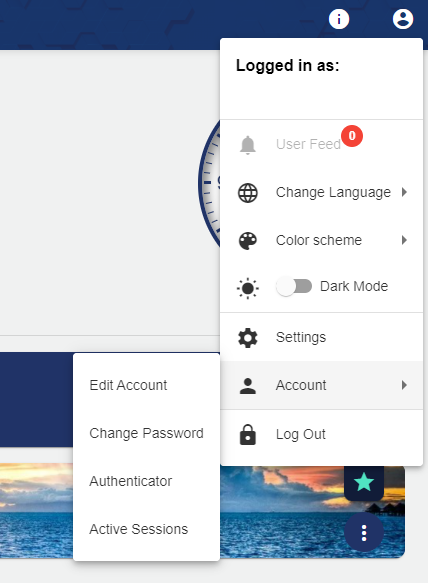
Dark Mode
The Dark Mode can be selected via the User Profile icon. This changes the white background to a gray background area.
Settings
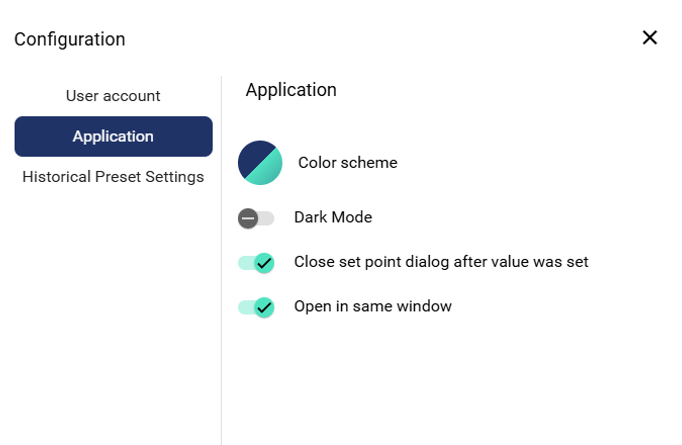
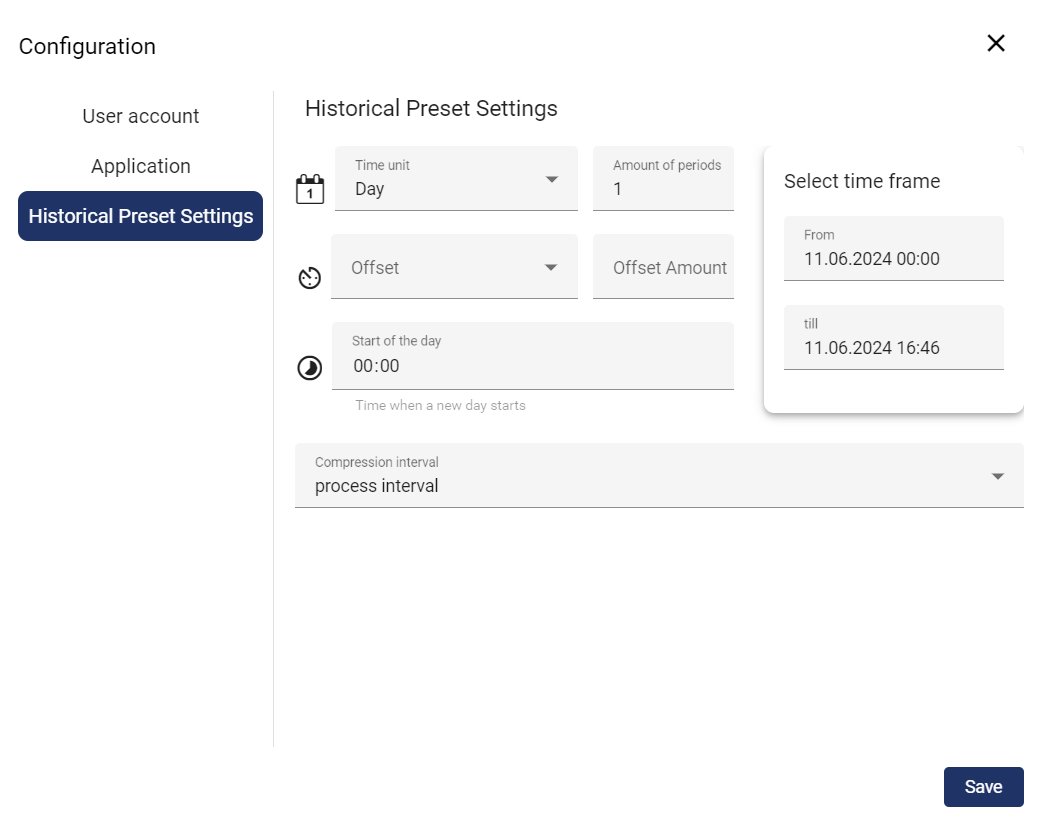
The time zone can be set manually under Settings. The language, color scheme, and account can also be edited here. You can also specify whether the application opens in the same or a new window (browser tab) when you click on a tenant, for example. You can also specify whether the dialog window closes immediately after entering a target value. In addition, the preferred time setting can be displayed in all historical views that are opened.
|
User account |
Application |
Historical Preset Settings |
|---|---|---|

|
|
|
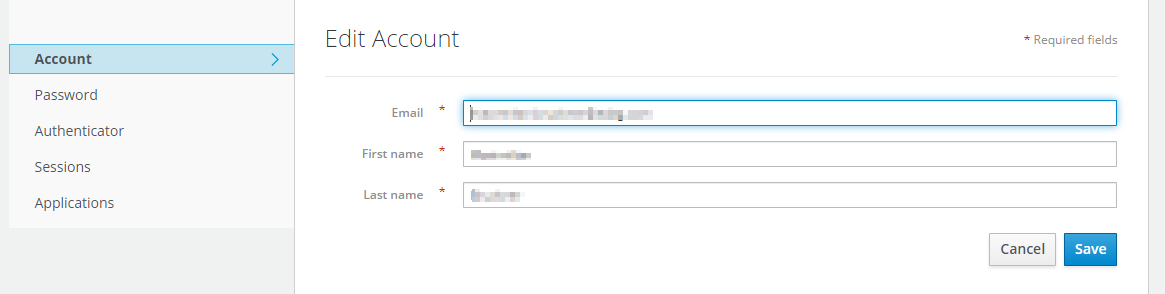
Account Settings
Edit Account
You can manage your user account via "Account".
The e-mail address and user name can be changed via the "User Account" selection field.
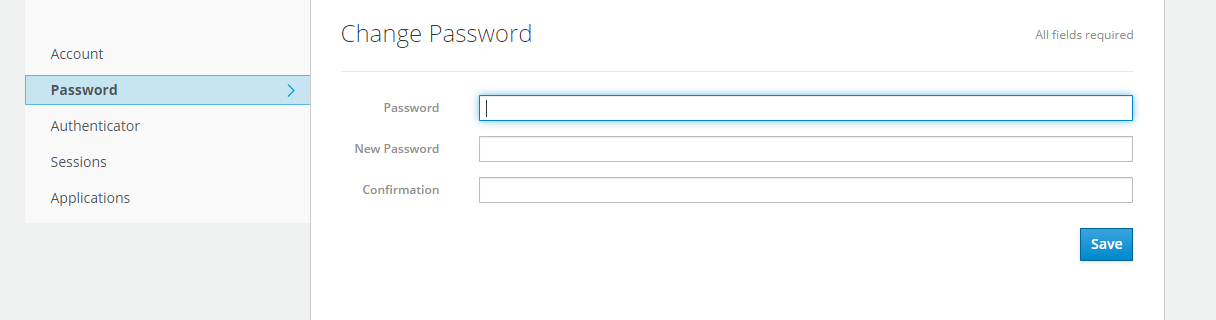
Change Password
The password can be changed via the "Password" selection field. To do this, the old and new password must be entered and then confirmed again.
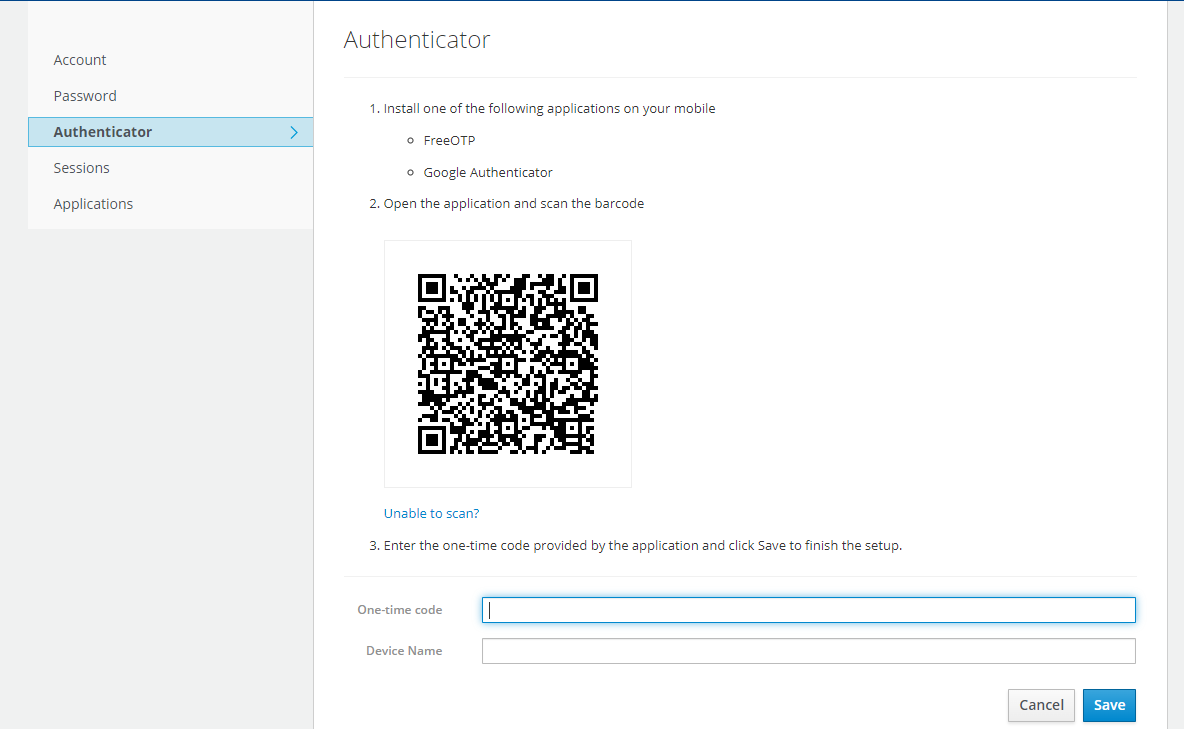
Multiple Authentication
This increases the security of your own user profile!
The "Multiple Authentication" selection field can be used to make your JUMO Cloud access more secure by means of double authentication.
-
Install Google Authenticator or FreeOTP Authenticator on your mobile phone.
-
Scan the QR code. If you are unable to scan the QR code, clicking the blue highlighted link "Can't scan the QR code?" generates a key that can be used to connect the two applications.
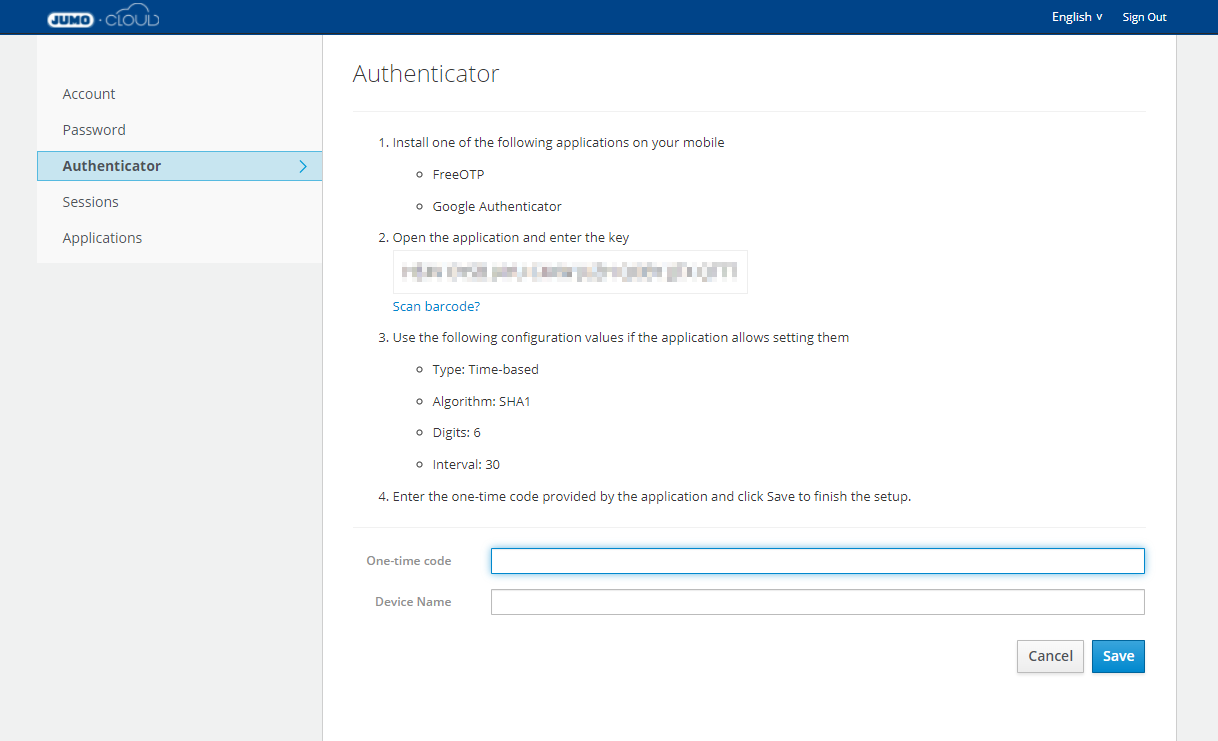
The meaning of the configuration data is as follows:
-
"Type: time-based": A new code is generated after 30 seconds.
-
"Algorithm: SHA1": Is the algorithm used to generate the code.
-
"Digits: 6": The code consists of a 6-digit number.
-
“Interval: 30”: A new code is generated every 30 seconds.
-
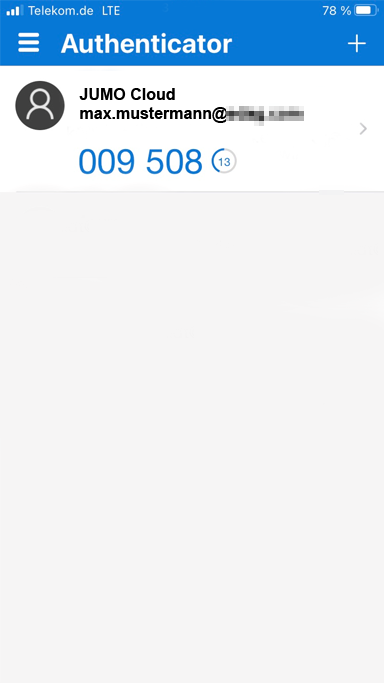
Enter one-time code and device name and save. Example:

-
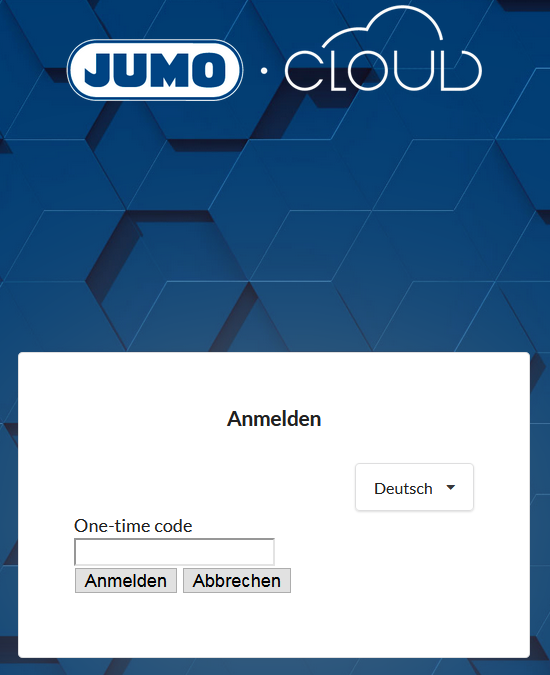
After multiple authentication, you are always asked for a one-time code when logging in to the JUMO Cloud.
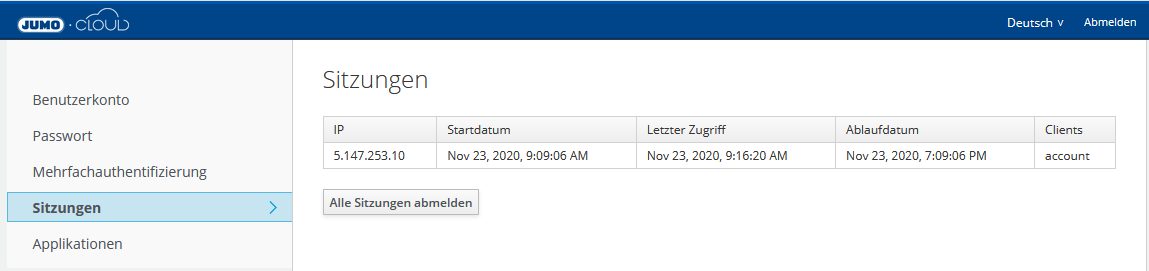
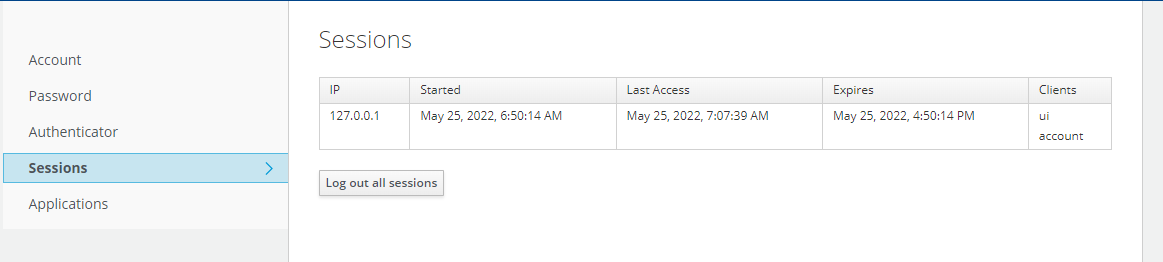
Active Sessions
You can find an overview of the last logins in the Cloud via the "Sessions" selection field. This tab can be of interest if an account is used by multiple people or you want to track who used this account and from where.
You can also use this to end active sessions.
Applications
You can use the "Applications" selection field to see an overview of the applications that have been granted access to your client account. Here you can see which roles ("Available Roles") the corresponding application has and which permissions have been granted. The user has no control over this.
Log out
The logout from the Cloud can be selected via the User Profile icon.
To do this, select "Log out" in the pop-up menu.
You are then automatically logged out of the application and can log in again afterwards.