
Important:
It is necessary to save the settings after each step!
First, the alarm services have to be set.. See Add alerting services
Alarms in variTRON and in SCADA must be set separately. Alarm cascades with on-call schedules can be set up directly from the cloud.
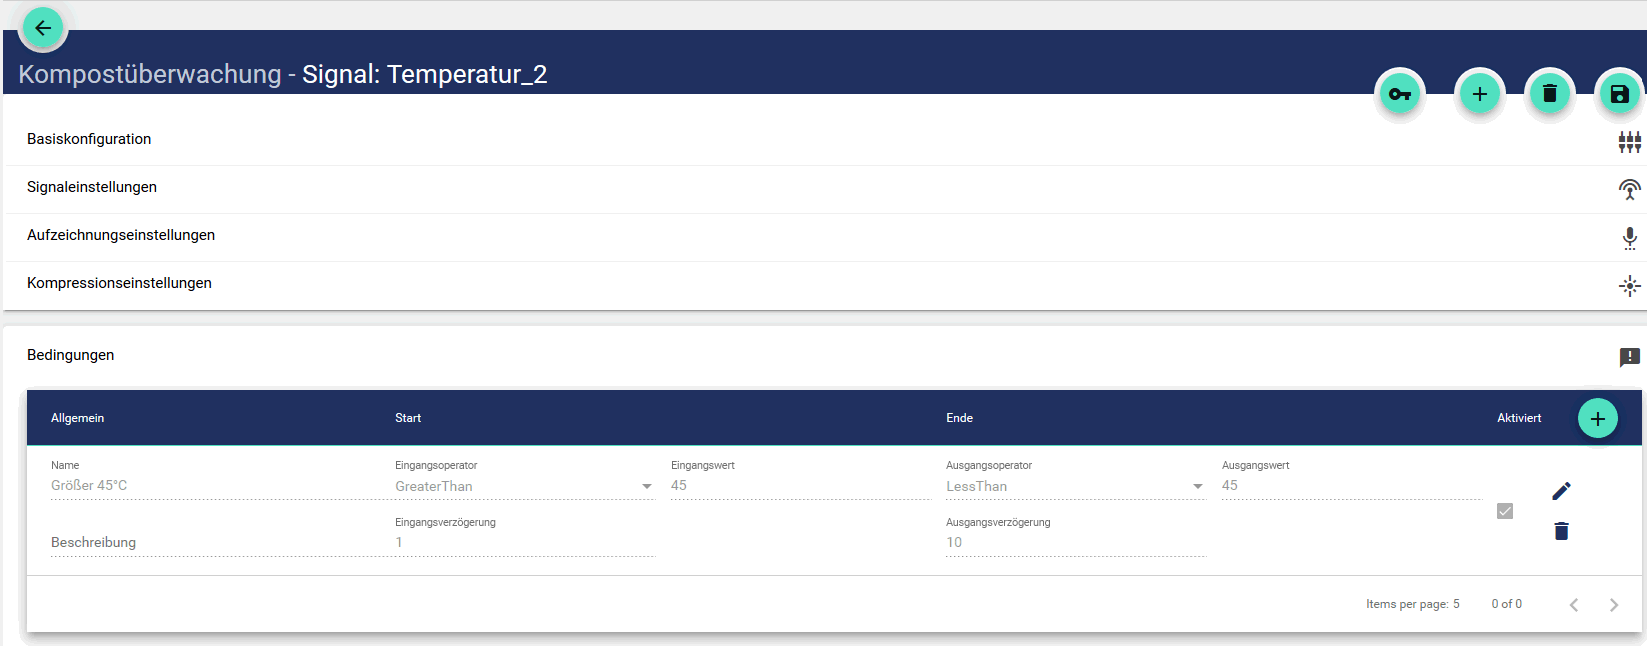
1. Create Signal with condition
2. Send configuration to variTRON (Datasource)
3. Create Event Category
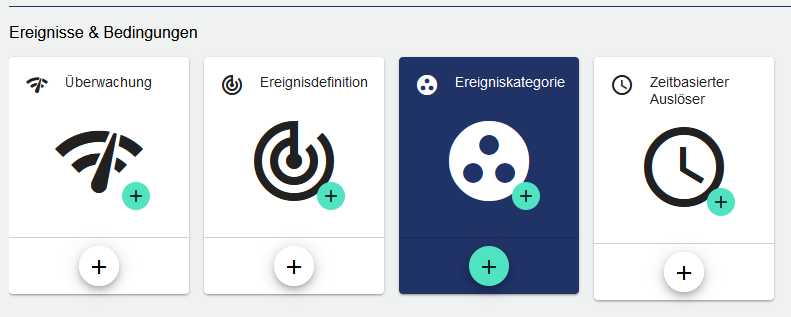
In the Event Category, multiple Event Definition are grouped together in order to assign multiple events to a Recipient or Recipient Group.
Here you enter the name in the Basic Configuration.
In the Advanced settings, you set the alarm, acknowledgeability, color and icon.
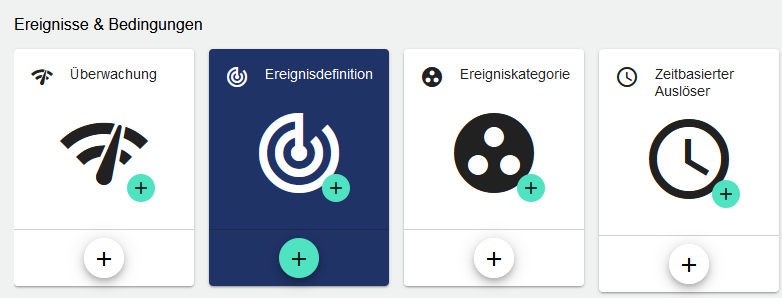
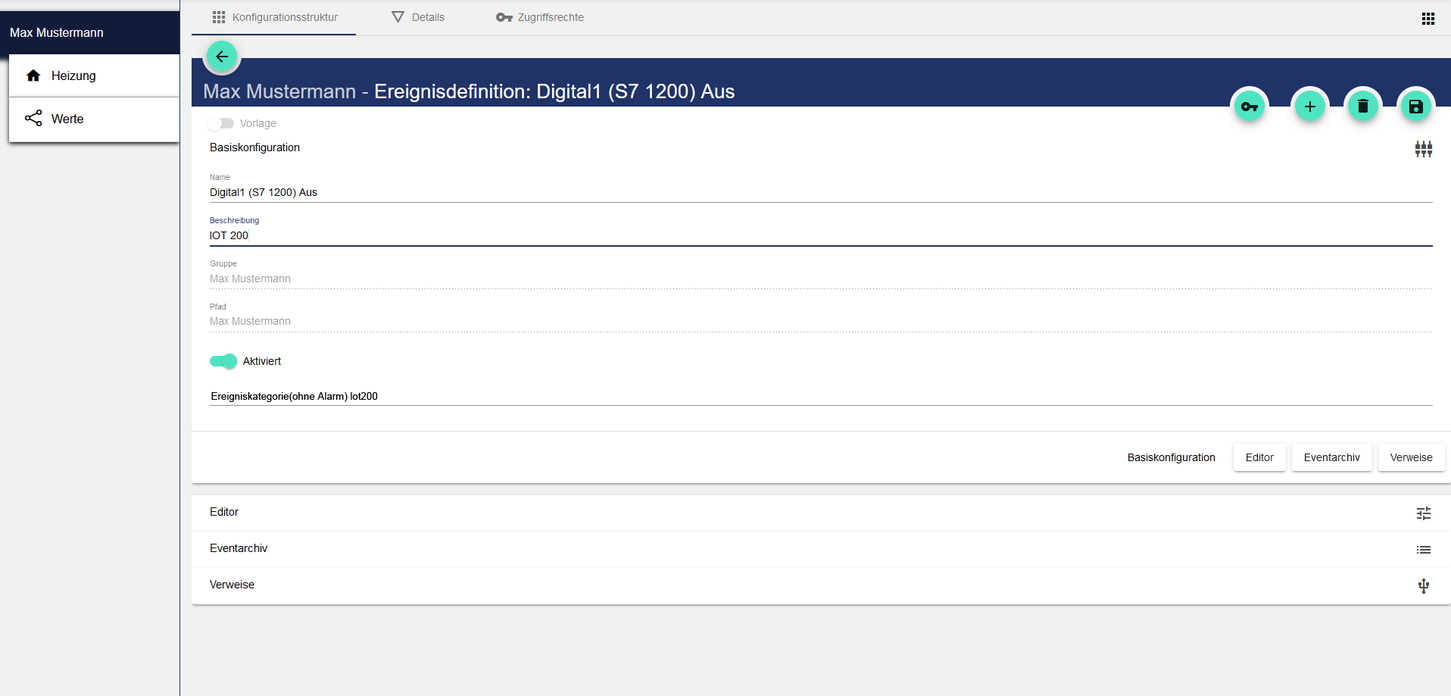
4. Create Event Definition
You can then proceed with the Event Definition.
Events always depend on the Condition of the Signals. This means, for example, that the event is only triggered when the condition that the value of the signal is equal to 0 is fulfilled. This is also possible for multiple conditions, which are connected by an AND or OR link.
In the Basic Configuration you create the name and description and select the previously created Event Category via the Navigator.
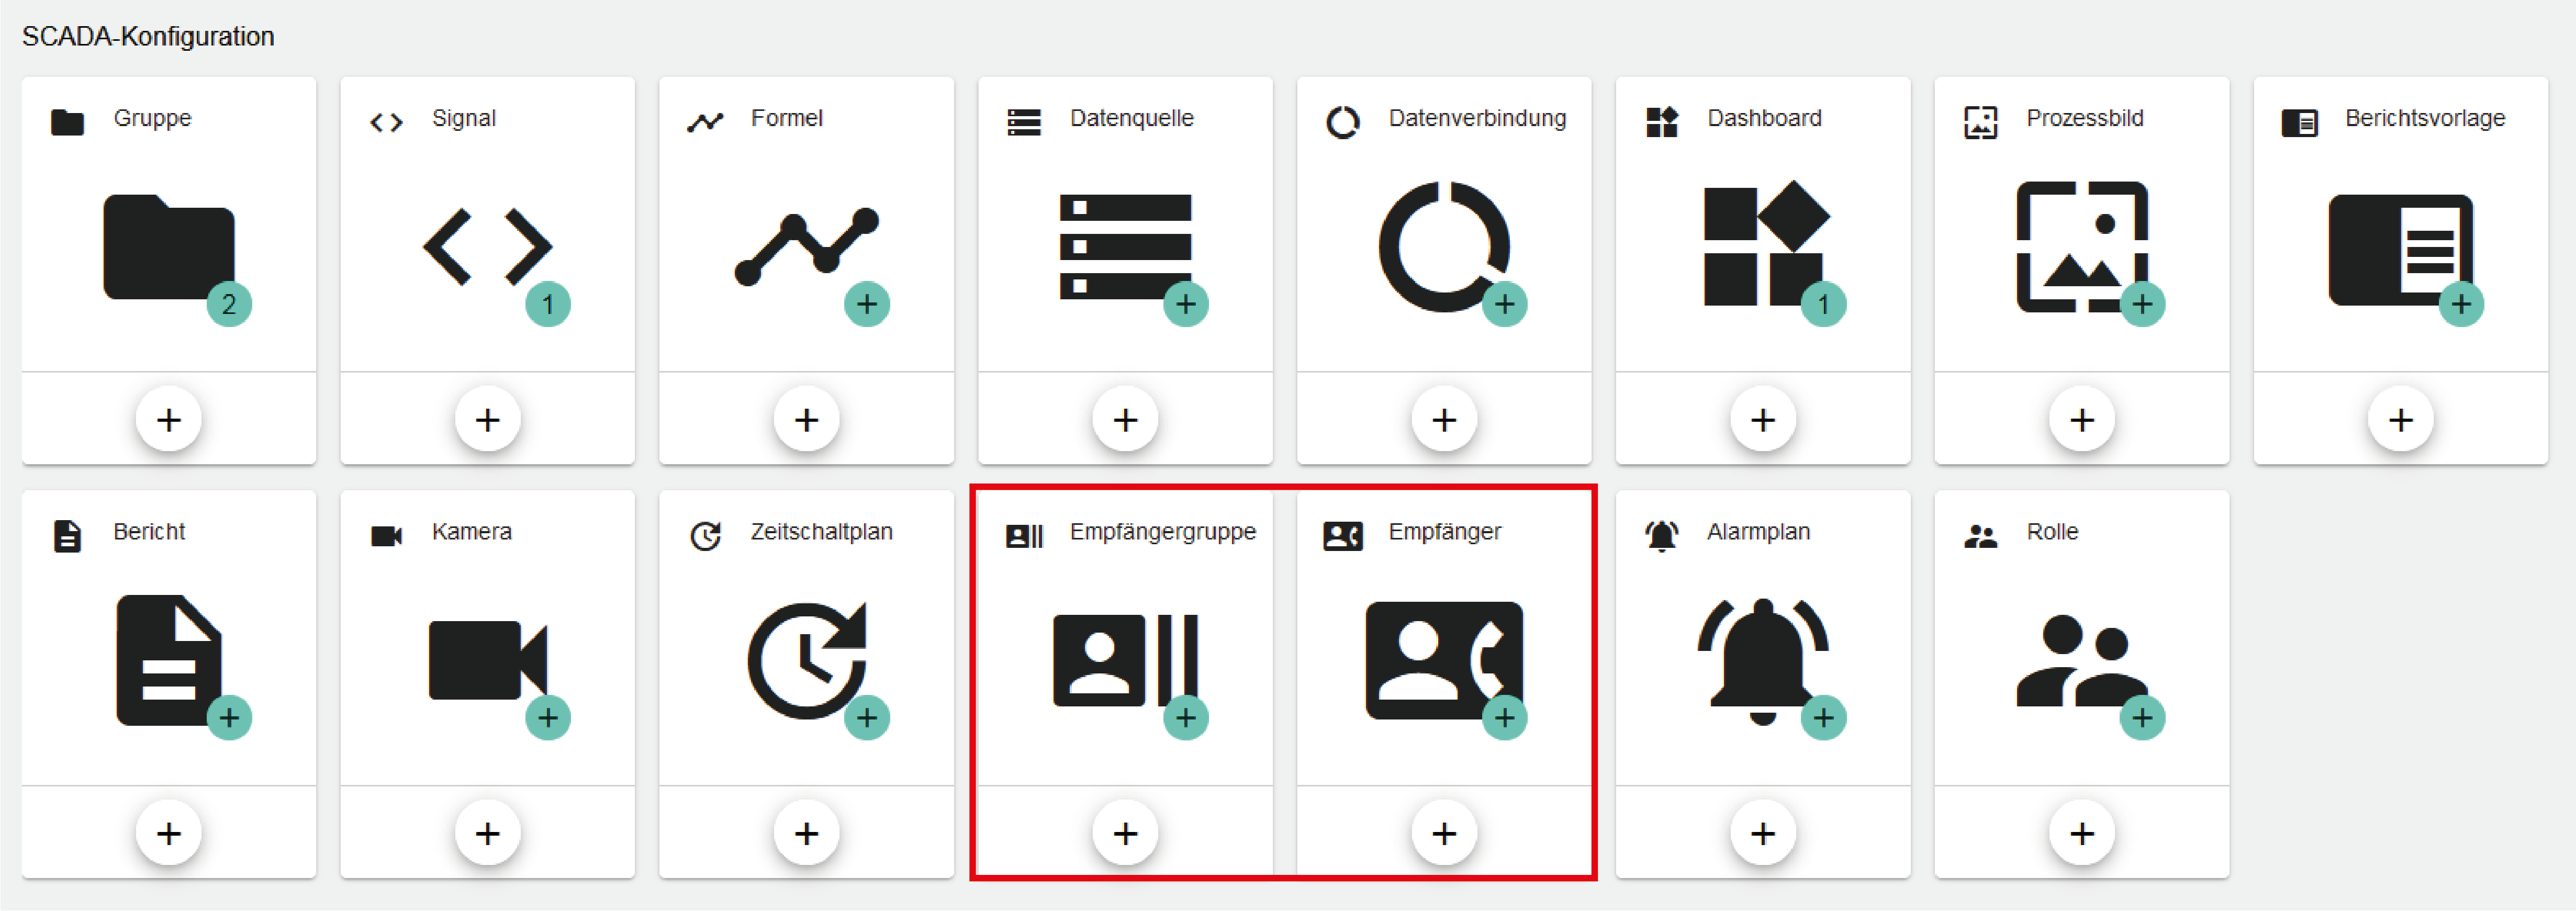
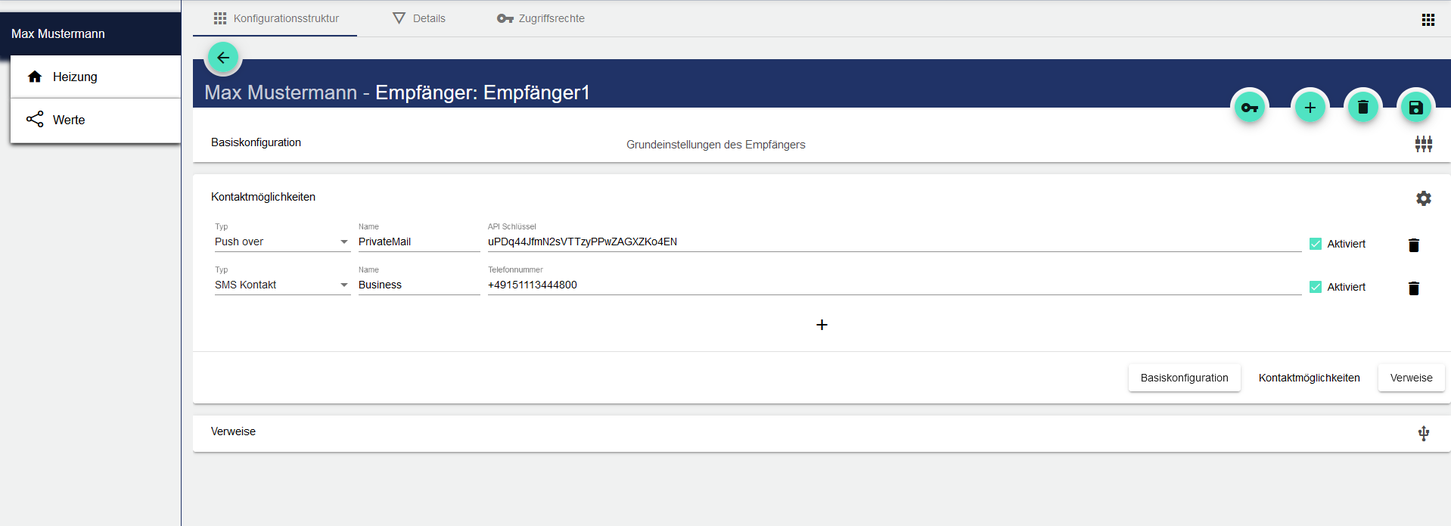
5. Create and Define Recipients
You have now created the Event. Now we need the contact details for the Recipient,
in order to assign the contact options, such as SMS, e-mail, Push Over App or VoIP voice call, to individual contacts.
In the Basic Configuration, enter the name, salutation, first name and last name as appropriate. To make it easier to find the Recipient later, an individual designation can be chosen for the name.
In the contact options, as already stated you can still select the name individually, in addition to the type, in order to facilitate assignment later. Depending on the type you have chosen, you will also need to enter an email address, an API key (required for the Push Over app) or a phone number. Finally, put a check mark after the contact options you want to use and save the configuration.
6. Define Recipient Group
Now combine individual Recipients into a Recipient Group here, in order to set a notification sequence and the frequency of the notifications (please make sure that you check the box to activate it). In the Basic Configuration, set the name and select a color for the Recipient Group, which will be displayed later in the alarm schedule. In the alarm settings, enter the desired number of repetitions for the notification and check the box to enable the setting. In Advanced Settings, we can now add the previously created Recipient by clicking the + icon in the middle of the left column. The selection is made via the Navigator. The added Recipient can then be moved as required and reinserted from the right-hand column, also using drag and drop. In the left column, drag and drop to set the order. You set the time between attempts according to the alarm settings using Delay and Unit.
7. Create Alarm Schedule and Specify Link to Event Category
Add "Alarm Scheduling" and other widgets to the Dashboard (see Alarming Plan)
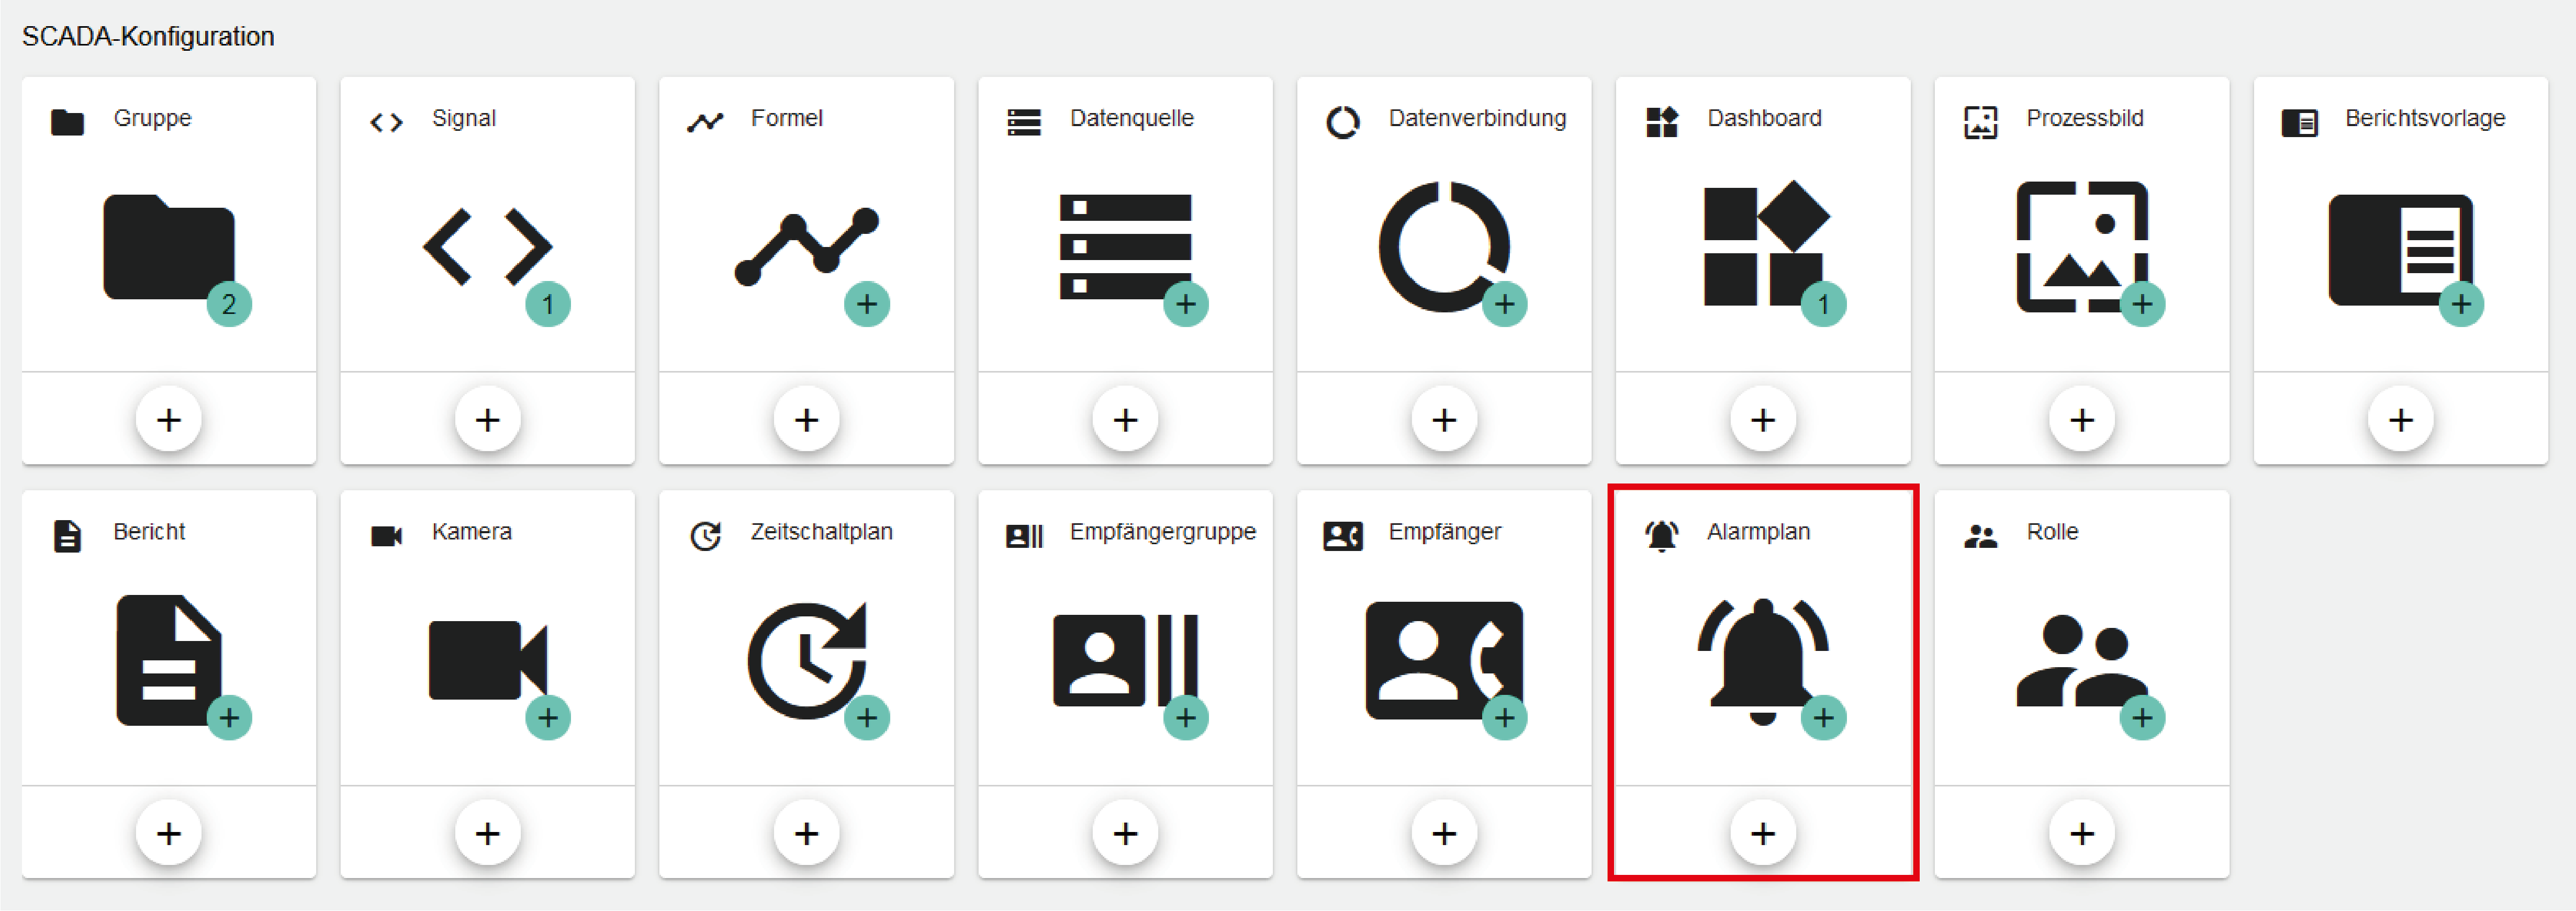
In the next step, you create an Alarming Plan and assign Event Category to it. In the Basic Configuration, enter the name and check the Enabled box. In the advanced settings, add the Event Category you want to assign to the alarm schedule. Here you also have the option to set alarms for multiple event categories.
8. Create Dashboard (optional)
To test the set alarm, the Test-Event widget can be added to the Dashboard.
Now select a Dashboard on which to display the widget for the alarm schedule. Enter a meaningful name in the Basic Configuration to make it easier to find the Dashboard later.
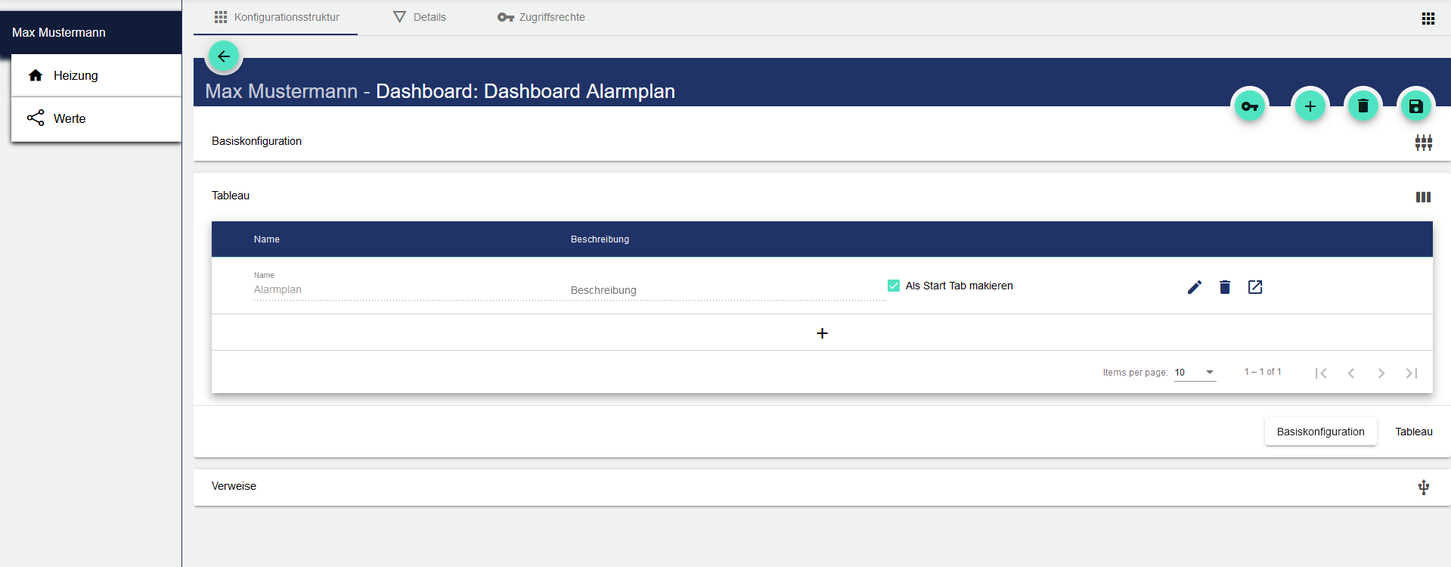
Here, for example, multiple tabs can be set and labeled in case more space is needed for additional widgets.
9. Add Widgets (Alarm Scheduling)
Navigate to the Dashboard and go to the Edit view to edit add widget.
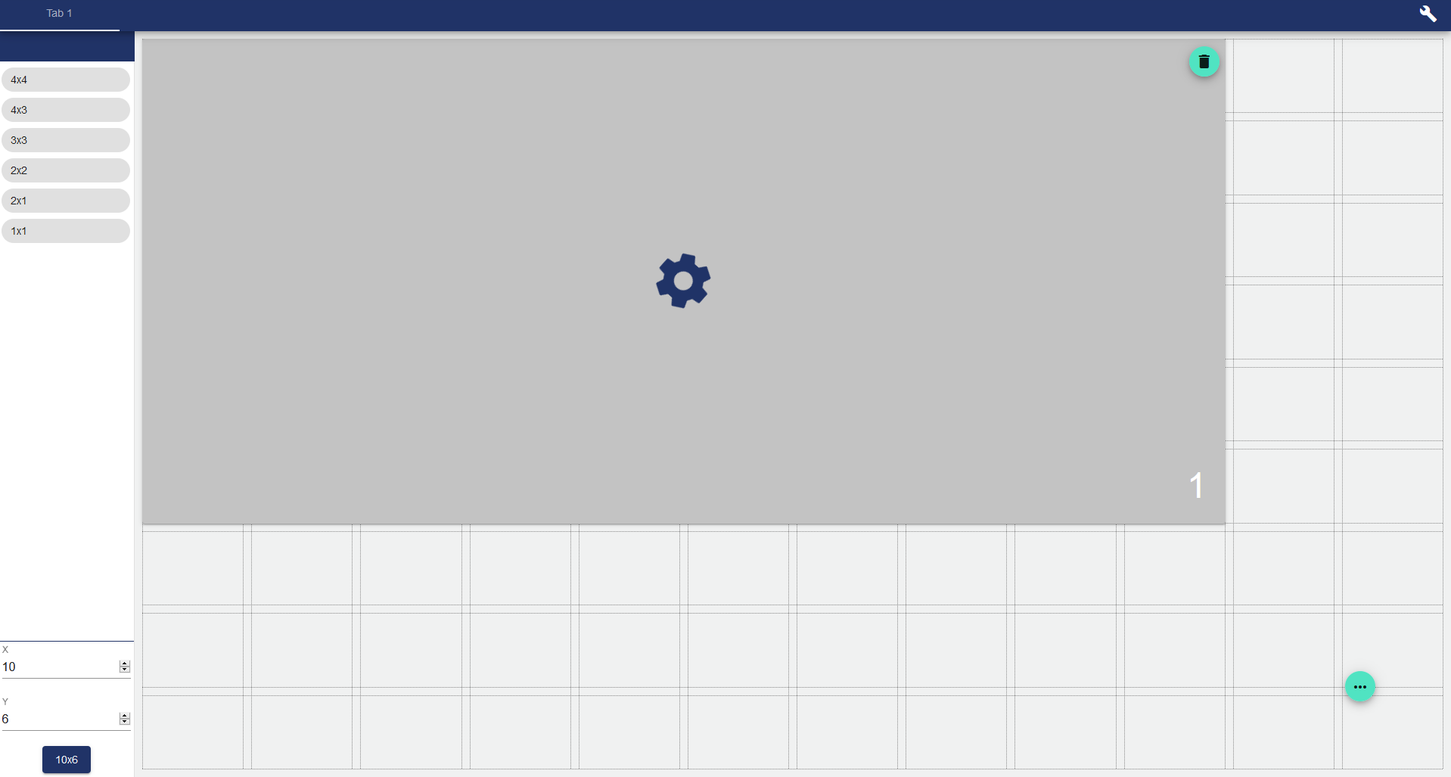
In the example, we have chosen a widget with an individual size (width (X): 10; height (Y): 6) and then selected the Alarm Scheduling widget. Next, we go to Save so that the widget is displayed for us on the Dashboard and is ready for further configurations.
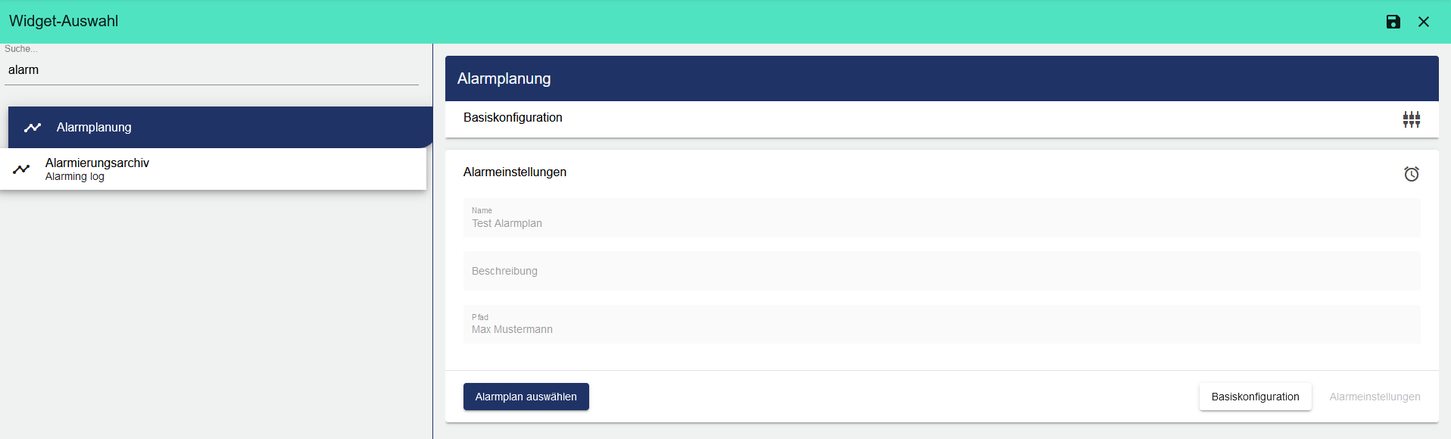
10. Select Alarm Schedule
Once you have selected the Alarming Plan widget, you need to choose which Alarming Plan you want to use. Before this, only the title of the schedule is entered in the Basic Configuration. This can be displayed in the Dashboard later by checking Show Header. In the Widget: Alarm Planning, just select your Alarming Plan using the navigator.
Here we now select, for example, Standby, in order to then specify time periods in the Alarming Plan for the Recipient Group contained in Standby.
11. Empfängergruppen zuordnen
Finally, create periods for each Event Category. You can use the Recipient Groups button to switch between your created groups and assign ranges by clicking a date or holding down the left mouse button and dragging to assign multiple days.
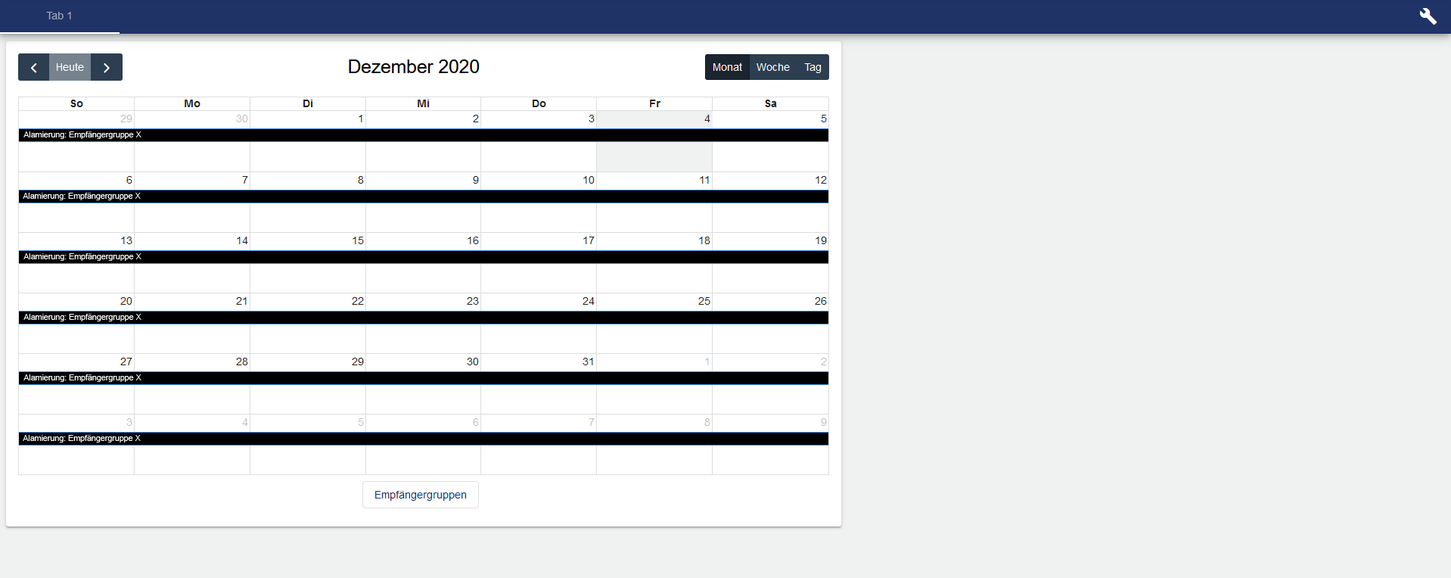
Then we save our changes and the alarm schedule is ready.
Congratulations, you have created an alarm schedule.