
How to Link variTRON Data to the Cloud?
Here you can see how the device from the JUMO variTRON family is connected to the JUMO Cloud and how device information is displayed in the Dashboard.
You prefer watching videos instead of reading, then the above is for you. (activate EN Subtitels)
Find Required Tenant
Log in to the Cloud
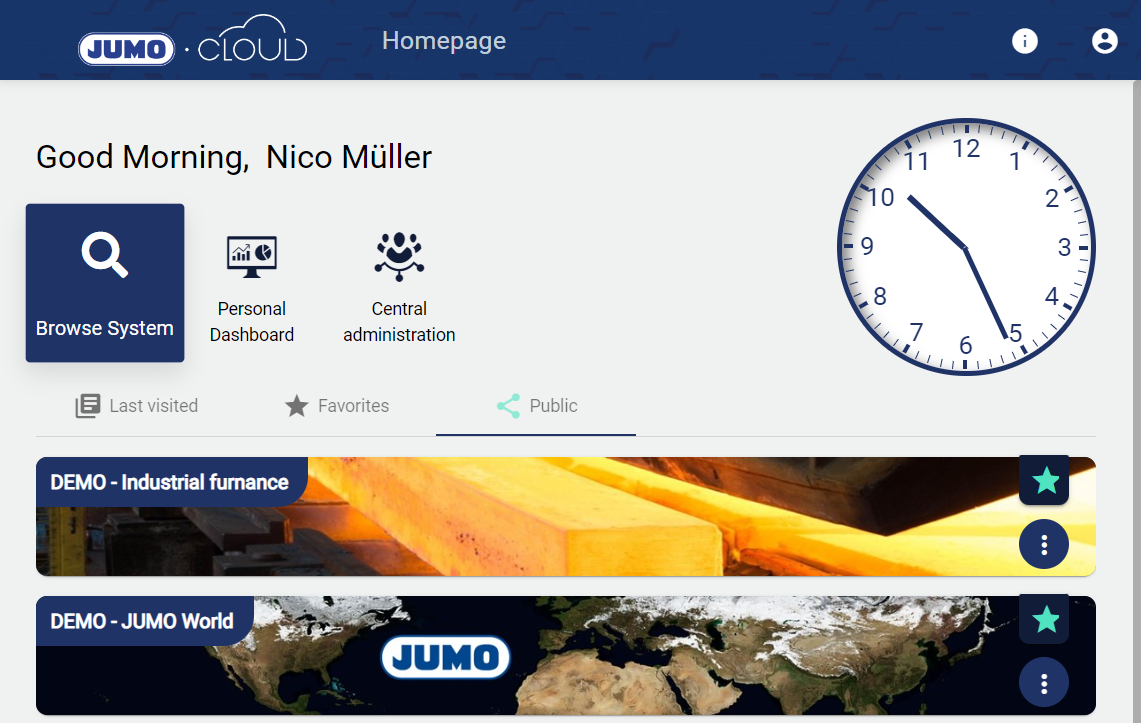
Select the "Browse System" button on the Homepage.
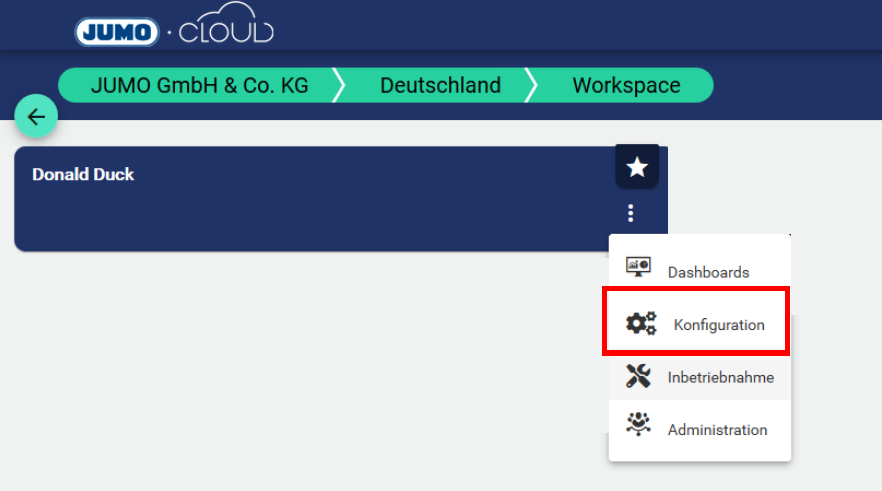
Select required Tenants.
Create Datasource
The prerequisite is a JUMO variTRON device with an Internet connection.
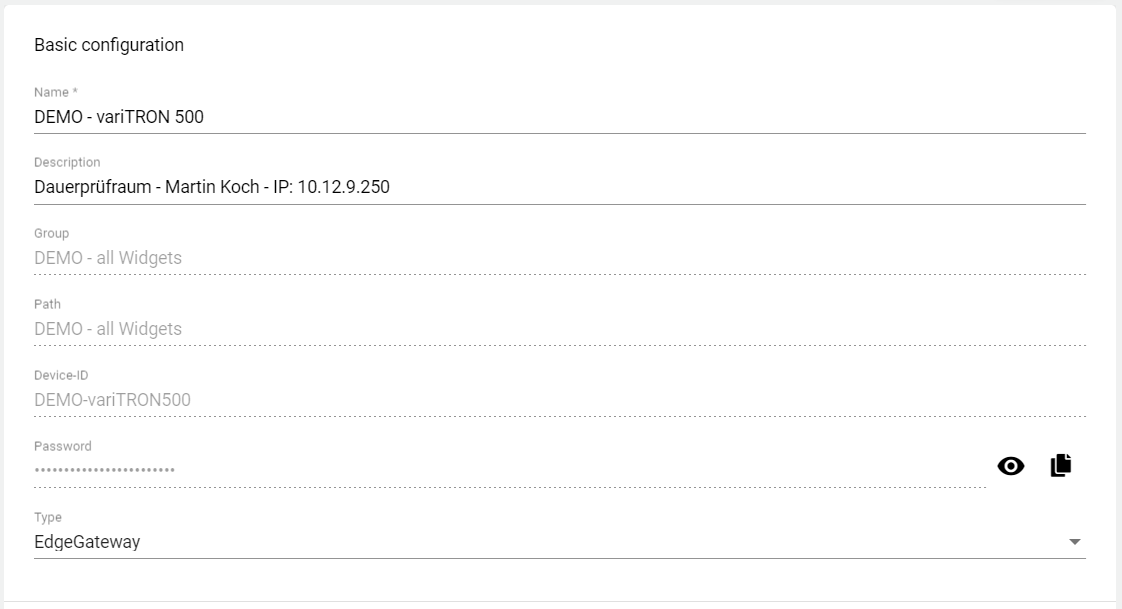
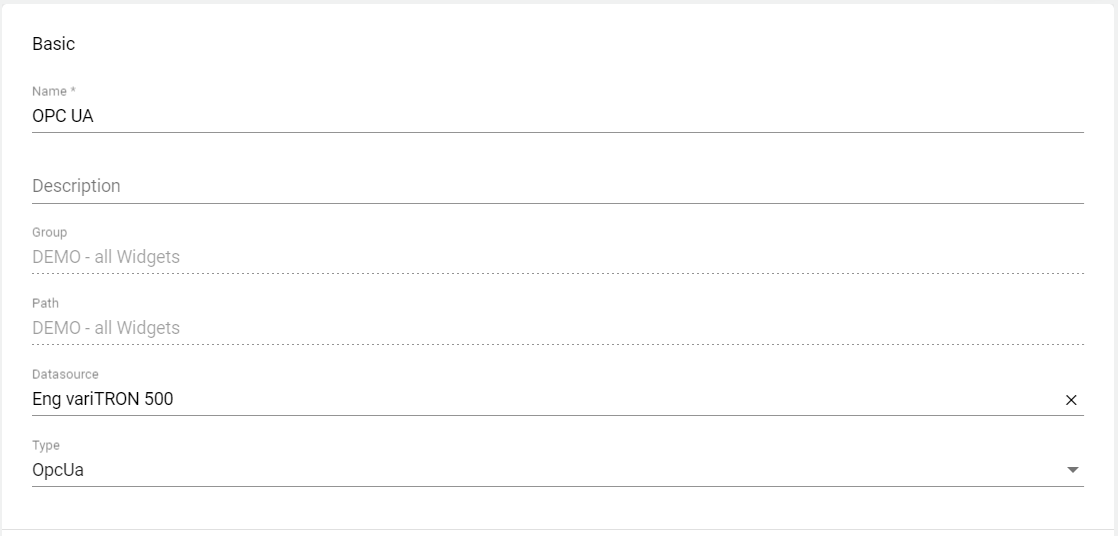
Add a Datasource via the Plus button and open the Basic Configuration.
Assign a name for the Datasource and save it. The Device-ID and password are generated automatically by the system.
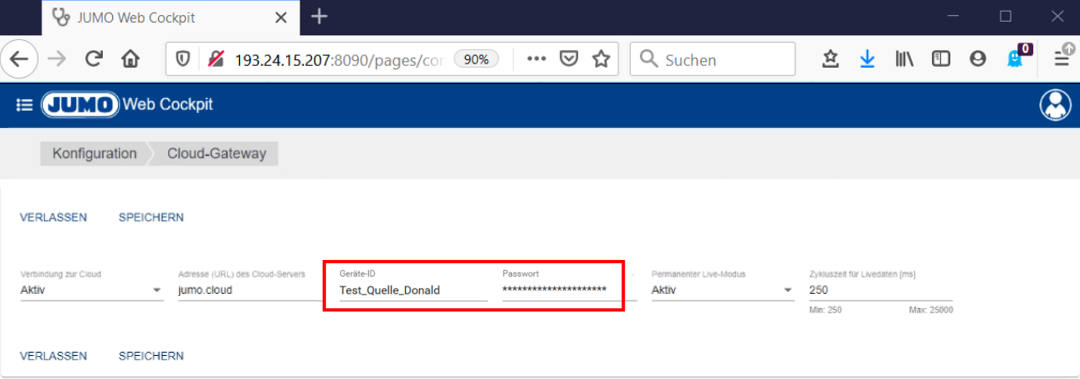
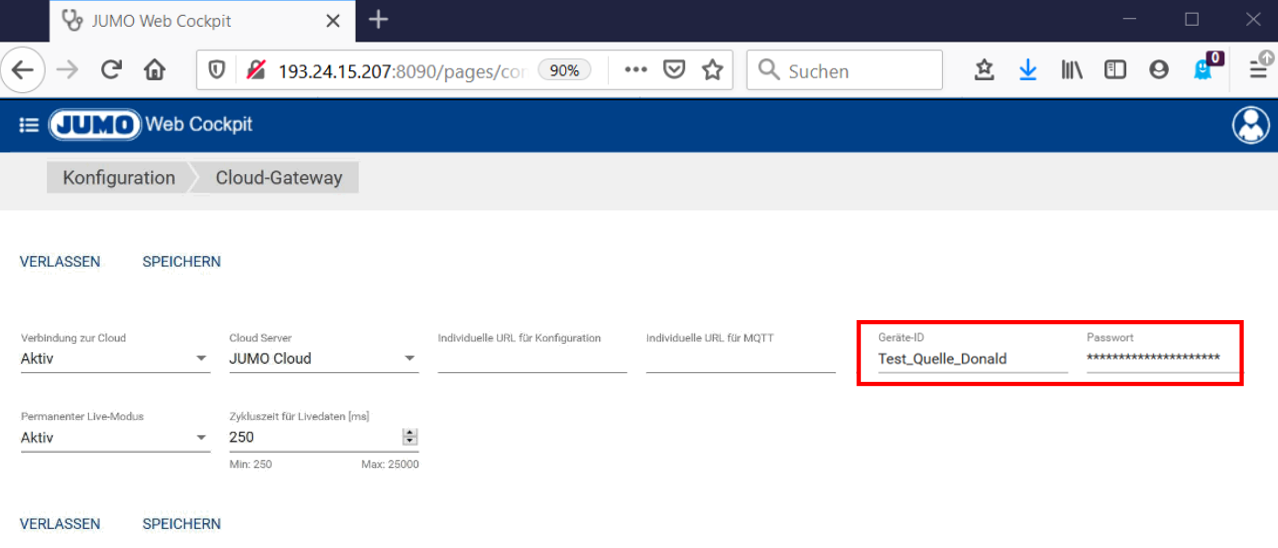
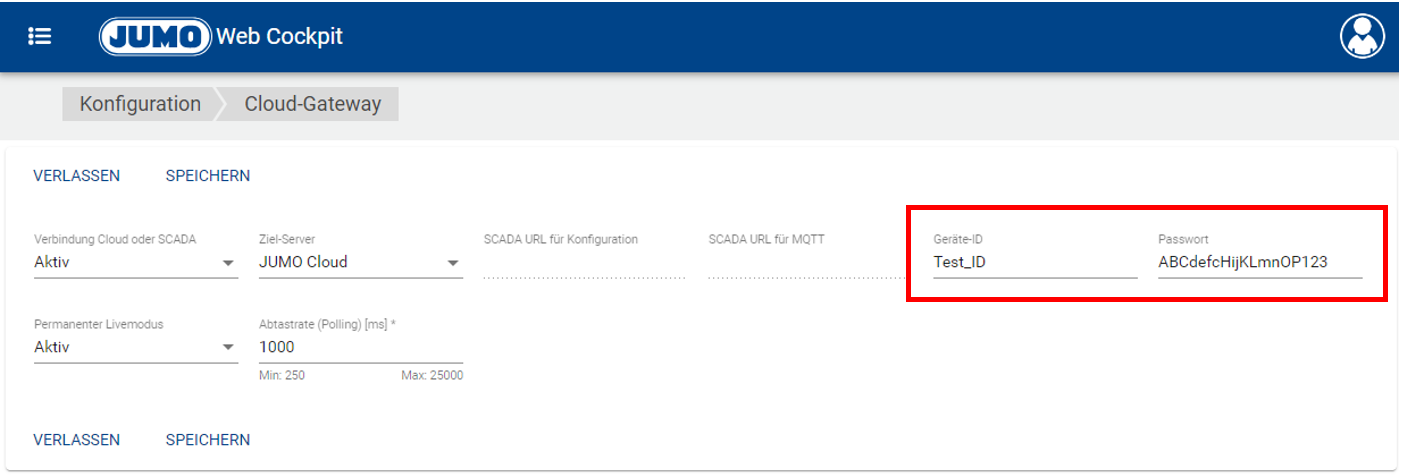
Enable the Cloud Gateway in the JUMO Web Cockpit
The Web Cockpit of the variTRON device is a web server that runs in the device and can be reached via an IP with port 8090.
Under Configuration and Cloud Gateway in the "JUMO Web Cockpit" of the variTRON device, enter the device ID and password from the JUMO Cloud.
Systemversion 3 | Systemversion 4 | Systemversion >= 5 | Systemversion >=8 |
|---|---|---|---|
 | 
| 
| 
|
The JUMO variTRON 500 documentation with an explanation of all terms is shown here.
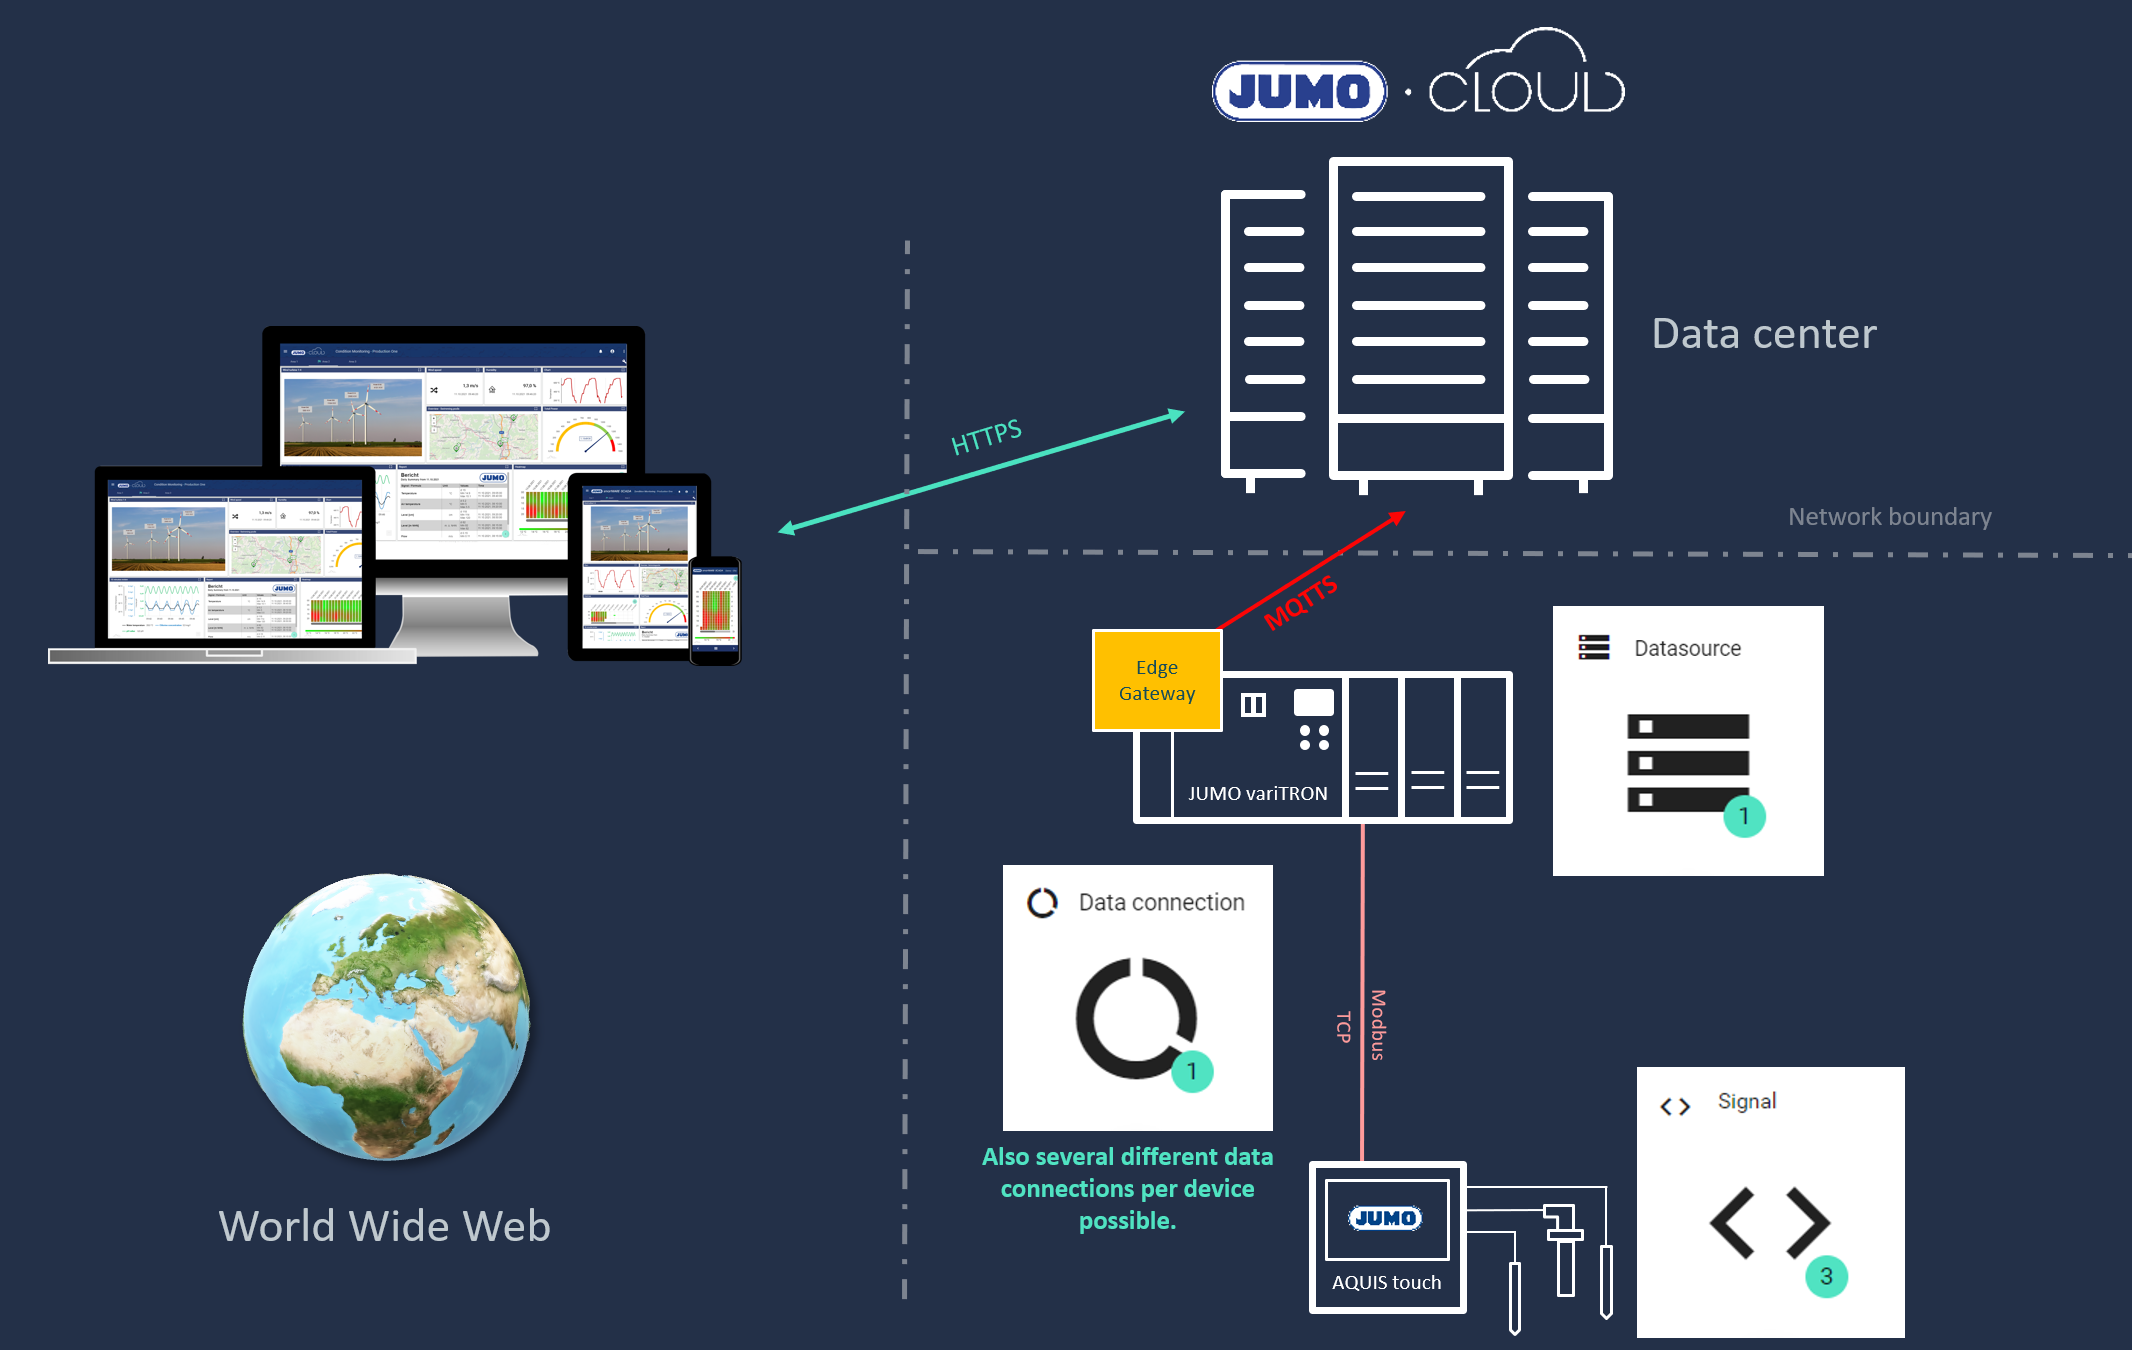
Create Data Connection in the JUMO Cloud
The Data Connection is required to inform the JUMO Cloud Software Gateway for the JUMO variTRON device which protocol it should use to pick up the signals / values from a specific location. There are two ways of retrieving values or signals in the JUMO variTRON Cloud Gateway. For information: Several of these "data connections" can be configured in one variTRON device.
Modbus TCP (With this data connection, it is very easy and possible to retrieve signals from a device (e.g. Aquis Touch, etc.) and forward them to the Cloud without JUMO Setup / Codesys). To select this data connection, please refer to the chapter Data Connection). (A Modbus Master is integrated in the Cloud Gateway of the variTRON device). How signals are subsequently created is described in the chapter Signal.
OPC UA (Is described in this chapter. We currently use the OPC UA server of Codesys. (An OPC UA Client is integrated in the Cloud Gateway of the variTRON device)
S7 TCP (PROFINET)
More Data connection
Then add a data connection in the JUMO Cloud, assign a name for the data connection, and specify the corresponding Datasource and the type "OpcUa".
Via "Advanced settings" enter the URL address "opc.tcp://localhost:4840" and save it via the disk symbol. This URL address is used to address the OPC UA server. In the above case, the JUMO variTRON internal (localhost) OPC UA server of the Codesys is addressed. In principle, however, another, different connection to another OPC UA server in the network can also be established.
CODEopc.tcp://localhost:4840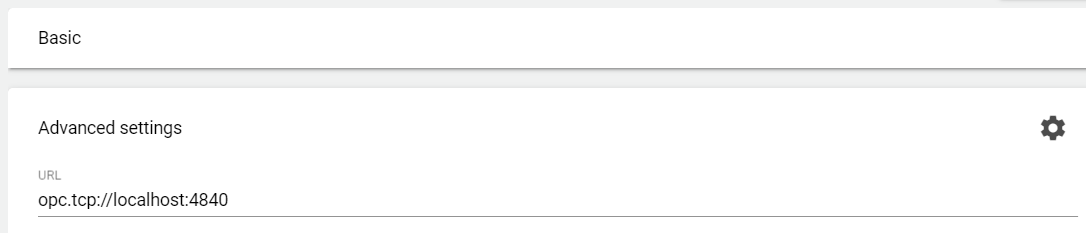
Click the Back arrow twice

The changes made in the JUMO Cloud must now be sent to the device.
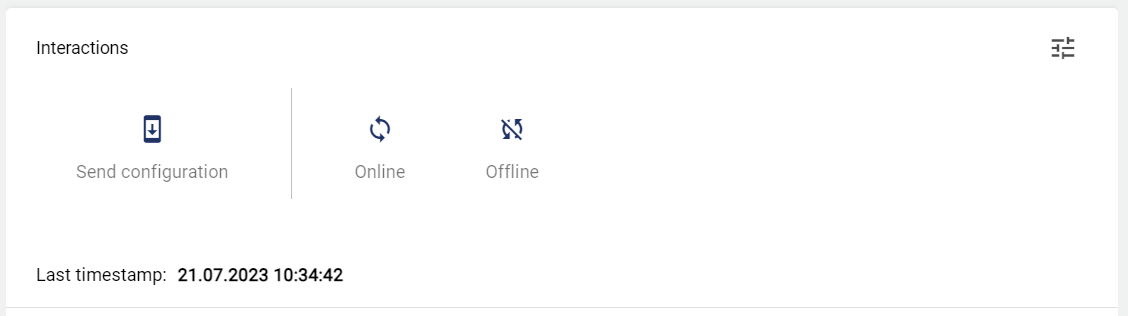
To send the Cloud Gateway configuration to variTRON, the "Signal" button can also be used. Here all connected Datasources are displayed in the upper right corner, by hovering over them, the user can quickly and easily interact with them.

Select the Datasource button via the configuration structure.
Select the "Send Configuration" button via "Interactions" and save → confirmation now appears that the information was sent. The JUMO Cloud settings have now been transmitted to the variTRON device.
Create Signal
After creating the Datasource and connection, the signal is created via the configuration structure.
Select the "Signal" button via the configuration structure.
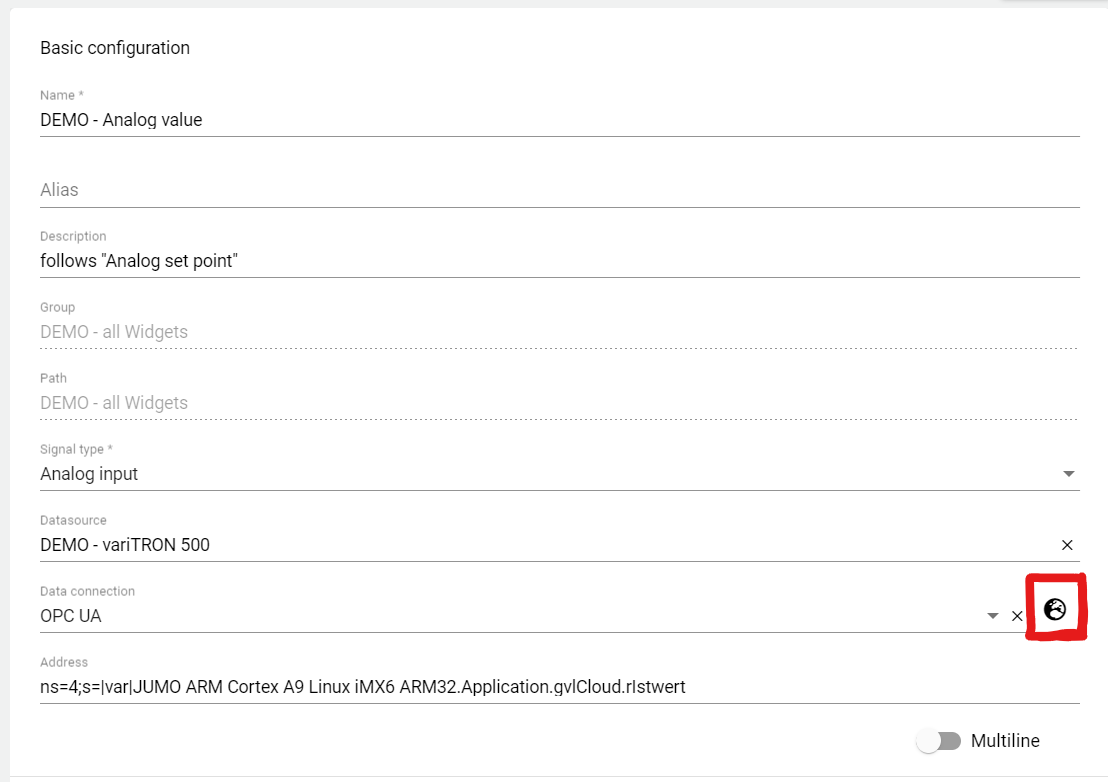
Assign a name for the signal, select the signal type, assign the Datasource and connection and browse the OPC UA value of the variTRON signal.
The address of the signal is provided automatically: Objects → Server → 4:JUMO ARM CortexIf the value is not browsed, check again in the "Web Cockpit" whether the IP address of the variTRON is also retrieved automatically under "Configuration" → "Ethernet" → "LAN1".
!Condition!:
The "CodesysOpcUa" function is activated (can be activated via Webcockpit in the Service tab).
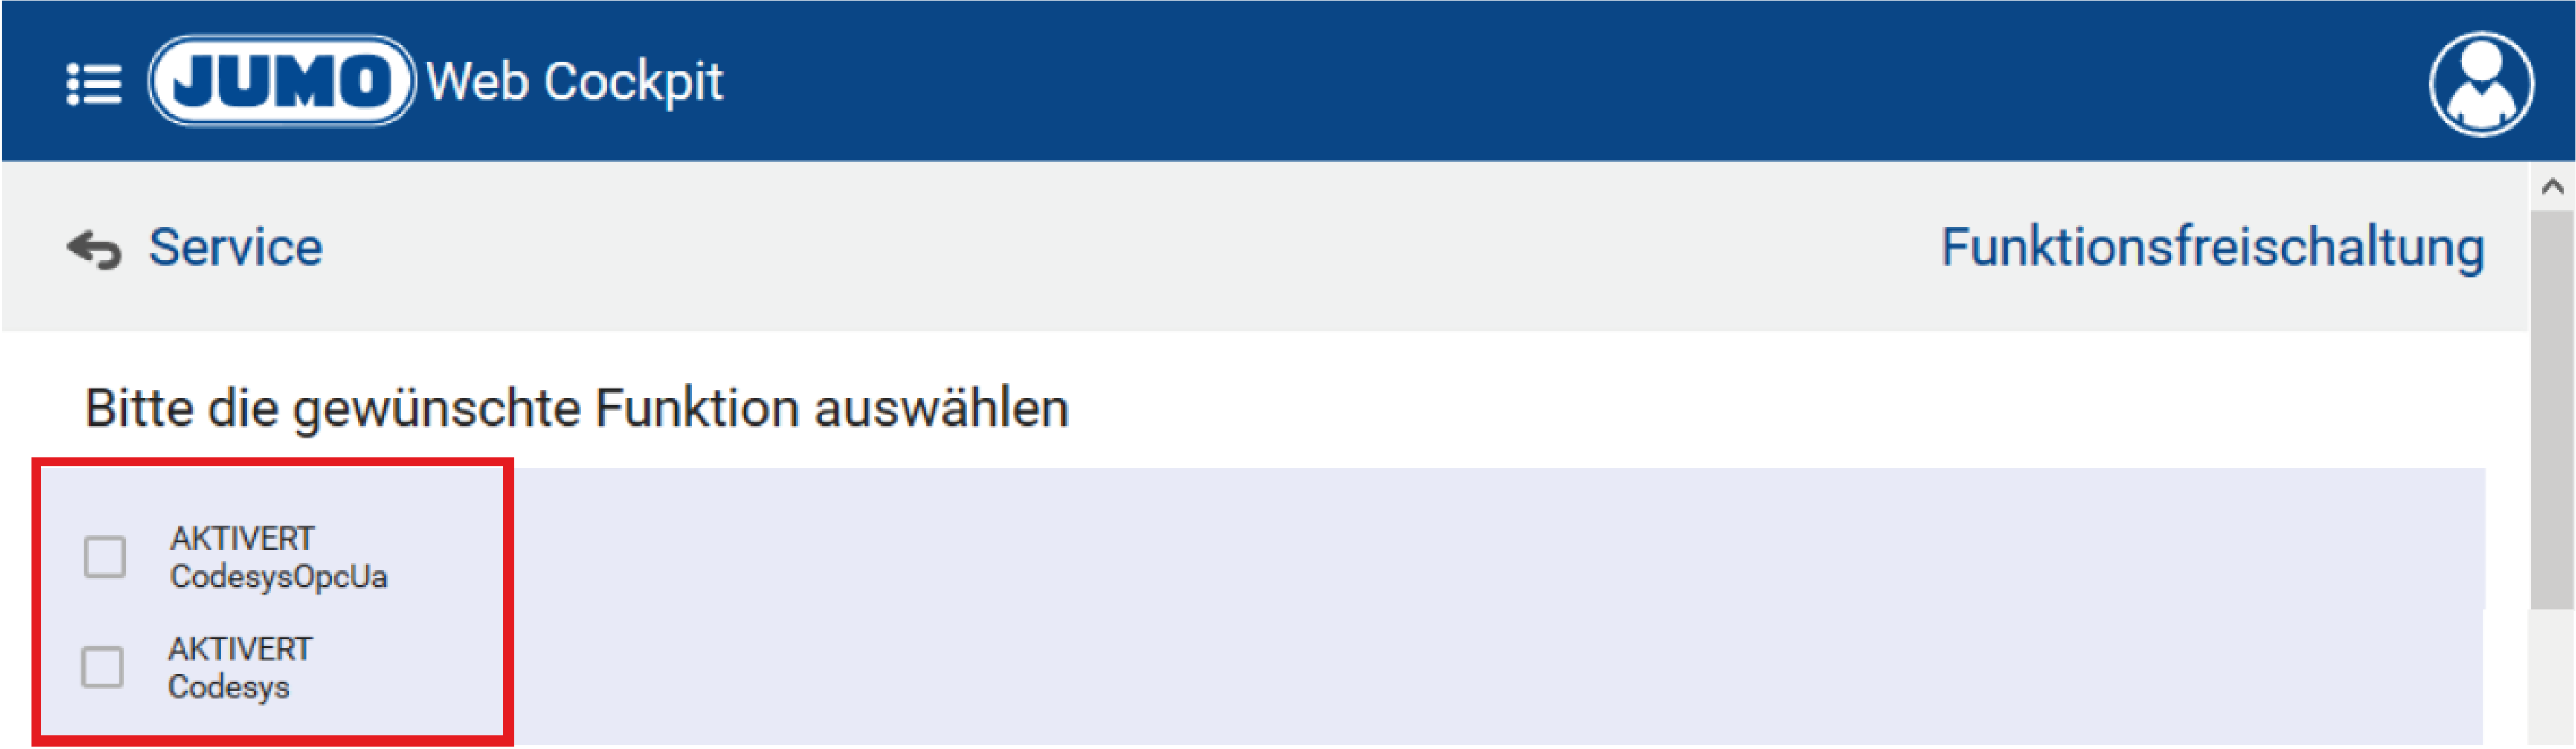
The "CodesysOpcUa" function is activated (can be activated via Webcockpit in the Service tab).
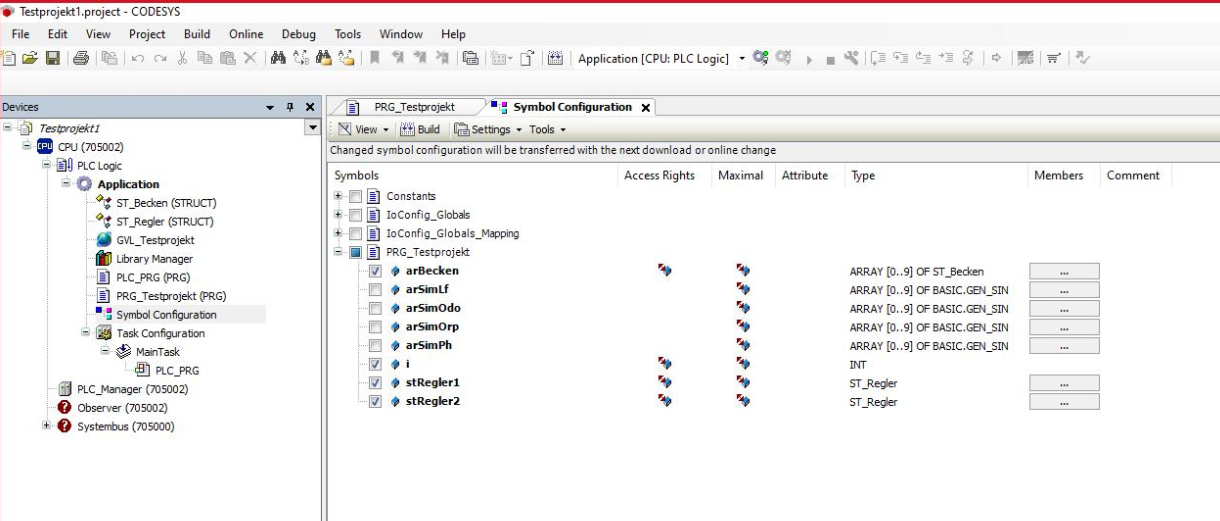
In the JUMO setup, the required OPC UA values can be enabled in the Codesys extension under "Symbol Configuration":
The "Send Configuration" button in the previously created Datasource must now be selected again and sent:
The "Commissioning" button can be used to check the correct and regular transfer of the variTRON's values to the Cloud.
Alternatively, this button can also be used (found under "Signal").
The "Signal" button can be used to check the correct and regular transmission of the variTRON values to the cloud. If the user hovers over a line with the mouse, a magnifying glass symbol appears on the right with which the historical values and progressions can be viewed.


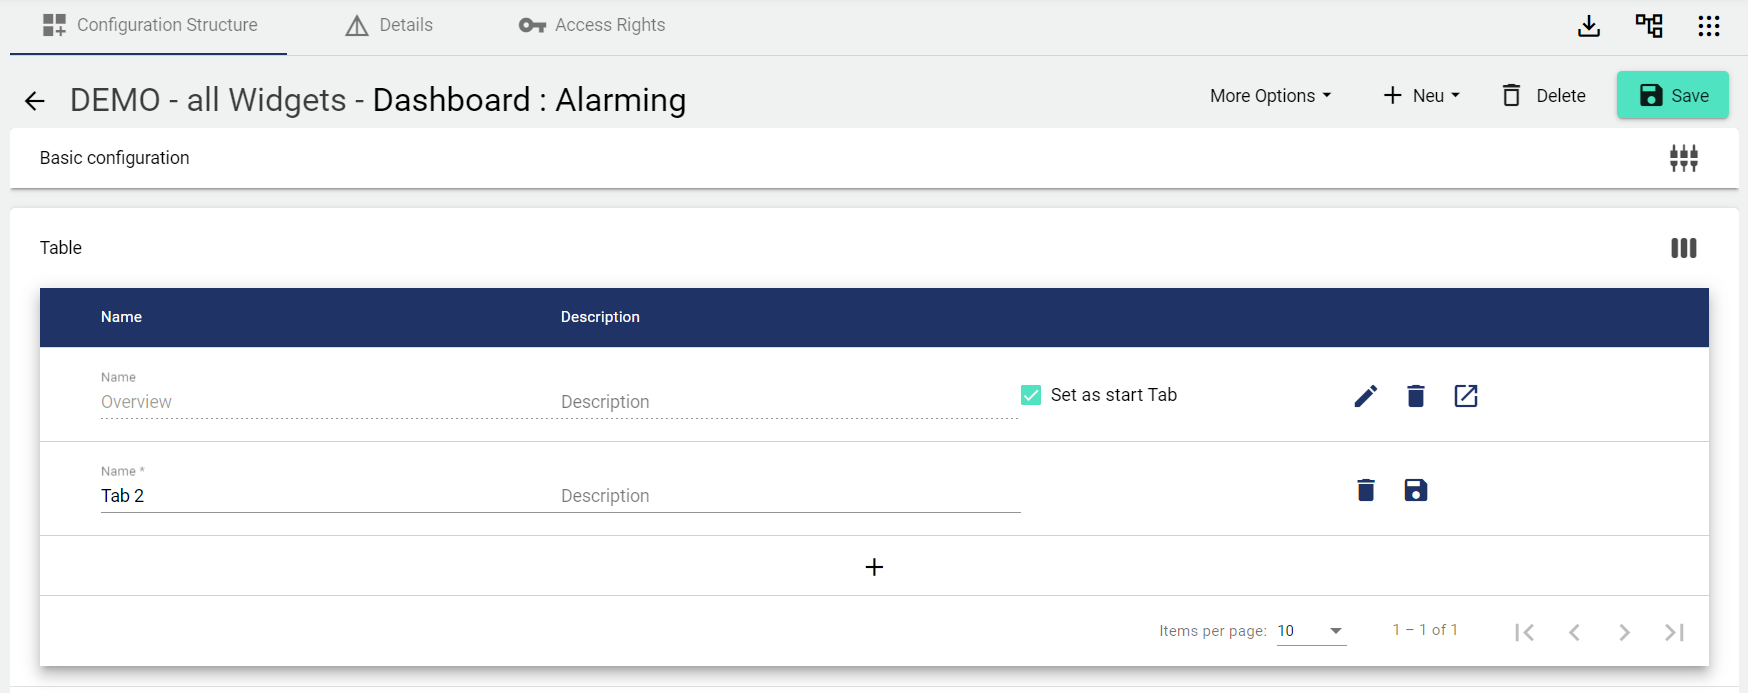
Create Dashboard
Once again via the configuration structure, select the Dashboard and add another one (see also: Dashboard Setup). In the Basic Configuration, assign the name and add as many tabs as you want via the "Panel" area → Save.
Visualize Signal in the Dashboard
You can access the associated Dashboards via the Tenant.
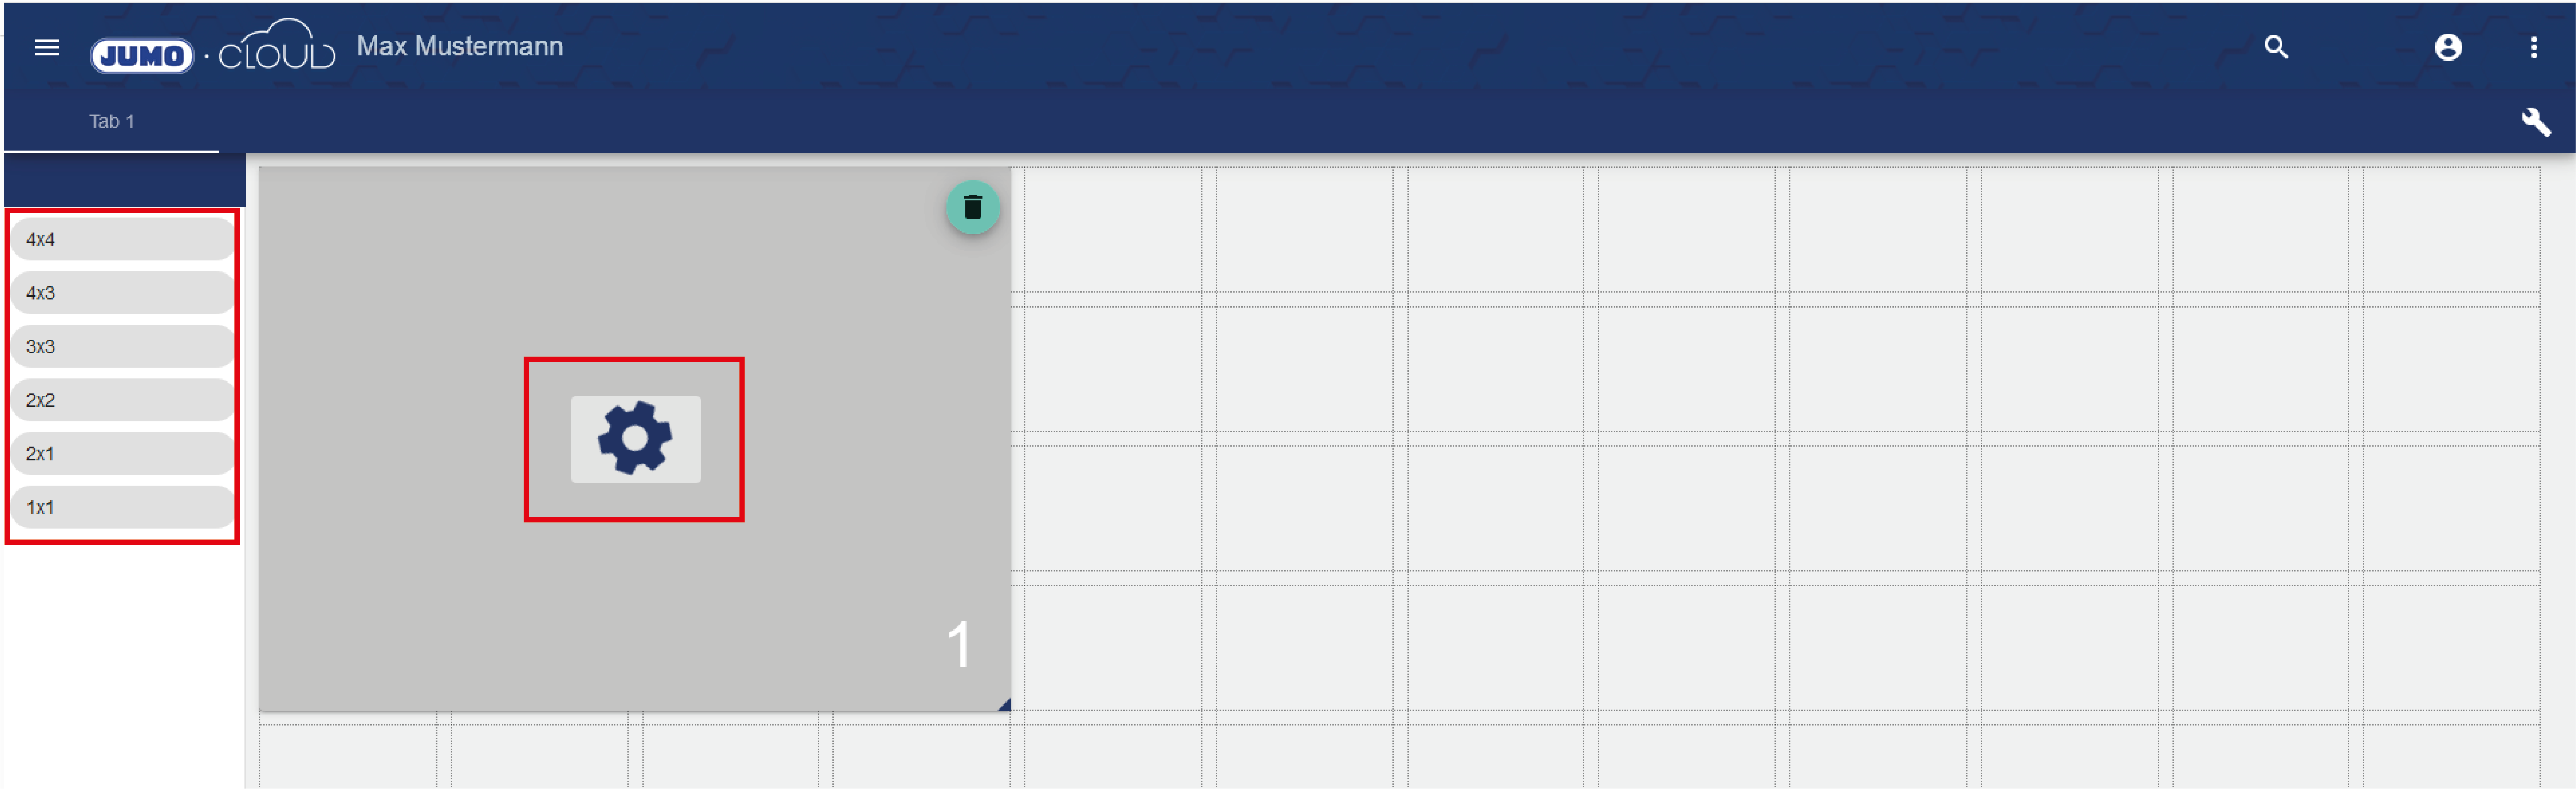
The wrench icon opens a menu that takes you to the Dashboard edit mode.
New widgets can be added, positioned and edited there.

In the edit mode, you can add empty widgets using the selection on the left sidebar.
Widgets are variable in position and size. The cogwheel icon is used to configure the widget (e.g.: set up signals etc.).
Recommendation, configure Widget: Single Signal
The editing status must always be saved. The desired values of the variTRON are then displayed in the view mode.
Congratulations! You have transferred your signal to the Cloud.