
Installation process
1) Check server / PC parameter
For installation in Windows, Windows 10 version 1903 or higher is required! For server installations Windows Server 2022 LTSC is recommended. Further information can be found here: System Requirements
AMD processors don't work. Please use only Intel. AMD is already working on a solution.
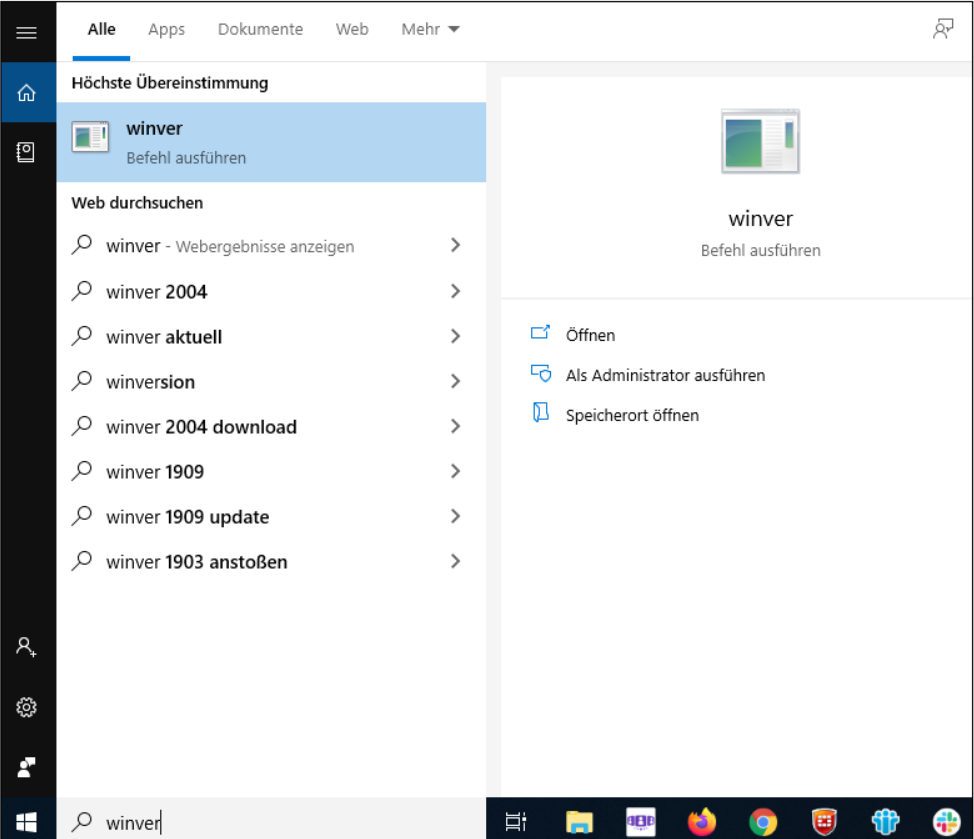
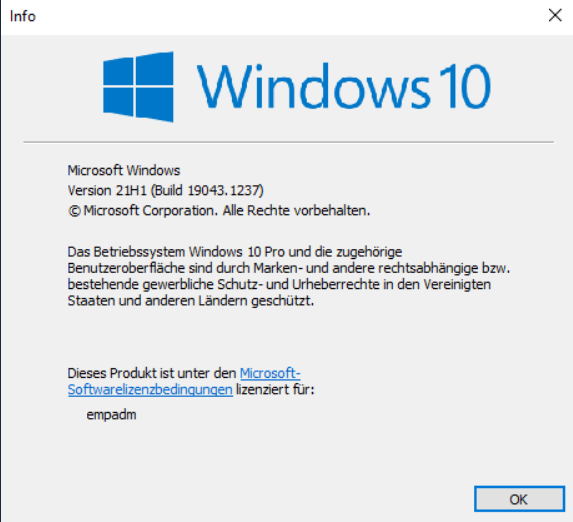
Query Windows version and Windows-Build
|
Step 1 |
Step 2 |
|---|---|
|
|
Check whether virtualization is activated (open Task-Manager with "Strg + Entf" and check virtualization under "Performance" and "CPU")
-
If virtualization is deactivated, the virtualization option has to be activated in BIOS. See the following link with instruction:
-
How to enable Virtualization (VT) on Windows 10 for BlueStacks 4
Check which Processor is being used (Open Task-Manager with "Strg + Entf" and check under "Performance" and "CPU" top right)
Checking the utilized processor for Quad-Core and Hyper Threading function.
Example: Intel Core i5-8250U Processor
2) Unpacking JUMO Installer Zip
Current version JUMO Installer
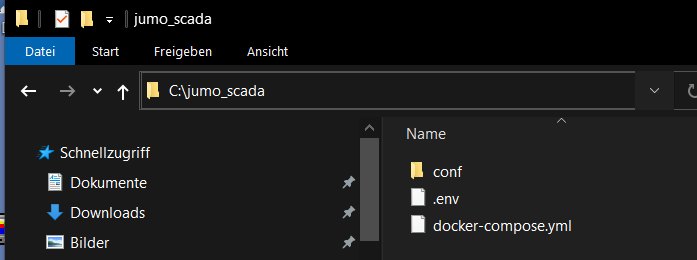
The JUMO installer has to be unpacked on a drive of the respective computer/server.
In this tutorial a folder "jumo_scada" was created directly under C, where the ZIP folder was unpacked:
3) Downloading and installing current Docker application
Docker Engine and Docker Compose are always required. On Window systems, only Docker Desktop has to be installed; it contains Docker Engine and Docker Compose.
Container Desktop is a possible UI alternative to Docker Desktop.
Installation rights are required for the following steps.
If your administrator account is not the same as your Windows user account (the case for domain users), you need to add the user to the "docker-users" group. Start the "Computer Management" as administrator and navigate to "Local Users and Groups",-> Groups -> docker-users. Right click to add the user to the group. Log out and log back in for the changes to take effect.
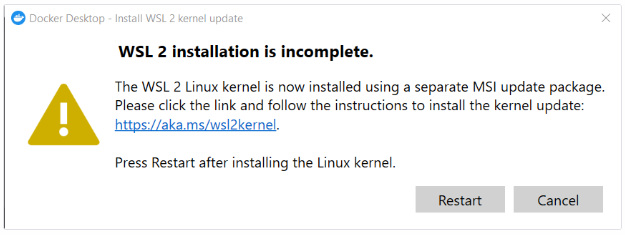
On Docker Desktop startup, Windows will prompt you to complete the WSL2 installation. The link in the prompt will take you to a website where WSL2 (Windows Subsystem for Linux 2) can be downloaded. All that needs to be done here is to execute "Step 4" and click on "Restart".
4) Loading and installing JUMO smartWARE SCADA image from JUMO Registry
1. Open PowerShell
The following page provides an overview all Powershell commands for Docker: https://docs.docker.com/compose/reference/overview/
-
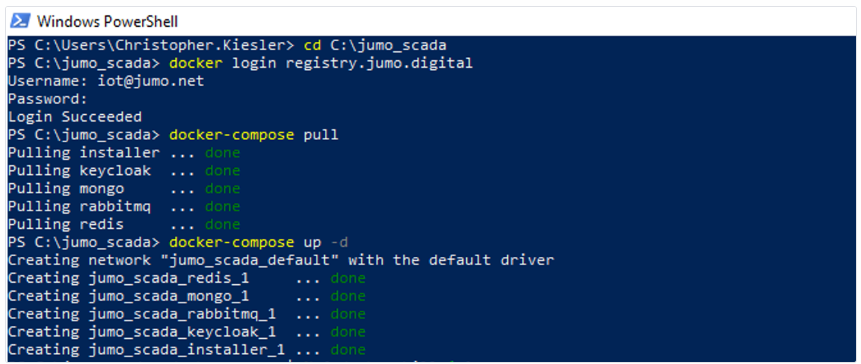
Open PowerShell and enter the following command.
cd C:\jumo_scada
"C:\jumo_scada" is our example path in these instructions. Replace it with the path leading to the unpacked JUMO installer.
-
Once cd C:\jumo_scada appears in the next front line instead of the original path, enter the following command:
docker login registry.jumo.digital
-
Subsequently, you have to log in with the "username" and "password" provided by JUMO. You receive this log-in data together with the license key when purchasing JUMO smartWARE SCADA.
-
After log-in, enter the following commend
docker-compose pull
-
Upon pressing the Enter key, the data is updated by Docker "pulling" the JUMO smartWARE SCADA images from the previously entered path. However, this does not yet activate the containers. The process can take several seconds.
-
When the download is completed, please enter the following command. This command starts the containers in Docker.
docker-compose up -d
The following commands can be used in case of error messages:
docker ps -q | % { docker kill $_ }
docker-compose rm -f
docker-compose up -d
2. Opening Docker desktop
-
Now check in Docker desktop whether your container appears in the Docker Dashboard.

3. Going through JUMO smartWARE SCADA - Installer
-
Open your browser and enter the following in the URL line. Depending on how the installation was done, the IP address of the server or the assigned DNS name must be entered here.
http://localhost
-
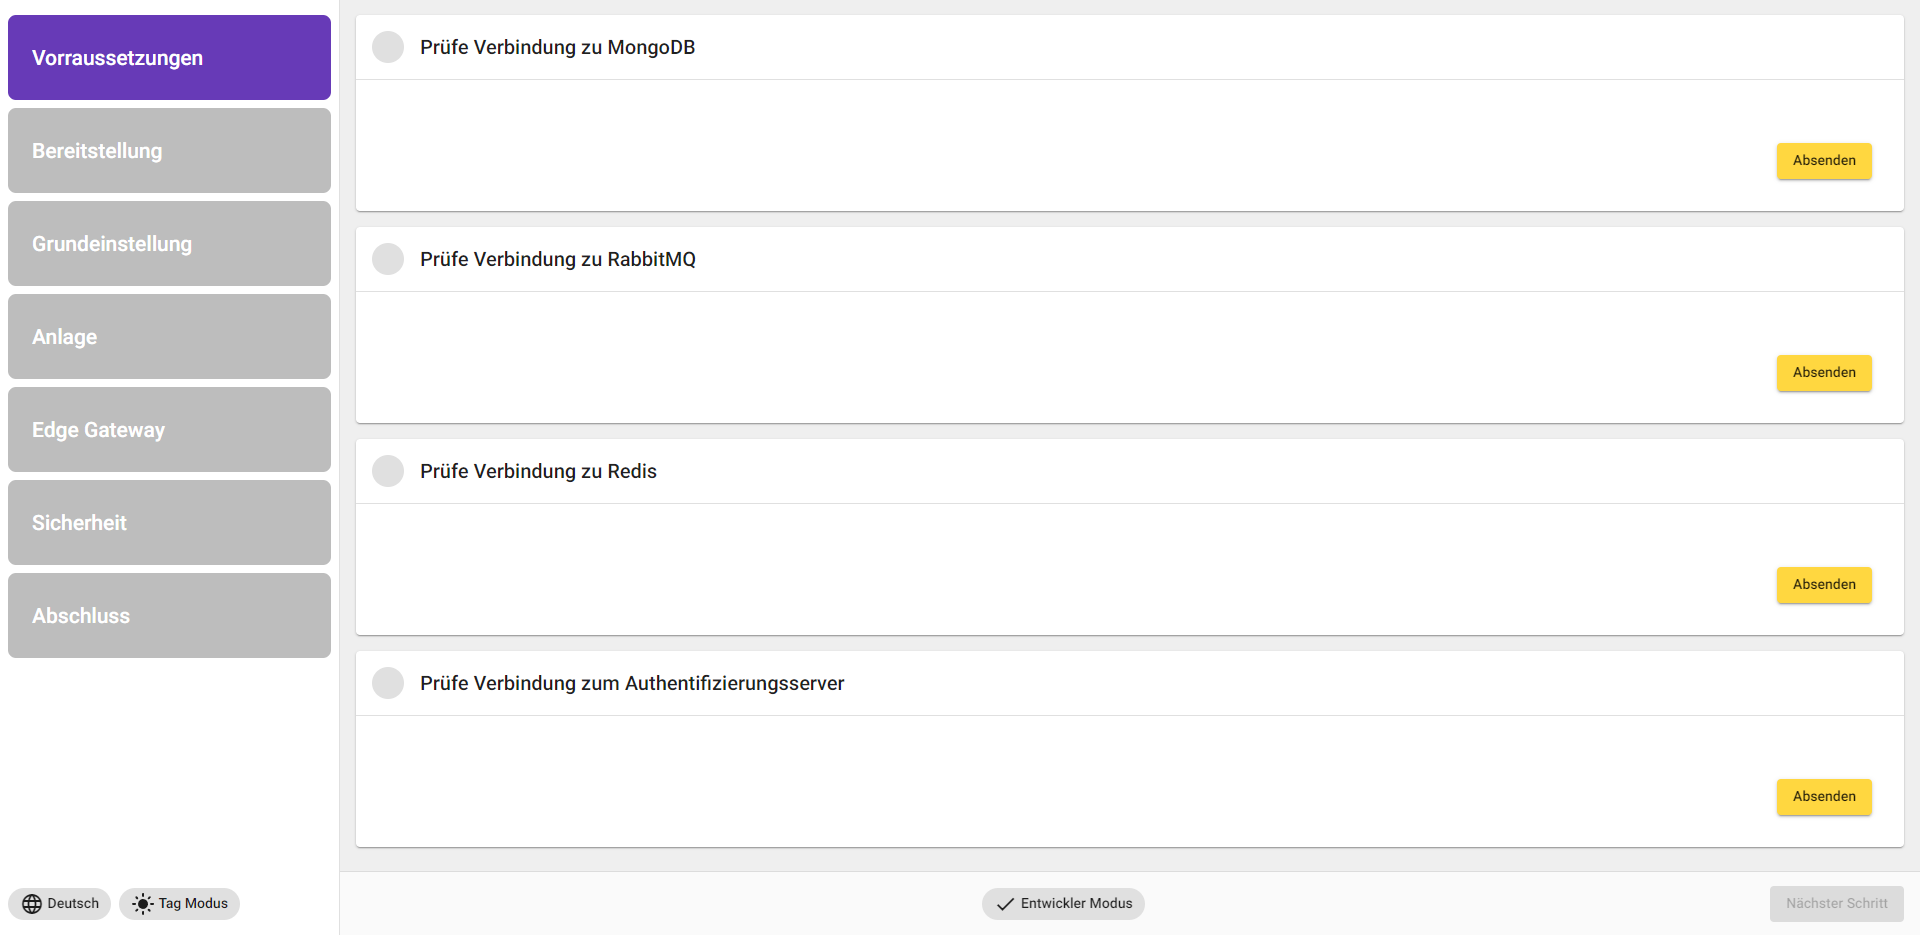
Then the JUMO Installer opens. Please follow the installation instructions.
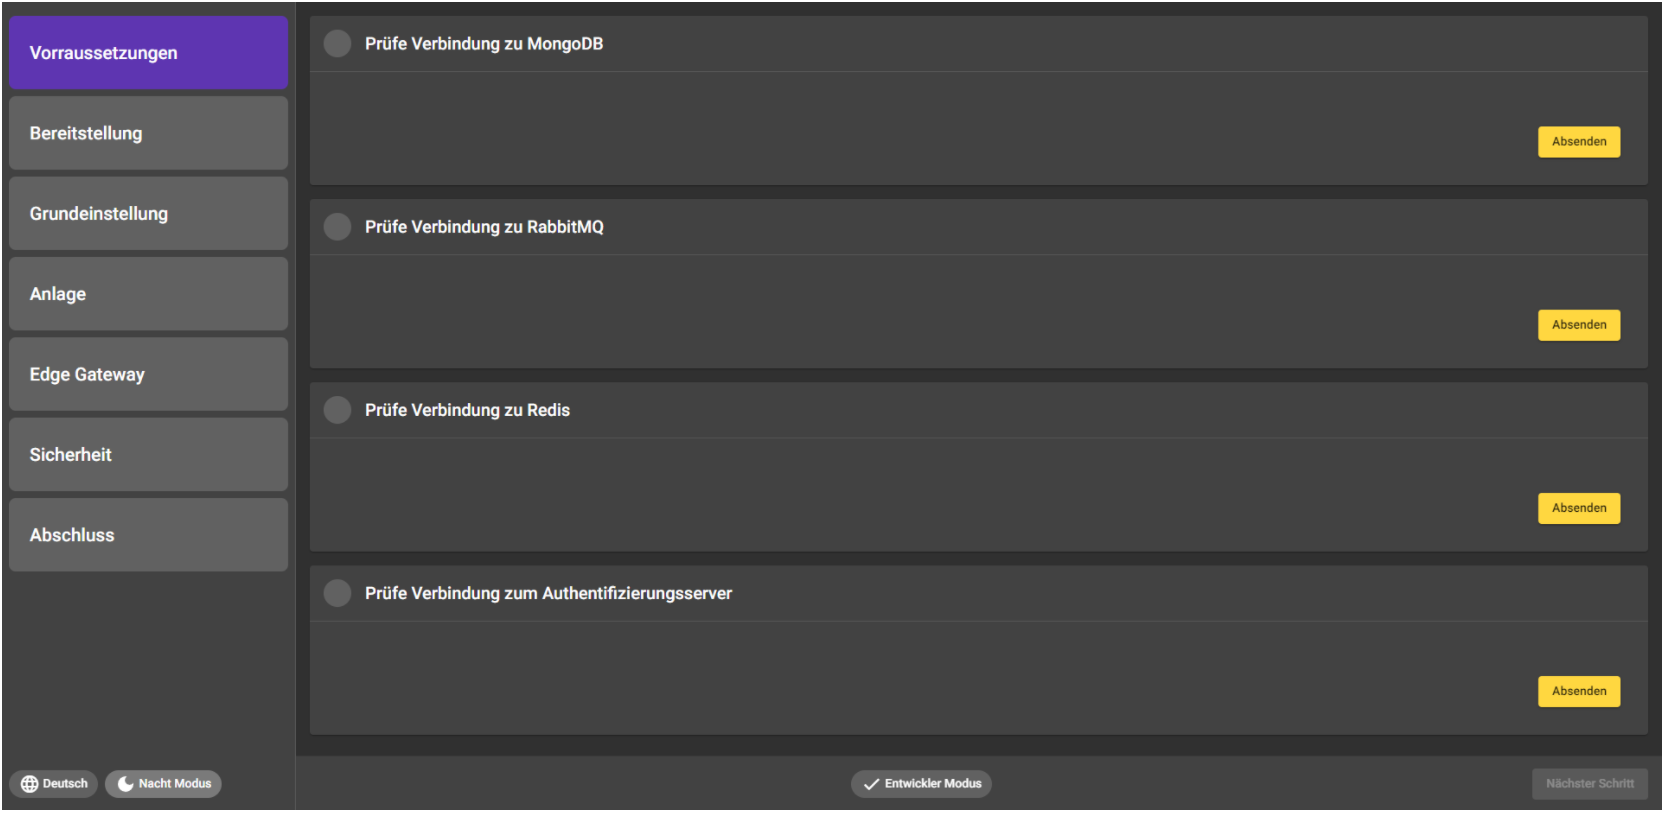
You can switch the language to English.
|
Normal Mode |
Night Mode |
|---|---|
|
|
After each menu item in the JUMO Installer, you can switch to the next one via "Next step".
|
Menu item |
Note |
|---|---|
|
Requirements |
Here, the connection to various databases and servers is checked. The test can take several seconds. 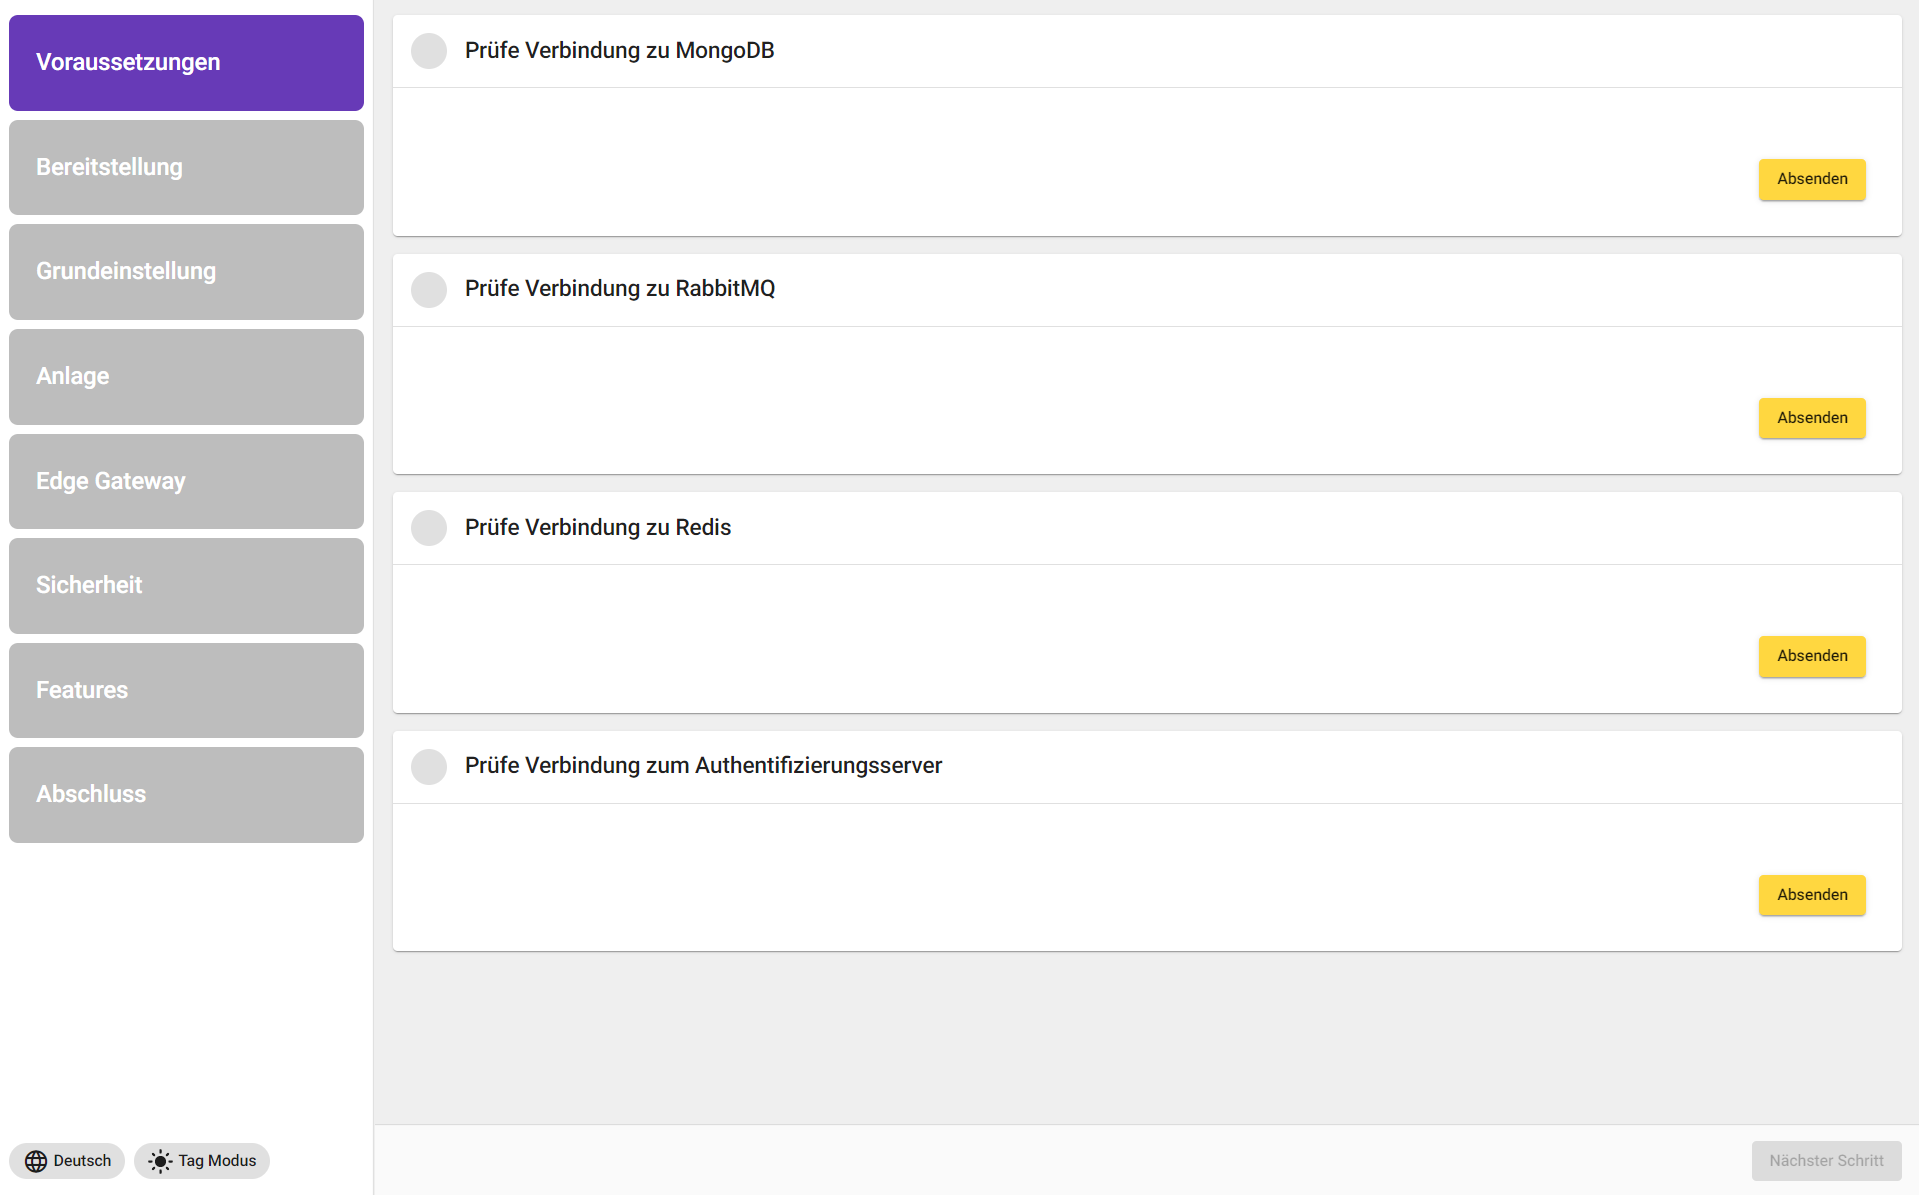
If the check fails, enter the following commands. |
|
Provision |
In the "Provision" sector, a certificate has to be signed and a host name has to be allocated. Select "Self-signed" to continue. Assign the name of the server/system on which you are installing the JUMO smartWARE SCADA as the host name (e.g.: smartware-scada or the correspondingly assigned DNS name the IT has given) and click on "Submit". 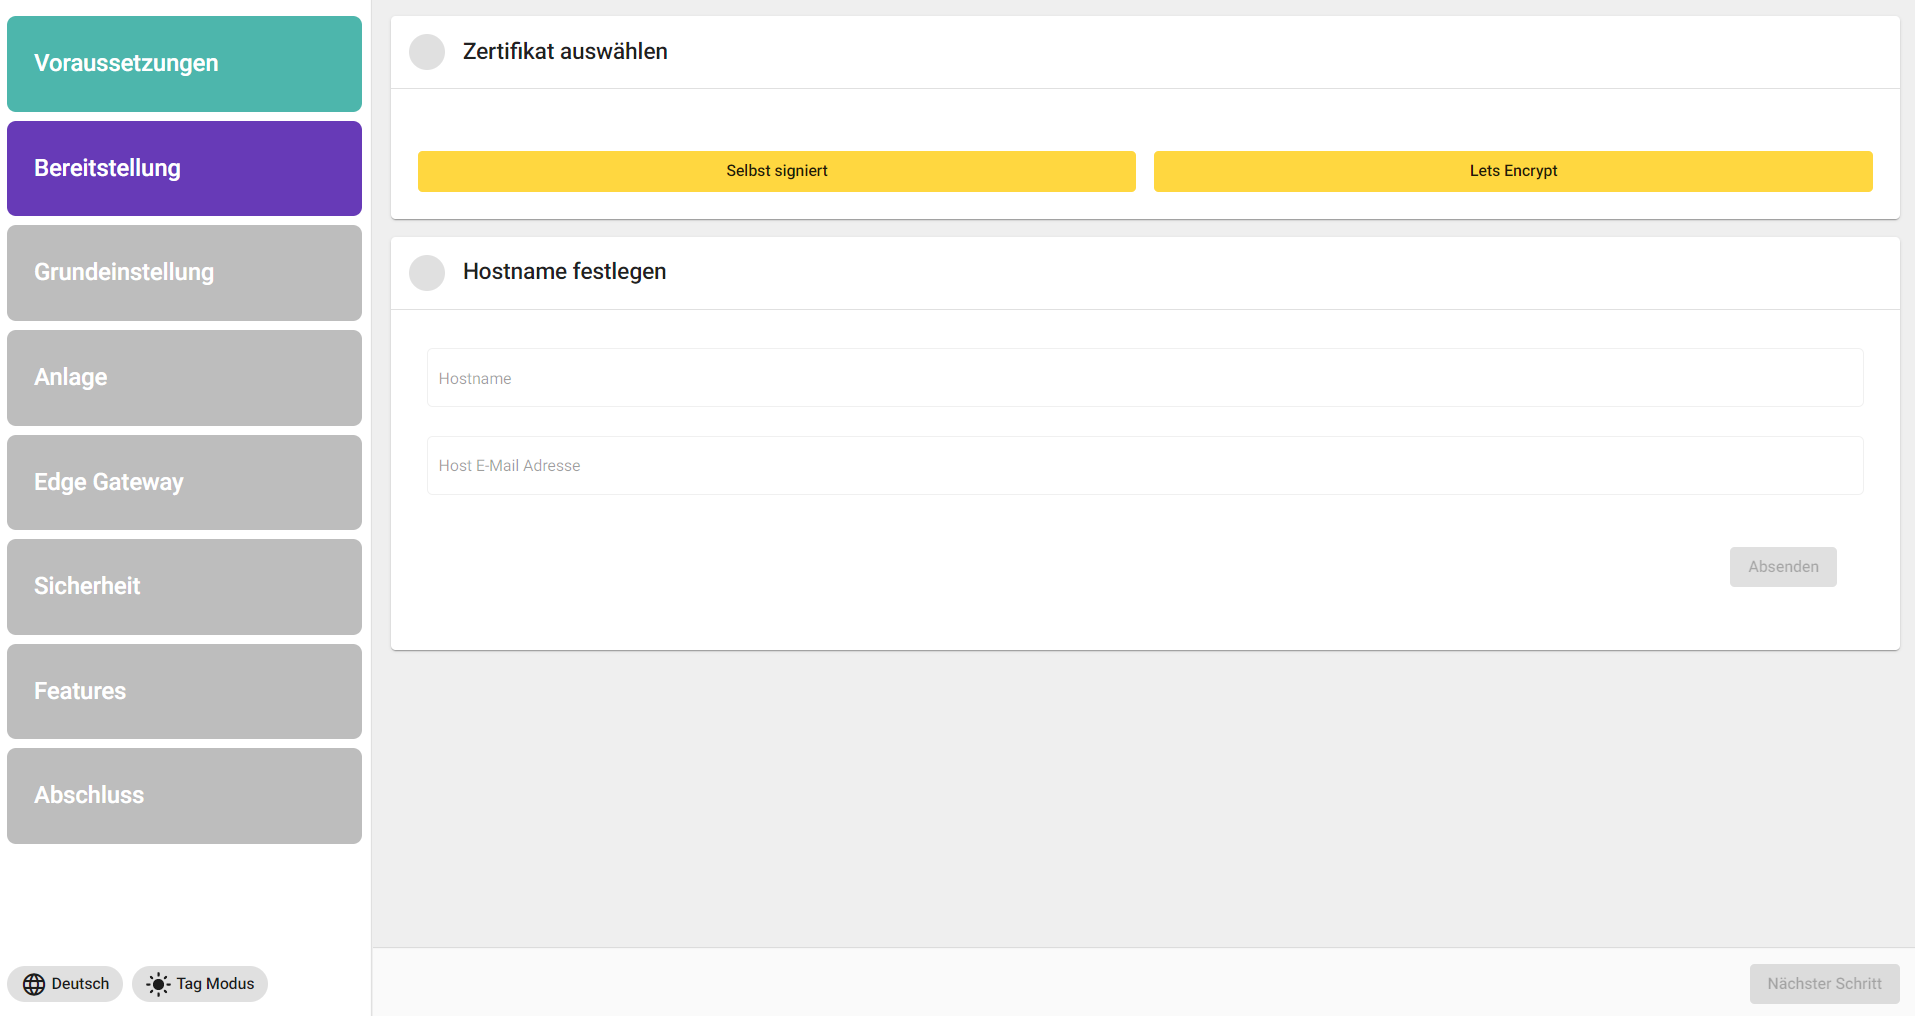
Example host name, subsequently available in browser under http://smartware-scada or https://smartware-scada smartware-scada Customer-specific host name under Windows (optional addition) 1.) Opening the "host" file under path C:\Windows\System32\drivers\etc 2.) Enter the IP address 127.0.0.1 in the file followed by the desired host name. Example: 127.0.0.1 scada-silothermometrie 3.) In the installation steps of the JUMO smartWARE SCADA, the desired host name can then be entered in the Host name field 4.) JUMO smartWARE SCADA can be accessed with URL https://scada-silothermoetrie after the installation |
|
Basic setting |
Databases and Server are established in the basic settings. When establishing the database, click on the "Send" button. Subsequently, you determine a password for your database and confirm your determined or generated password via the Send button. Passwords can be randomly generated via the fingerprint symbol. Subsequently, press the "Send" button at "Set up authentication server" to create the database. 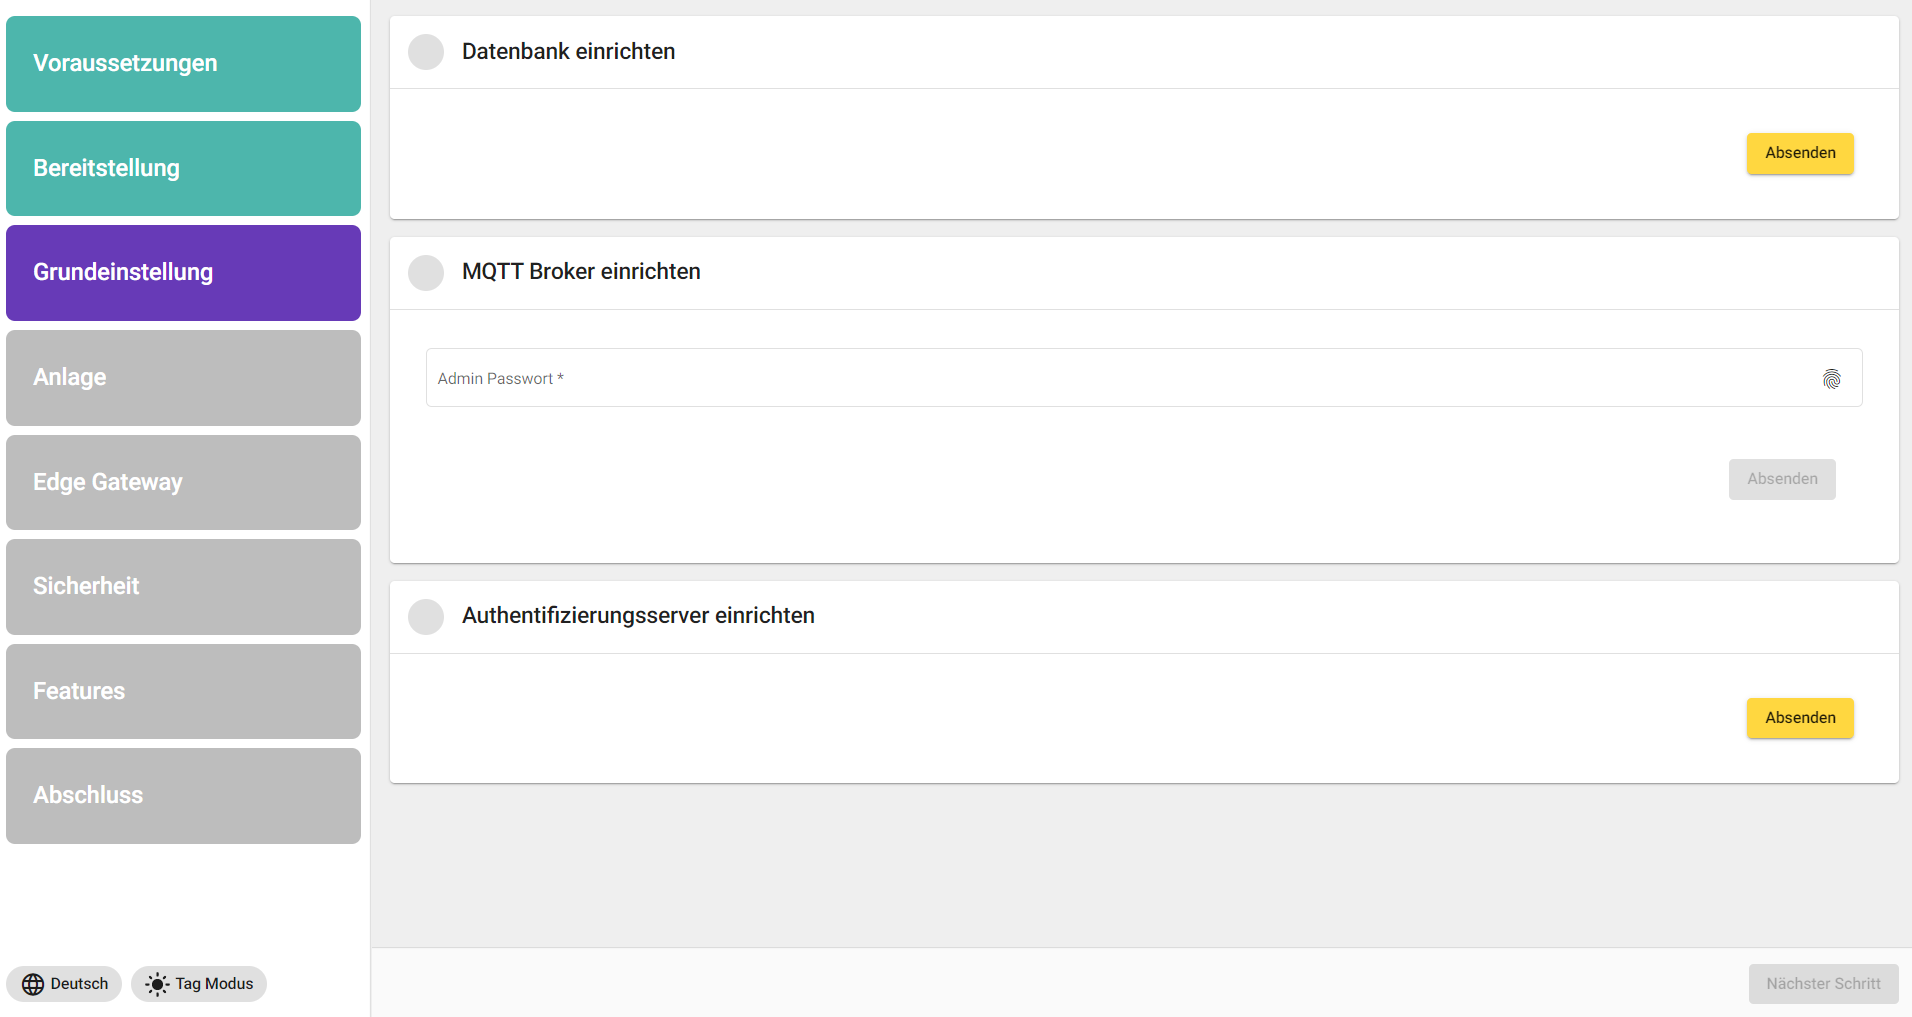
|
|
Plant |
A base tenant and an asset tenant must be defined here. Tip: Name the base tenant after your company and the asset tenant after its subject area in which the SCADA is to generate added value. 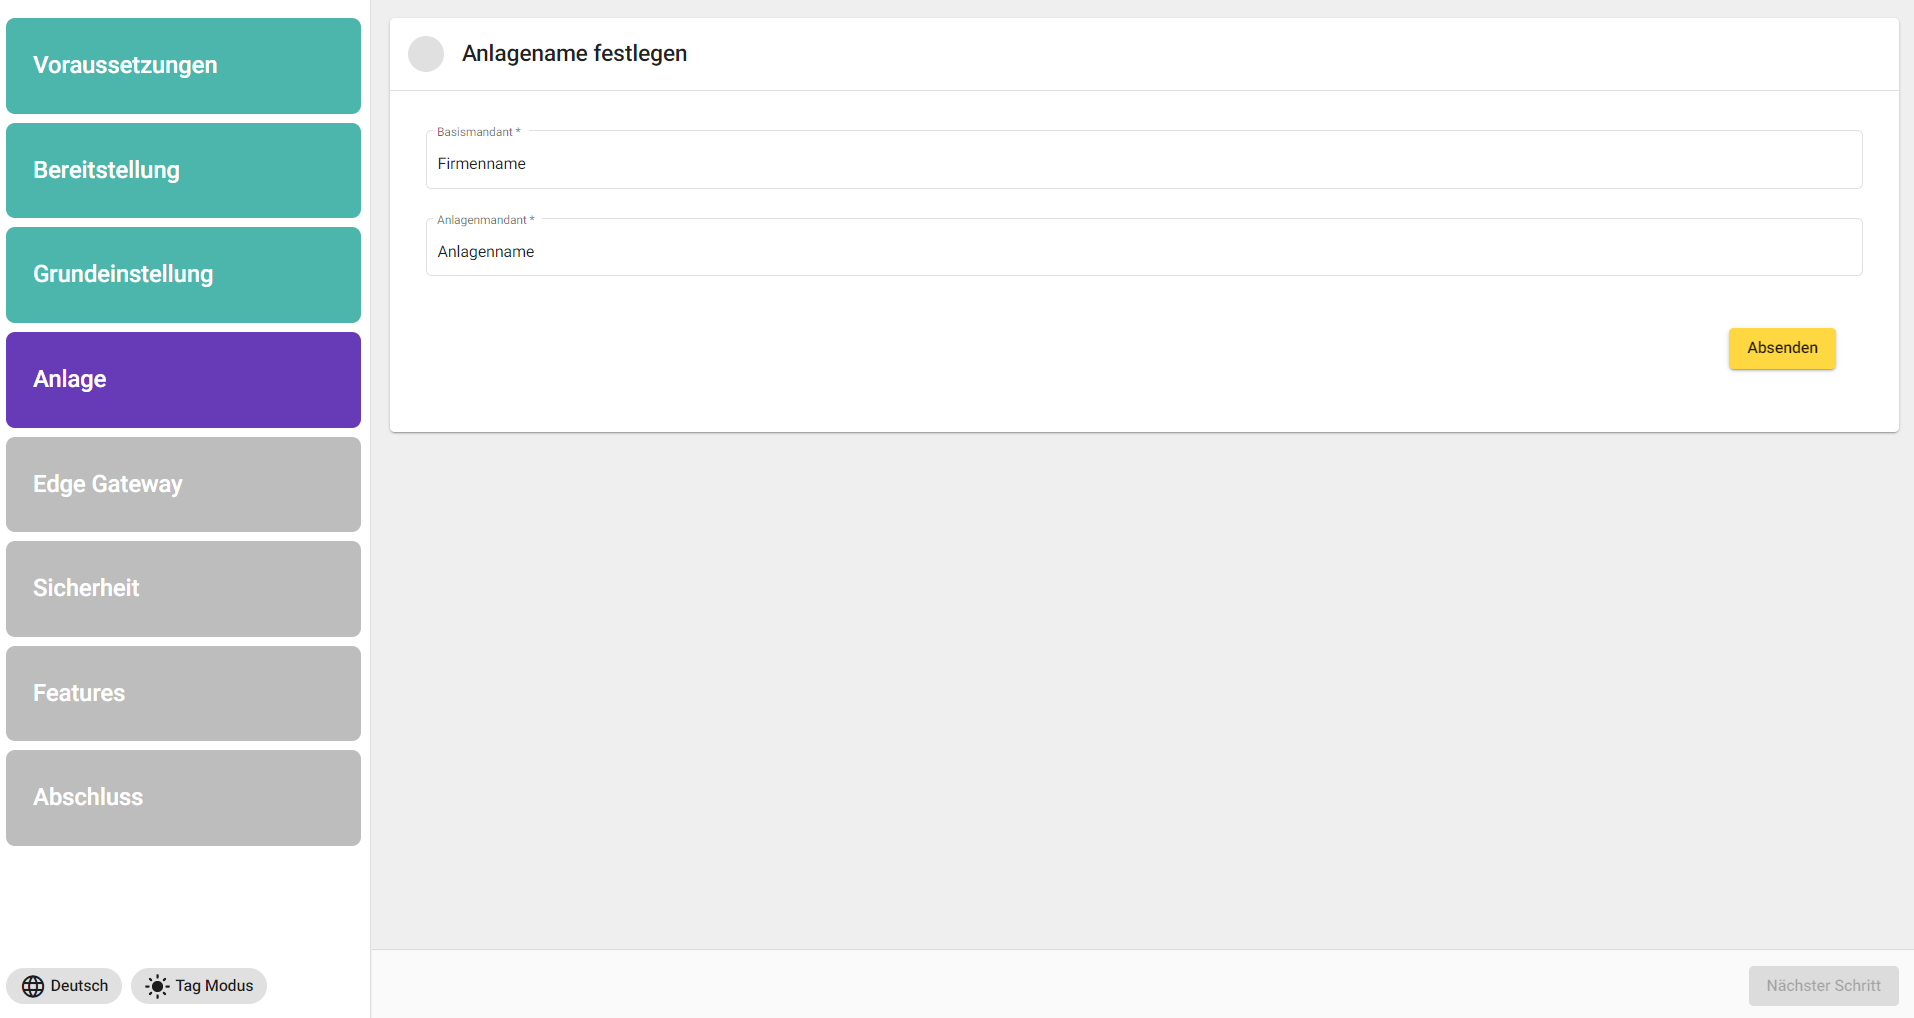
|
|
Edge Gateway |
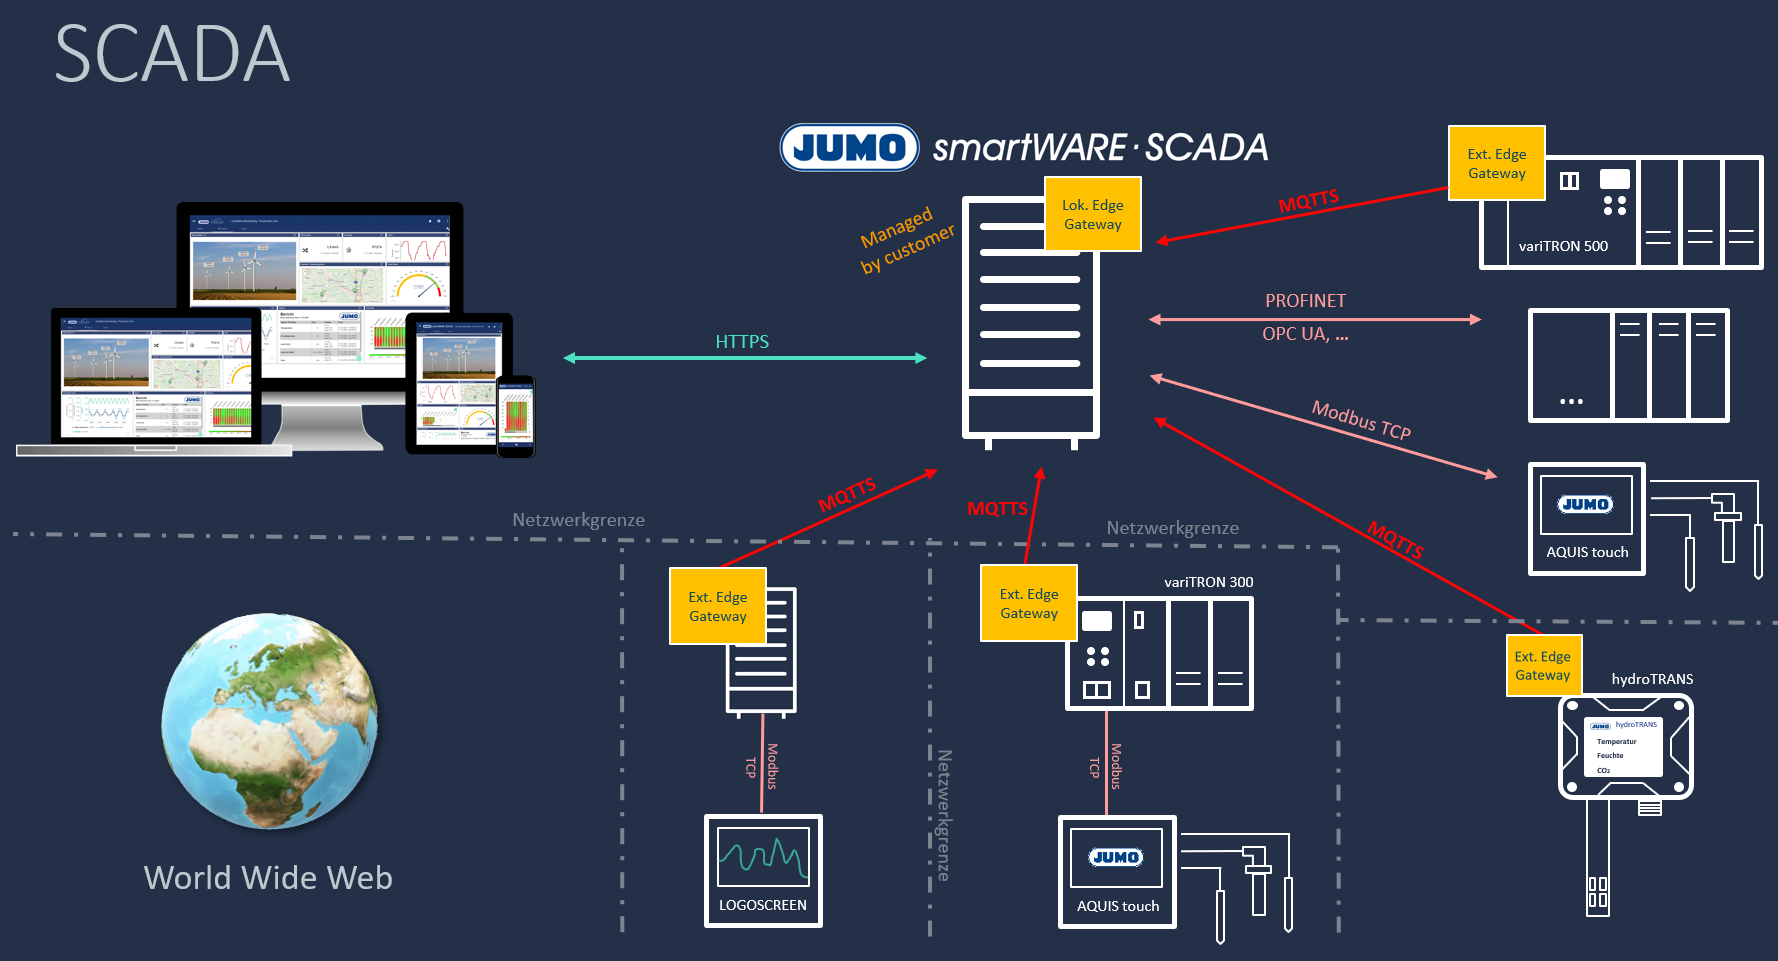
In the "Edge Gateway" area, you are asked whether a local IoT edge gateway should be created or not (usually: "Yes"). You are also asked about external IoT edge gateways. If, in addition to the SCADA main server (local IoT edge gateway), other networks or JUMO variTRON devices (external IoT edge gateways) are to be connected via MQTTS, click "Yes" (can also be changed subsequently). Under "Data source name", the name is assigned to the first data source. It is recommended to use "Local edge gateway". External edge gateways must be purchased per license. The internal edge gateway is always included. 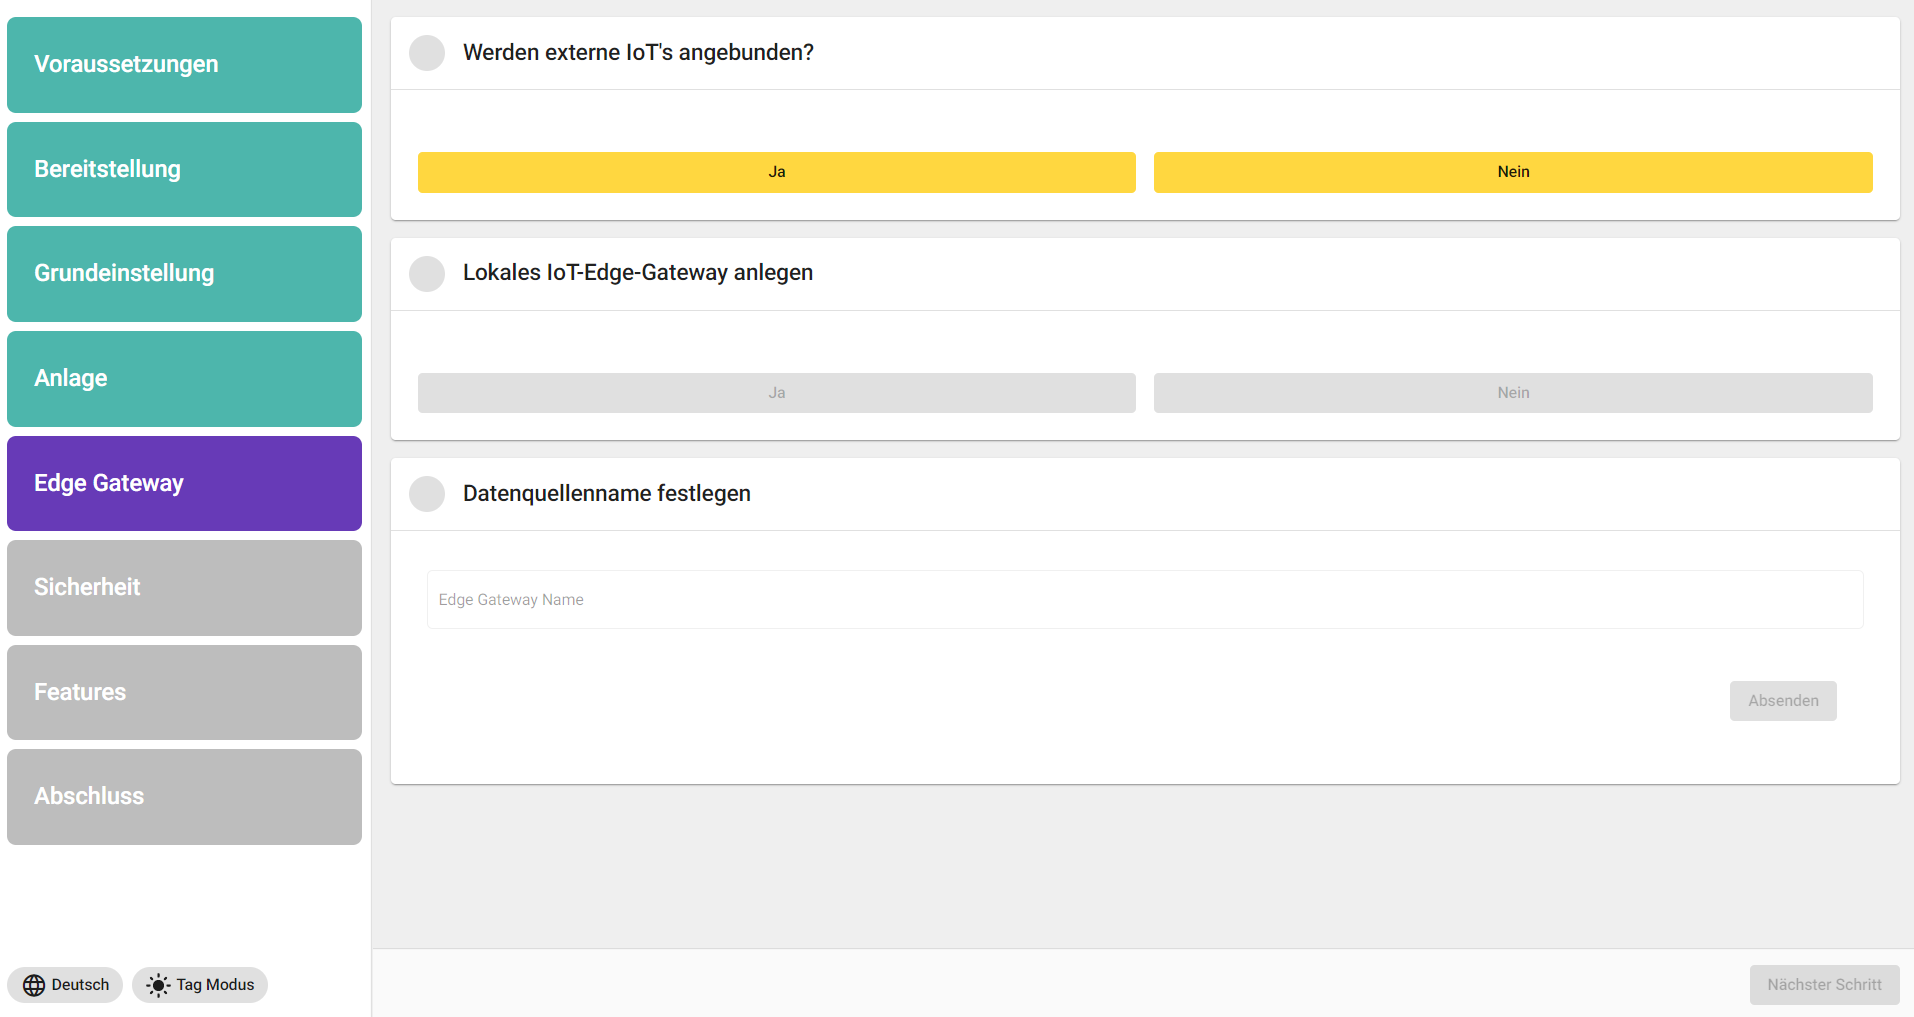
|
|
Security |
In the security settings, a password is set or generated for the database and authentication server respectively. Passwords can be randomly generated here via the fingerprint icon (recommended). In the "Redis" tab, simply click on "Submit". 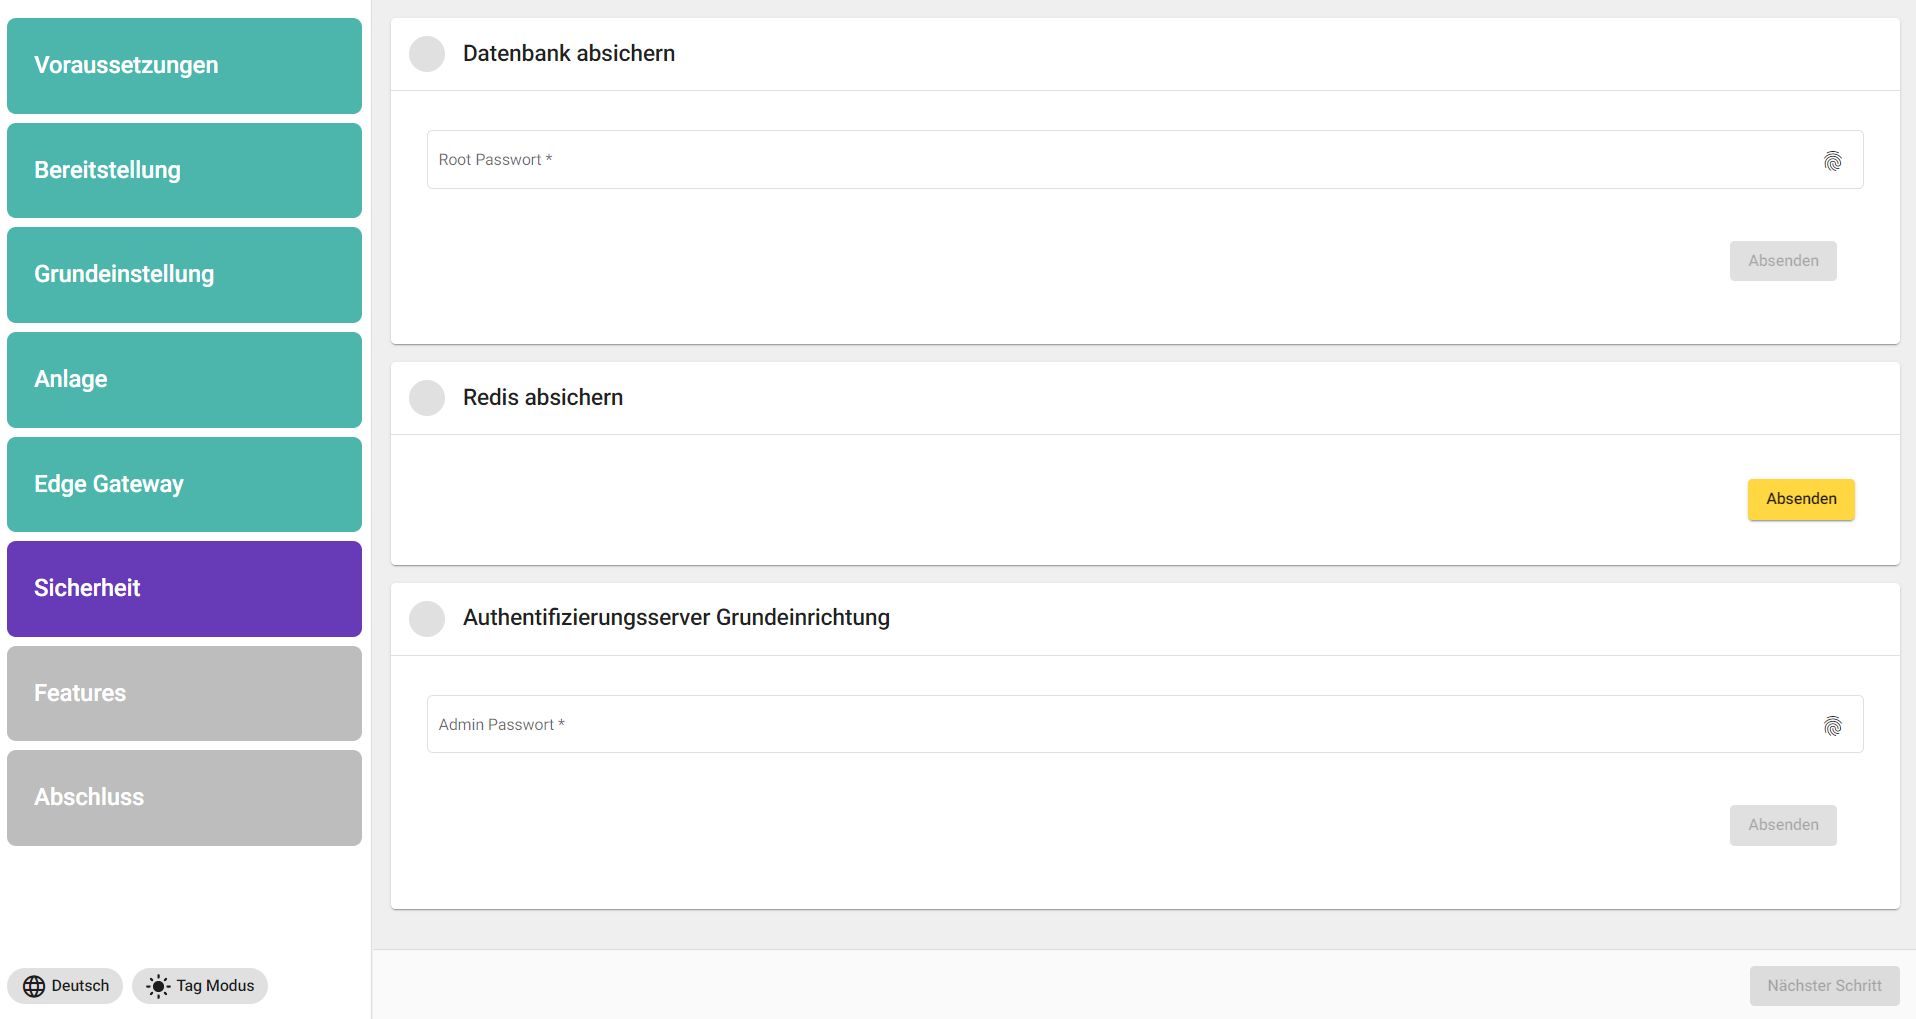
|
|
Features |
Depending on which feature or module is required, it can be decided here whether it will be implemented or not. Please follow the purchased licensing here. Modules that are not required consume unnecessary server power.

|
|
Conclusion |
An overview of all user names and passwords which are to be printed or saved as a PDF file is displayed in the final window. After pressing the "send" button in the "Conclusion" menu item of the JUMO installer, Linux Terminal commands have to be entered (appears in the software). The root password is especially important. 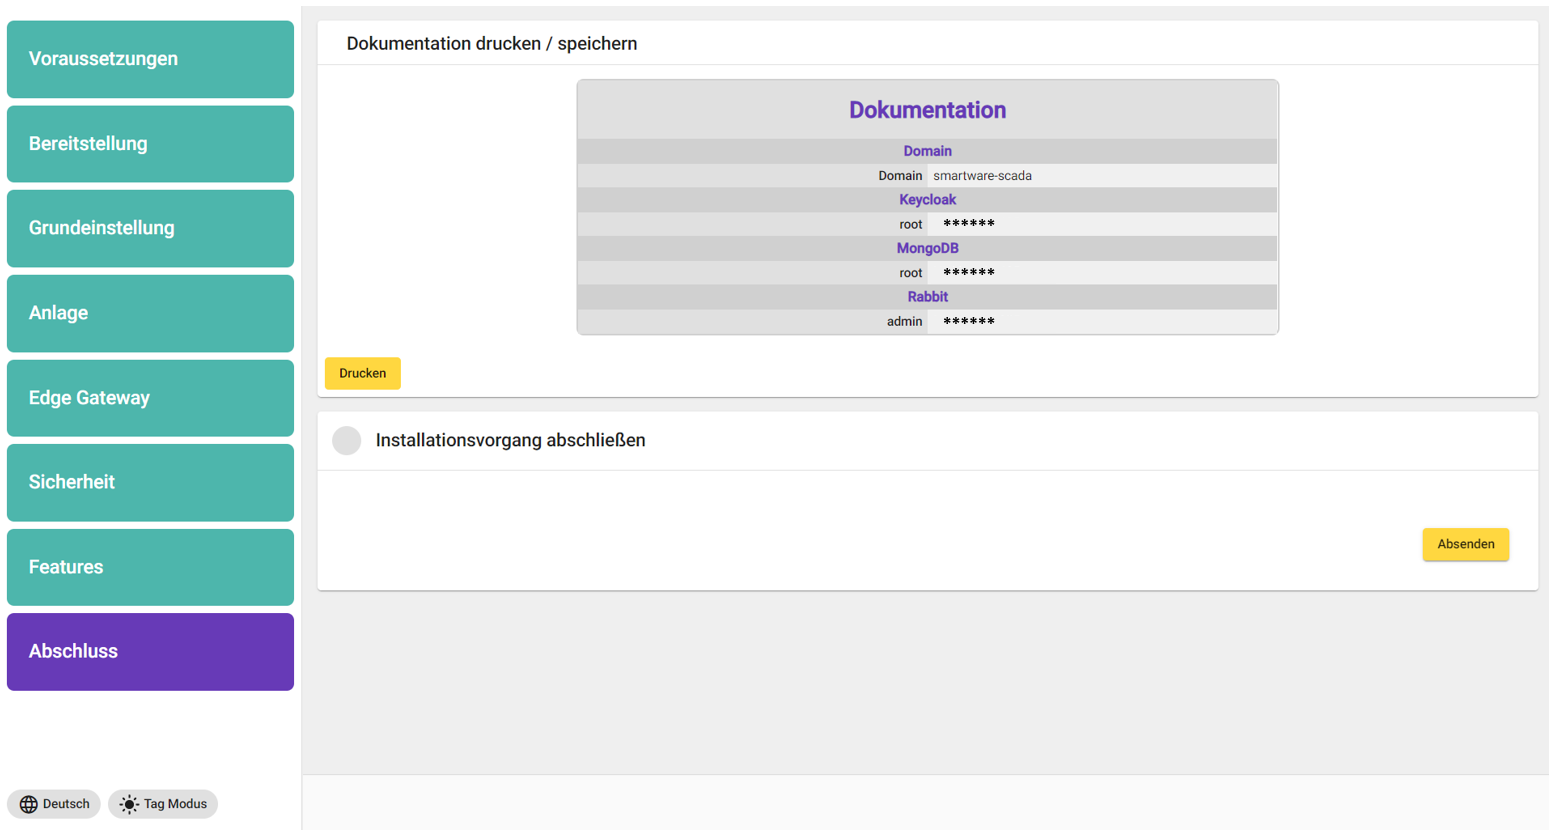
|
-
After pressing the "send" button in the "Conclusion" menu item of the JUMO installer, the following commands have to be executed in PowerShell:
docker ps -q | % { docker kill $_ }
docker-compose down --remove-orphans
docker-compose up -d
Executing these commands takes a little time! At this point, a restart and update is performed.
docker ps -q is a command to show all IDs. The command docker-compose kill stops all running containers. docker-compose down --remove-orphane removes all containers where the activity was not defined in the file, while the last two previously known commands re-pull JUMO smartWARE SCADA images and restart the container.
Activating JUMO smartWARE SCADA license
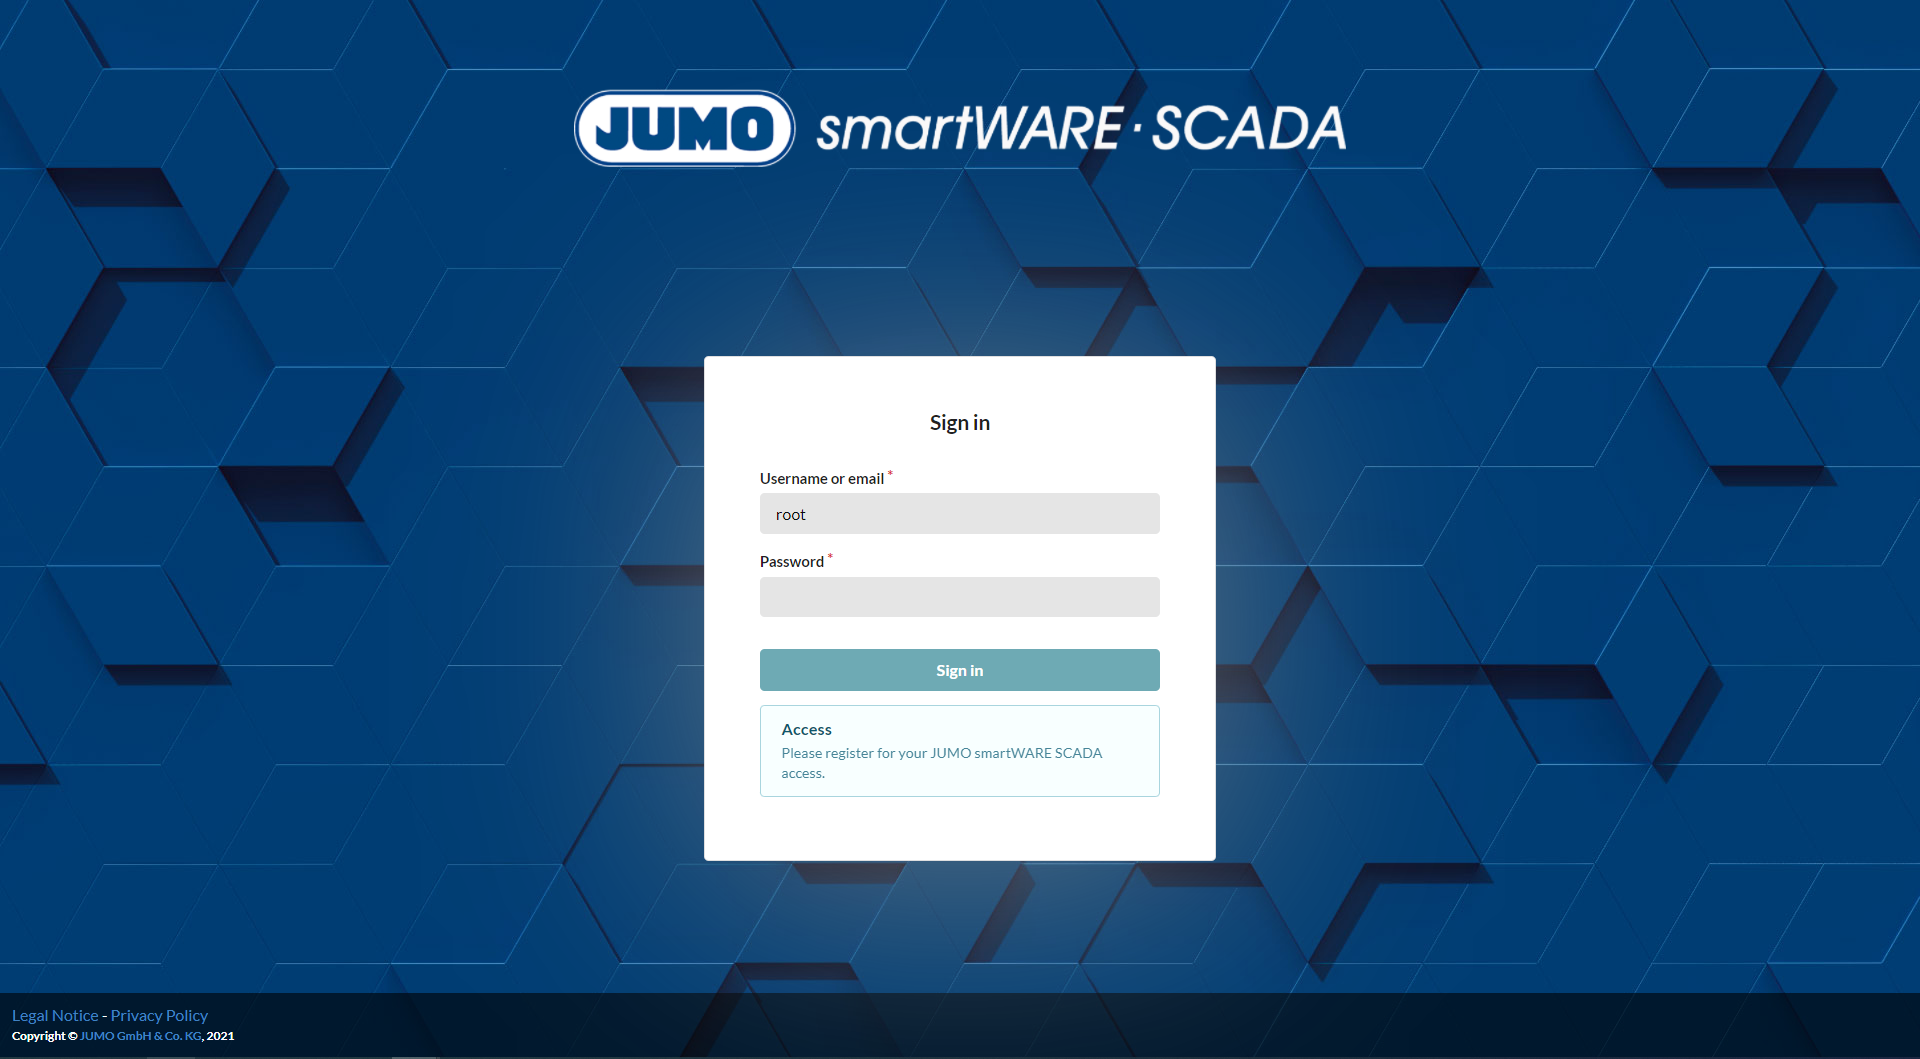
The start page of the JUMO smartWARE SCADA can be called up in the browser via the host name. The login works with the user "Root" and the corresponding password from the password list of the last step.
At this point, we recommend that you provide the server with a CA certificate. The application can then be accessed at https://.
To adjust the log-in themes (SSO, Security, Registration, LDAP, etc.) please check the chapter User management Keycloak (IAM)
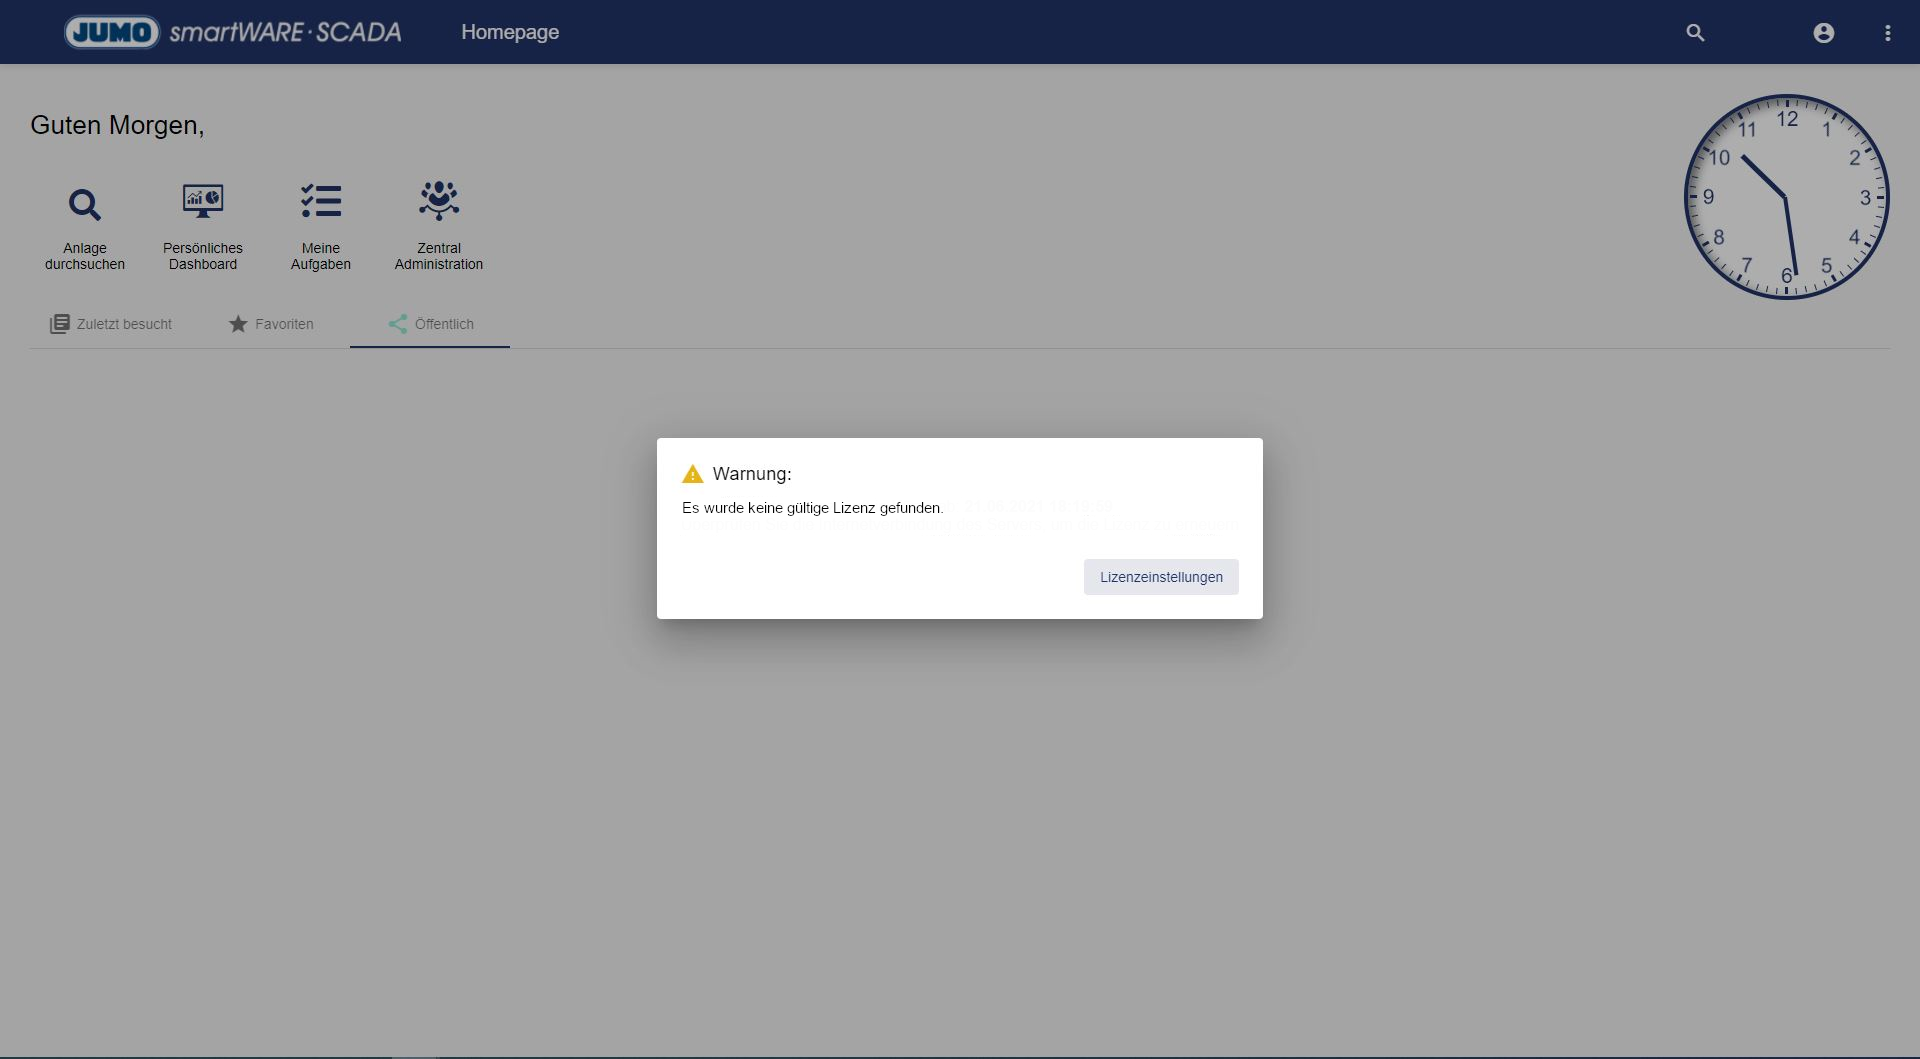
1) Opening license settings
As soon as a JUMO application is started, a warning not appears that no valid license was found. The license settings open by clicking the license setting in the warning window. Here, copy the system UID.
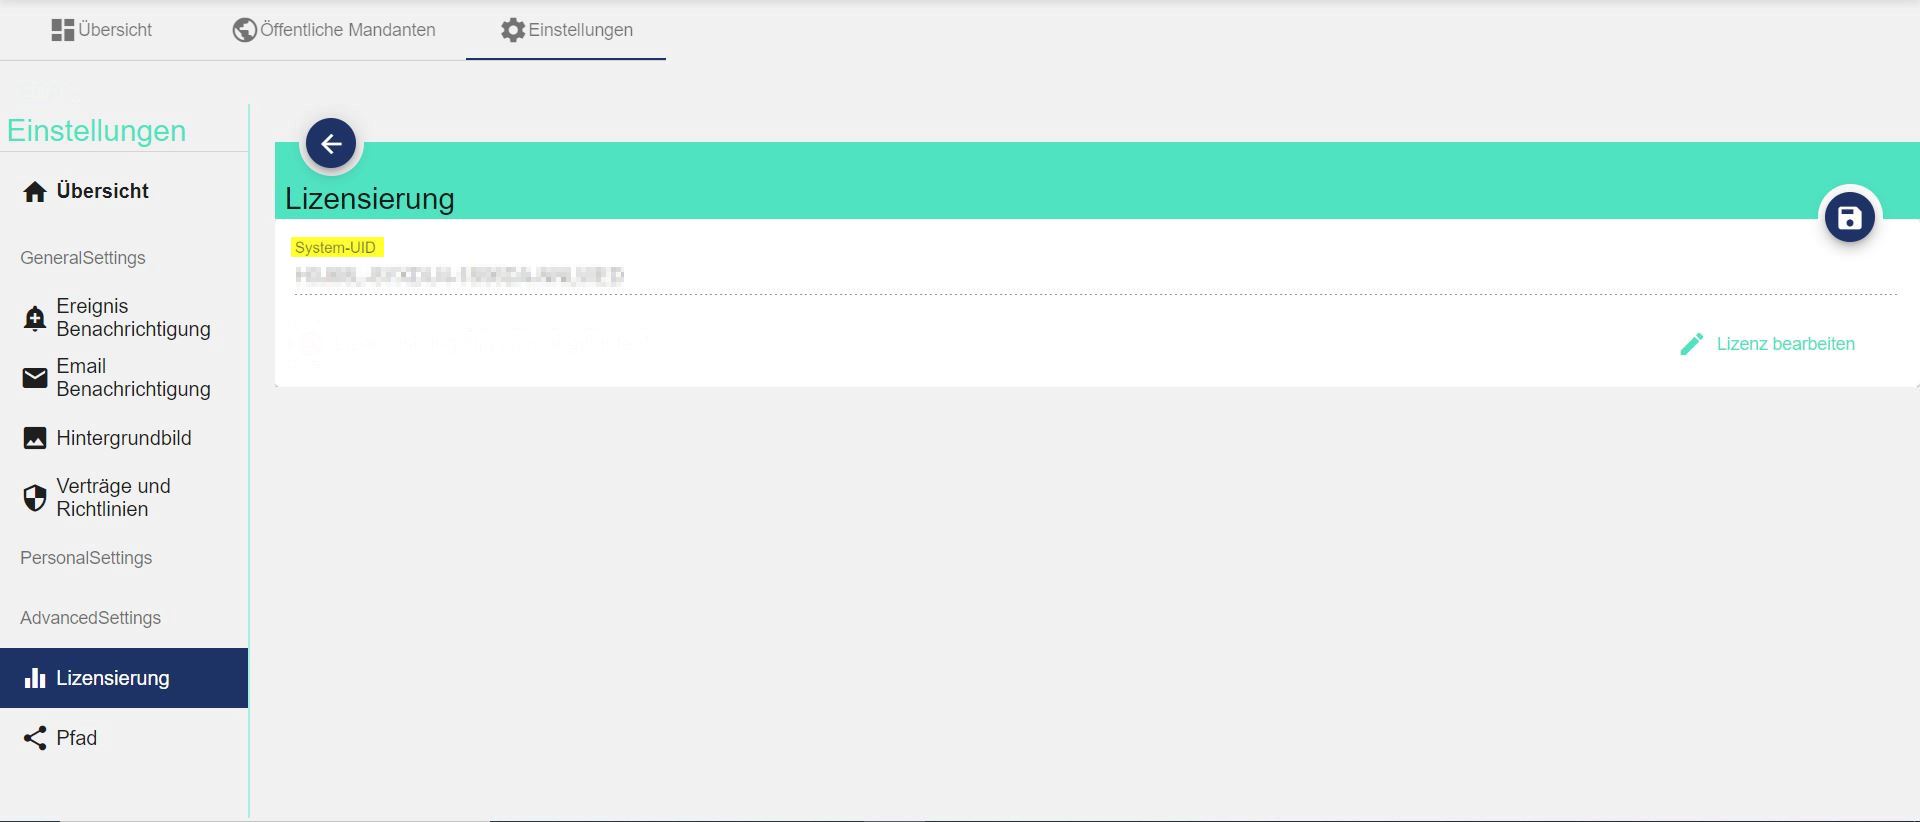
The UID of the respective SCADA Installation can be found in the central administration under Settings and Licensing. This settings overview can only be viewed in the top root client.
“Es wurde keine gültige Lizenz gefunden” (German) → No valid license was found
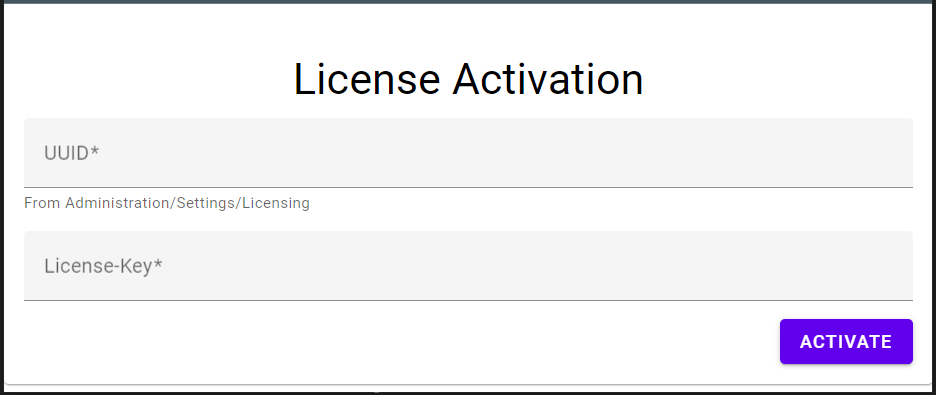
2) Activating the SCADA license
In order to use the SCADA application, a valid license has to be entered in the system. If a valid license has not been entered, only the central administration can be accessed.
In order to be able to store a license in the system, it must first be activated in the JUMO license portal under https://portal.jumo.digital using the license key sent to you and the system-specific UID (identification number of the SCADA installation). You receive the license key by mail as soon as you have purchased the JUMO smartWARE SCADA.
If you wish to activate the software offline, please contact JUMO.
JUMO smartWARE SCADA license portal:
Once the license is activated/established, it can be downloaded as a file or copied directly.
Before you leave the website, be sure to back up (copy to a text file or hit the download button) after activating the license, as it is a one-time activation. The license key cannot be used for further licenses!
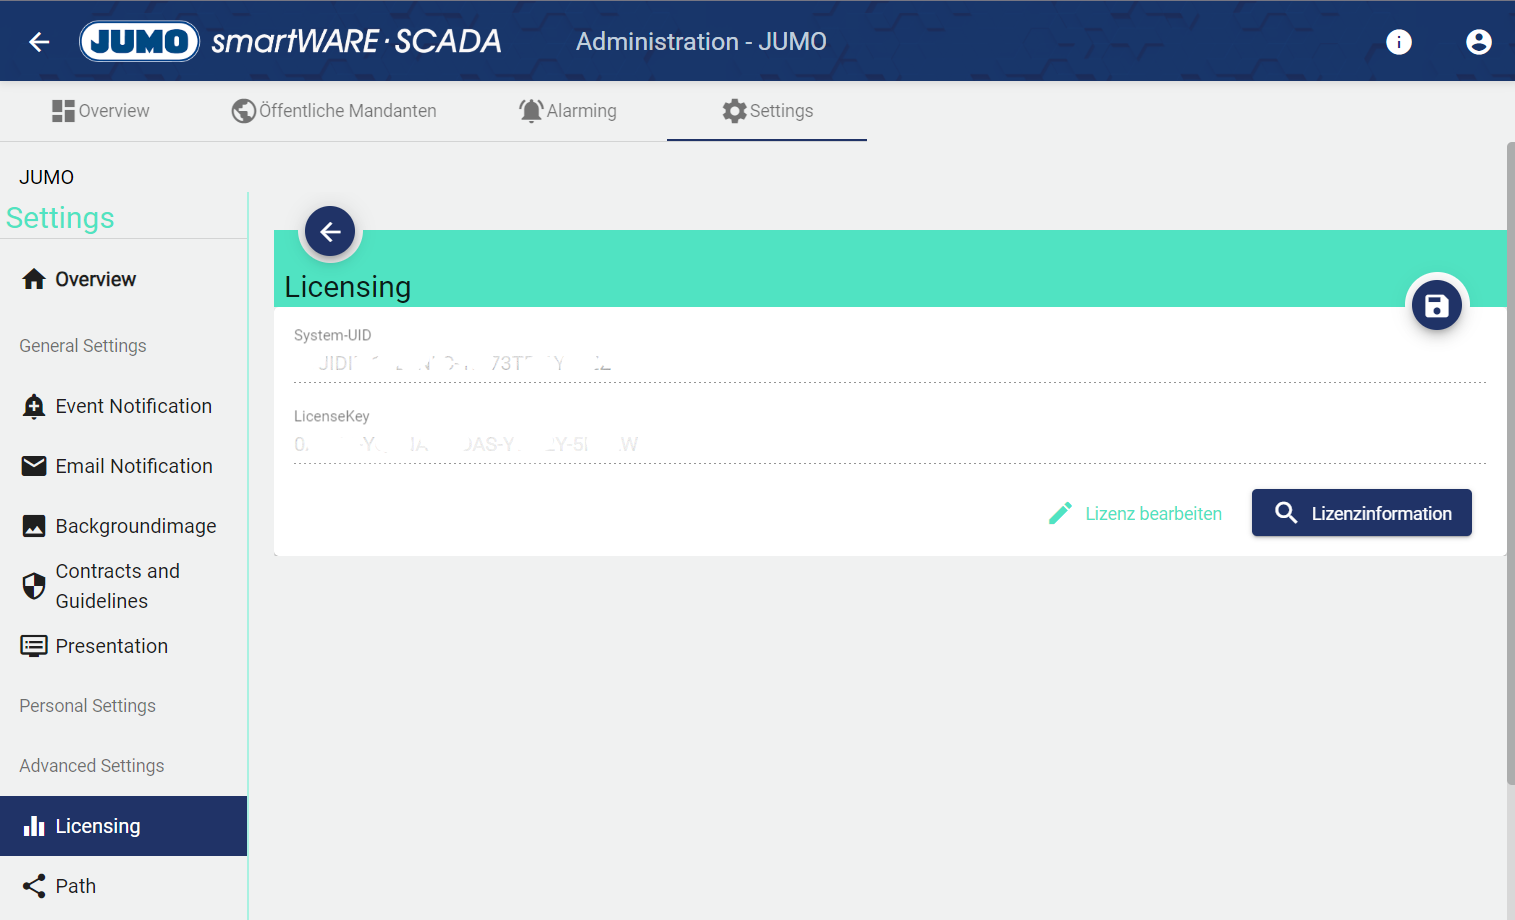
3) Activating the SCADA Software
The activation of SCADA with the activated license is done via the settings for licensing in the central administration. The activated license has to be entered und LicenseKey and saved
Congratulations! You have successfully activated your SCADA.
Would you like to add further users in addition to the root user, please consult chapter User management Keycloak (IAM).
Troubleshooting:
1) SCADA-Installer - check Connection to MongoDB failed
Problem
Check of connection to MongoDB failed
Detailed description
MongoDB may take a little longer to boot up.. The JUMO installer requests the activity of MongoDB. It can happen that the JUMO installer quits this request if MongoDB takes too long to start up. The error "410 Gone"appears in the console.
Solution
Empty the entire cache of the browser.