
Stromversorgung und Netzwerkeinrichtung
-
Establish power supply using included power supply unit
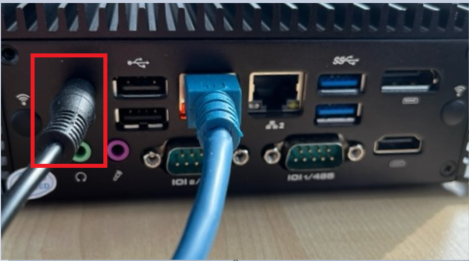
-
Plug in network cable
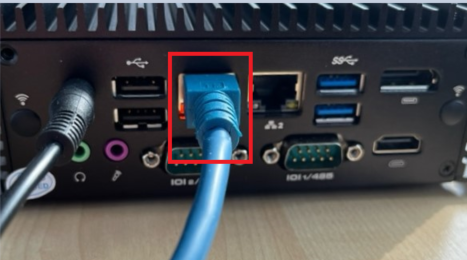
-
Perform network setup
Option 1: IP address of the IPC is assigned automatically.
Option 2: IP address of the IPC must be assigned manually, since it is not assigned automatically.
Please contact your IT to locate the IP address of the device.
In addition, IT should assign the DNS name of the device. E.g. scada-ipc.customer.net. Under this address, the SCADA application can then be called up via a browser that is located in the same network: http://scada-ipc.customer.net
Optionally, a CA certificate can be assigned so that the browser classifies the page as trustworthy. Once this has been done, the IPC can be accessed at https://scada-ipc.customer.net.
Complete the SCADA setup according to the license.
After the device has been made known in the network, the SCADA setup can be completed. To do this, you must enter the IP address or the assigned DNS name in a browser that is located in the same network as the IPC. Afterwards the following application opens.
https://scada-ipc.customer.net
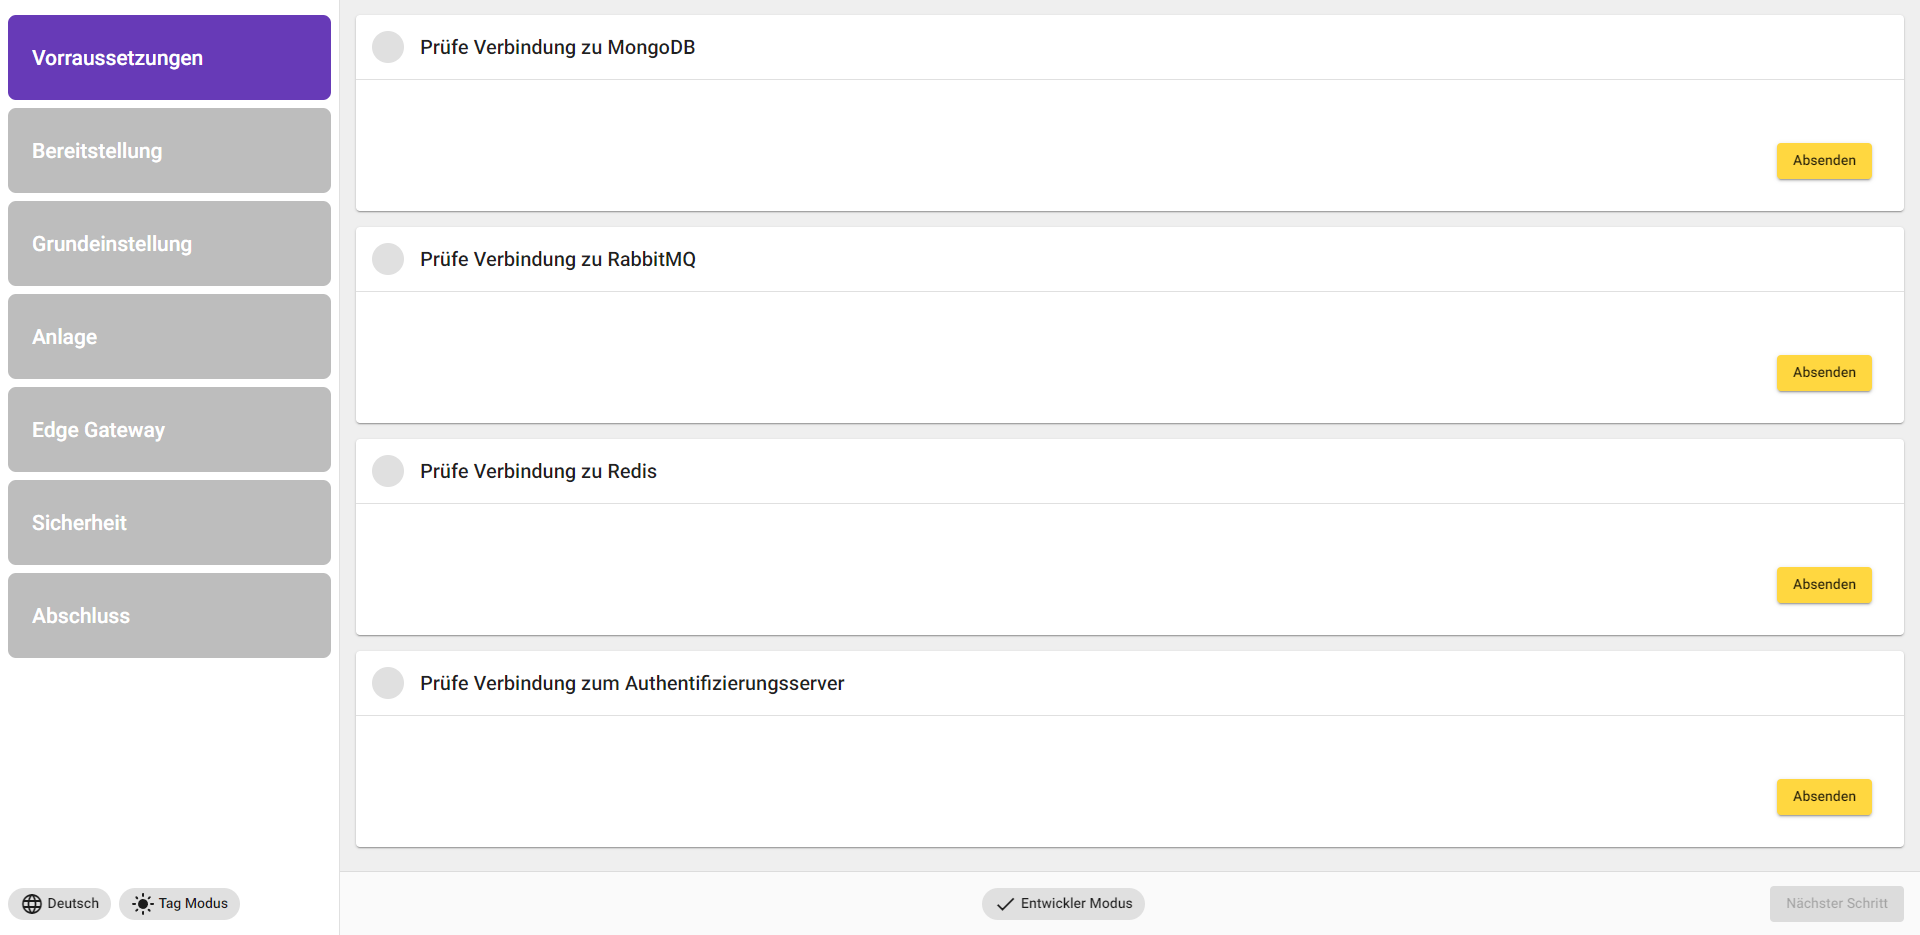
The following application is used to set up the SCADA application according to the purchased license.
|
Normal Mode |
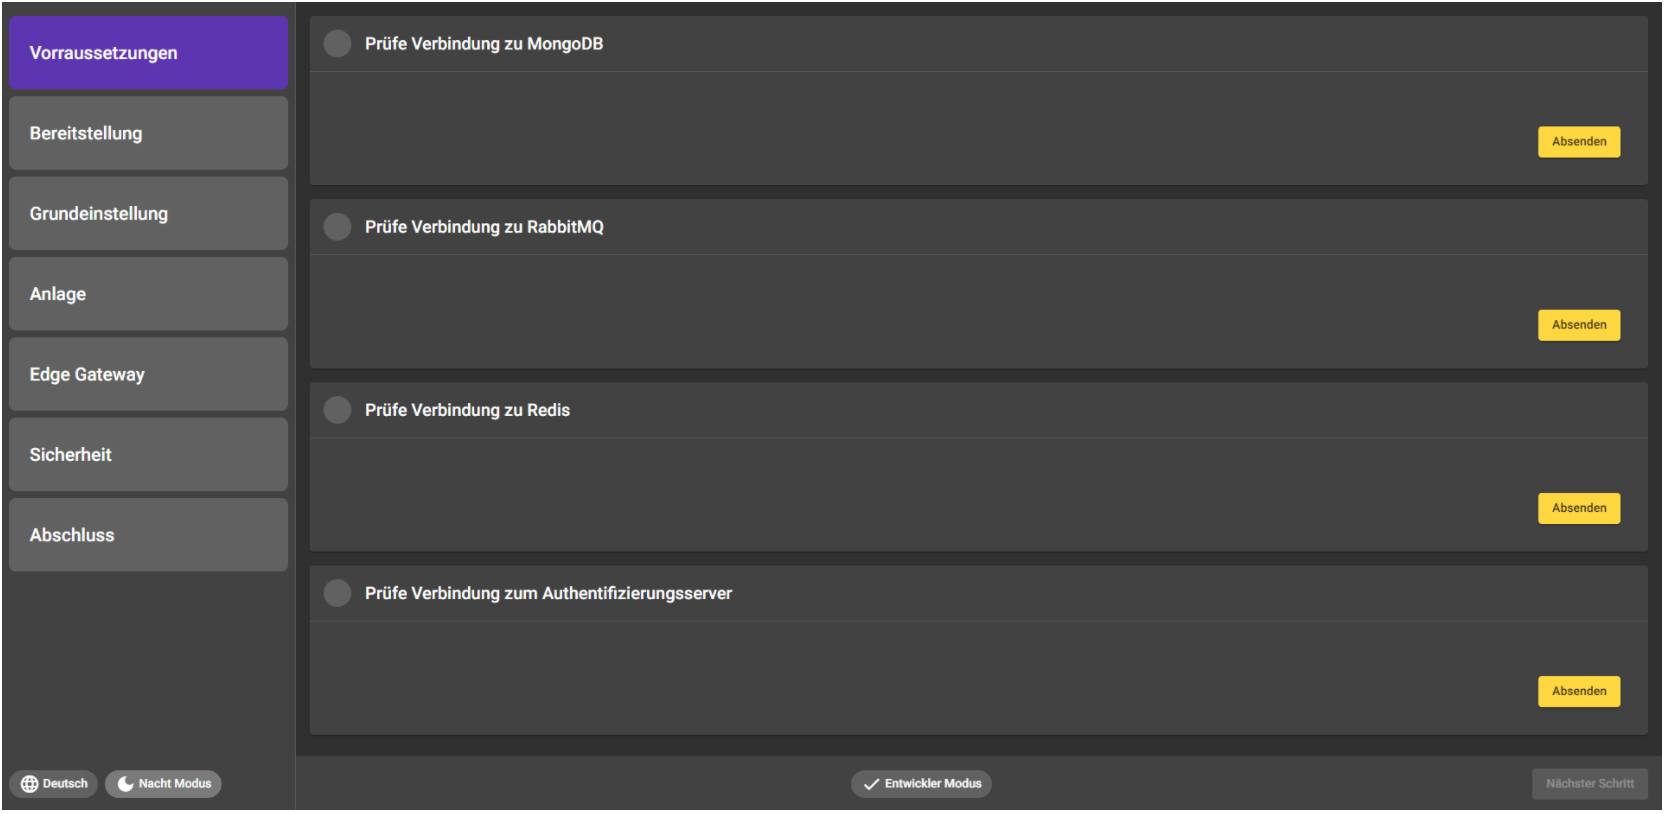
Dark Mode |
|---|---|
|
|
|
Menu item |
Note |
|---|---|
|
Requirements |
Here, the connection to various databases and servers is checked. The test can take several seconds. 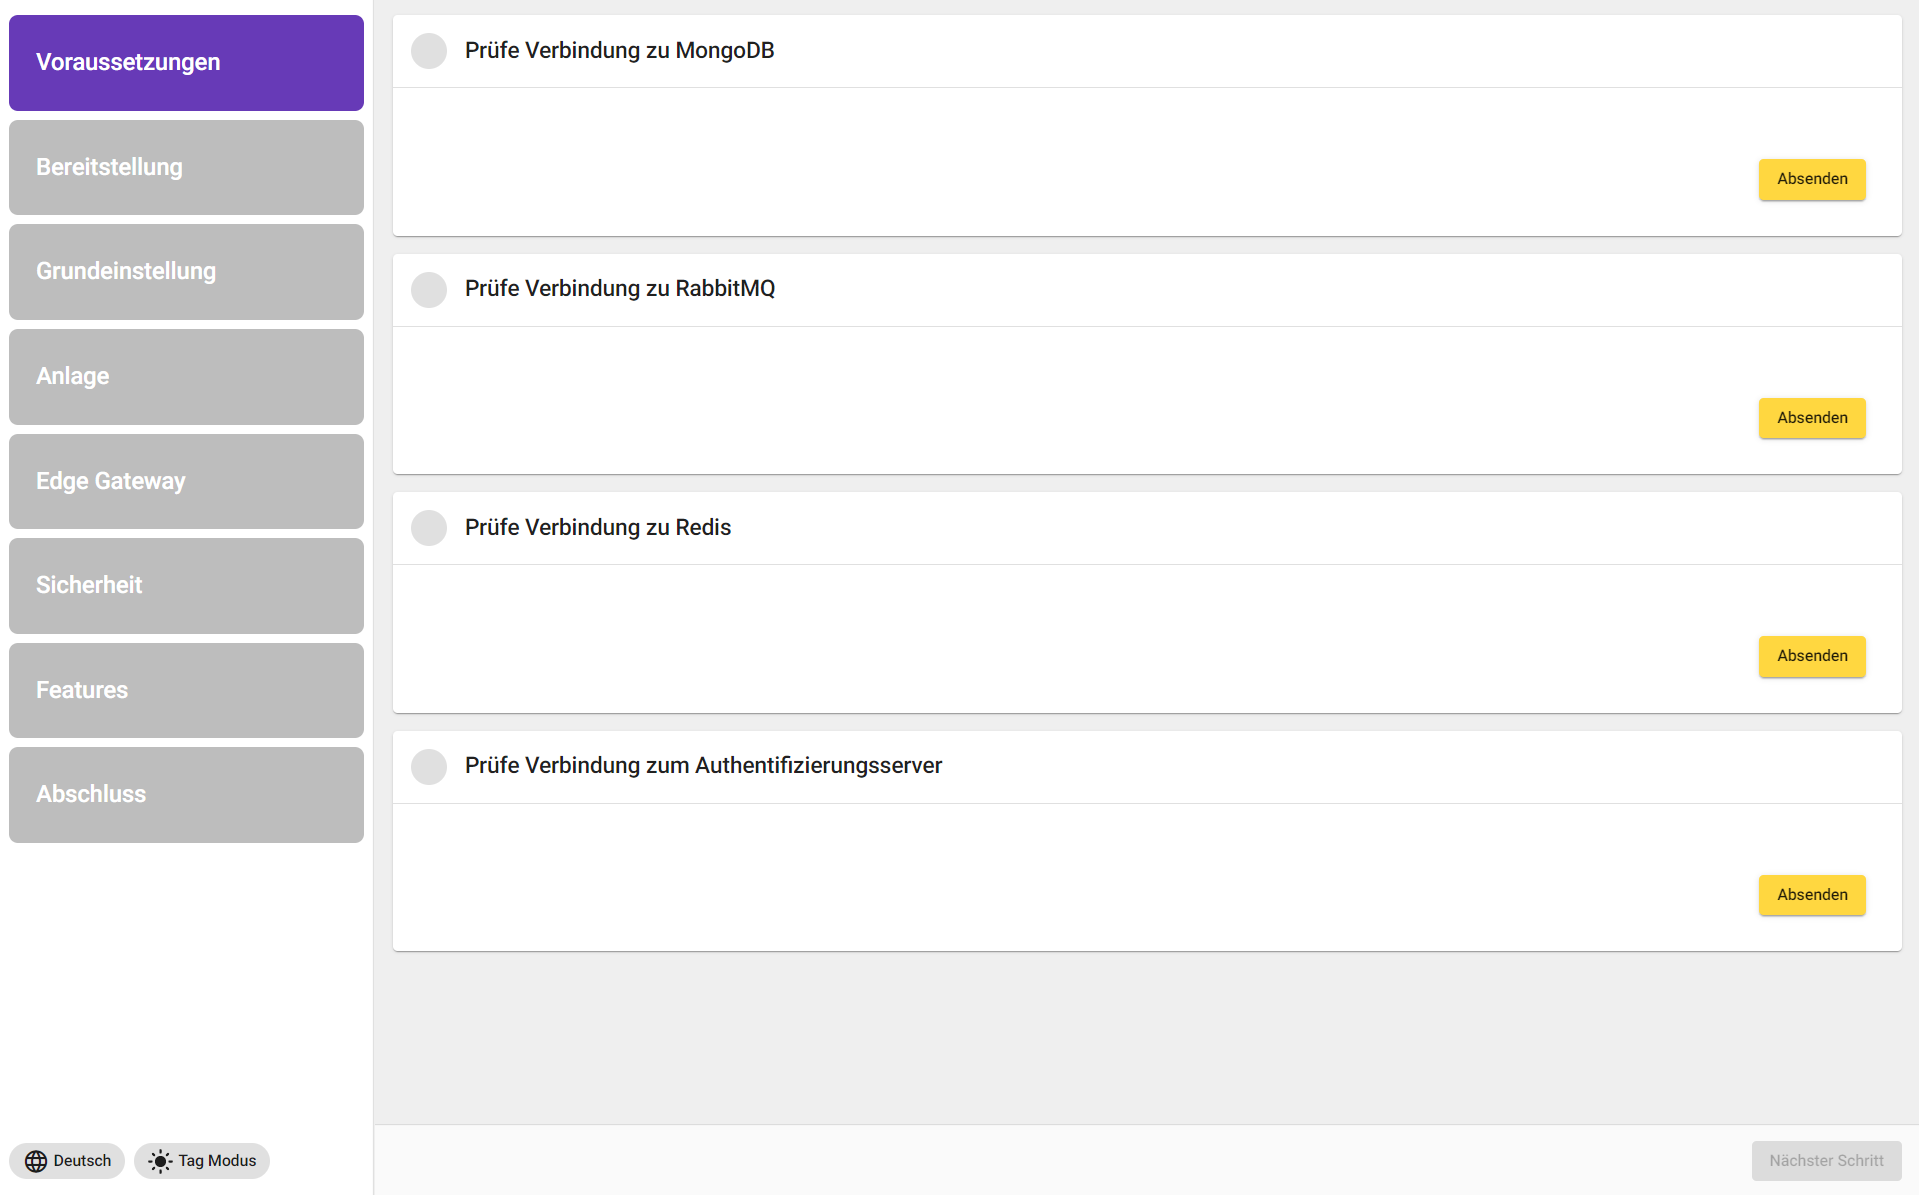
If the check fails, enter the following commands. Where to enter these commands is listed at the very bottom of the page under "Additional information". |
|
Provision |
In the "Provision" area, a certificate must be signed and a host name assigned. Select "Self signed" here to continue (IT has already assigned a CA certificate). Assign as hostname, the same name that IT has already set for the SCADA application e.g.: scada-ipc.customer.net. Then click "Submit 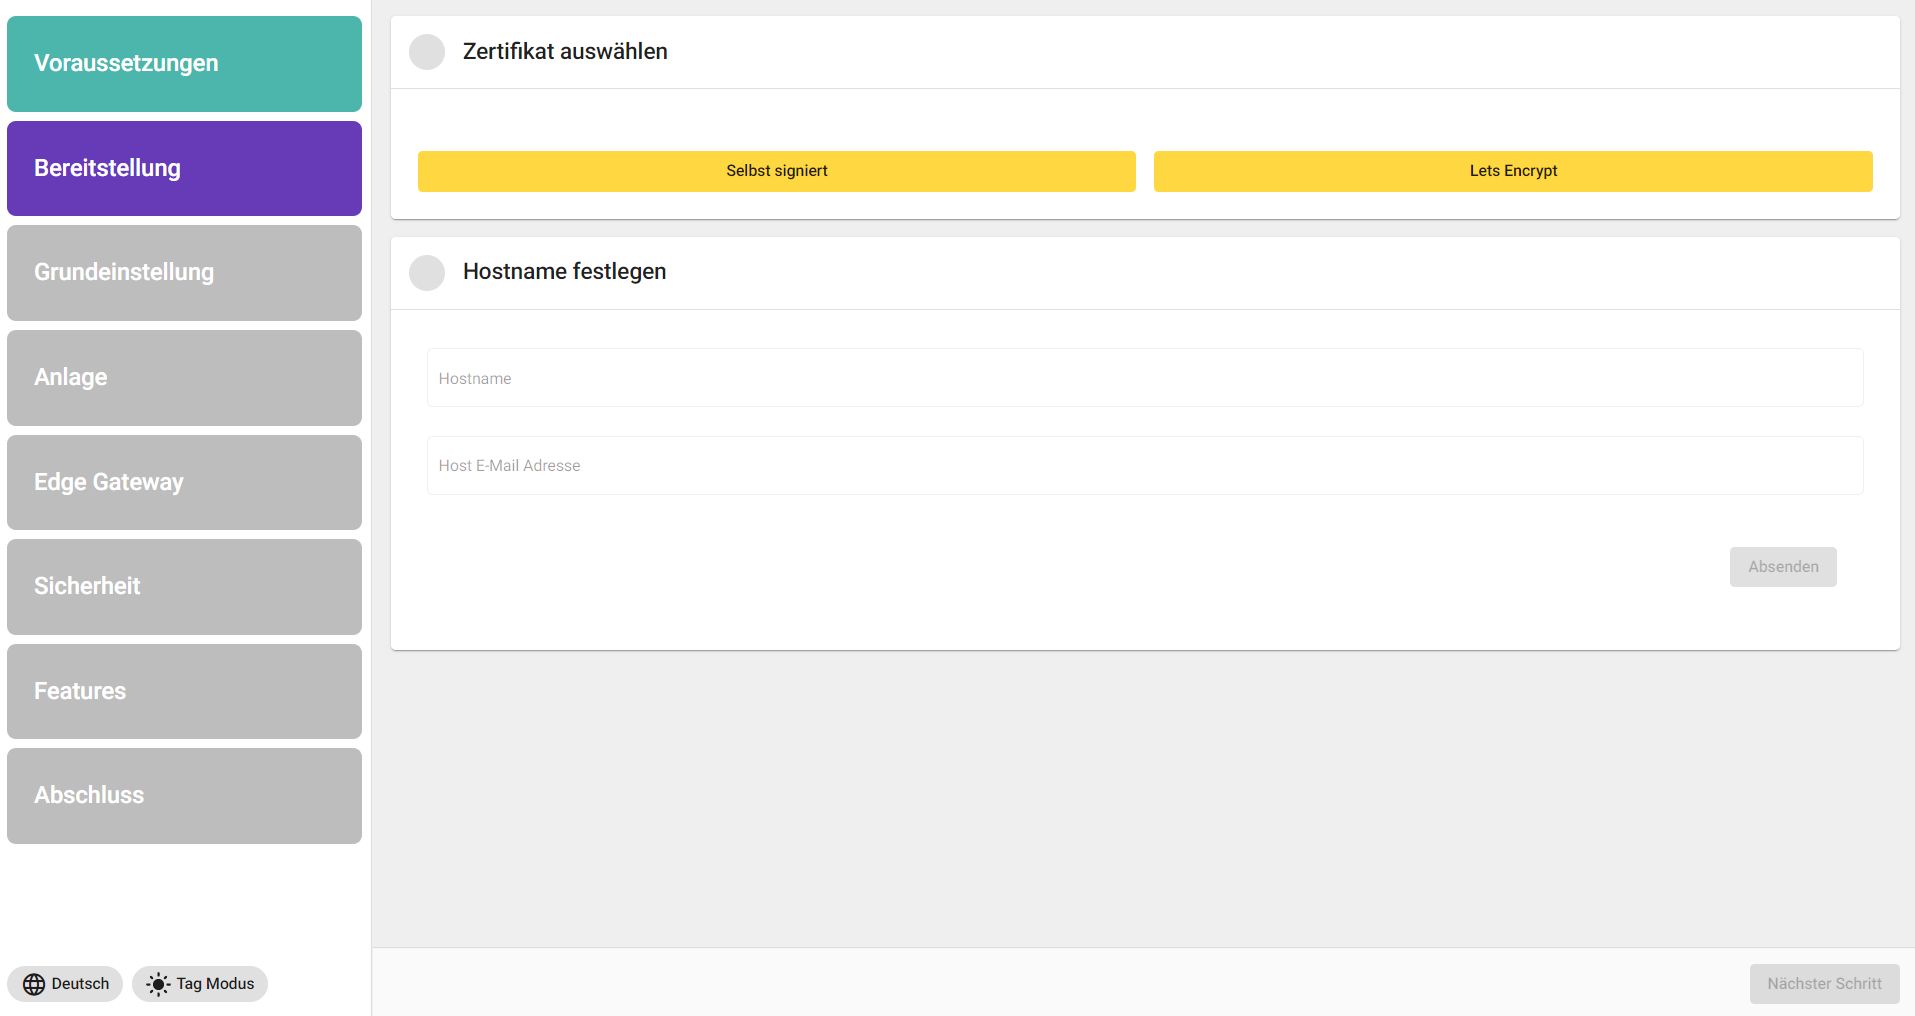
|
|
Basic setting |
Databases and Server are established in the basic settings. When establishing the database, click on the "Send" button. Subsequently, you determine a password for your database and confirm your determined or generated password via the Send button. Passwords can be randomly generated via the fingerprint symbol. Subsequently, press the "Send" button at "Set up authentication server" to create the database. 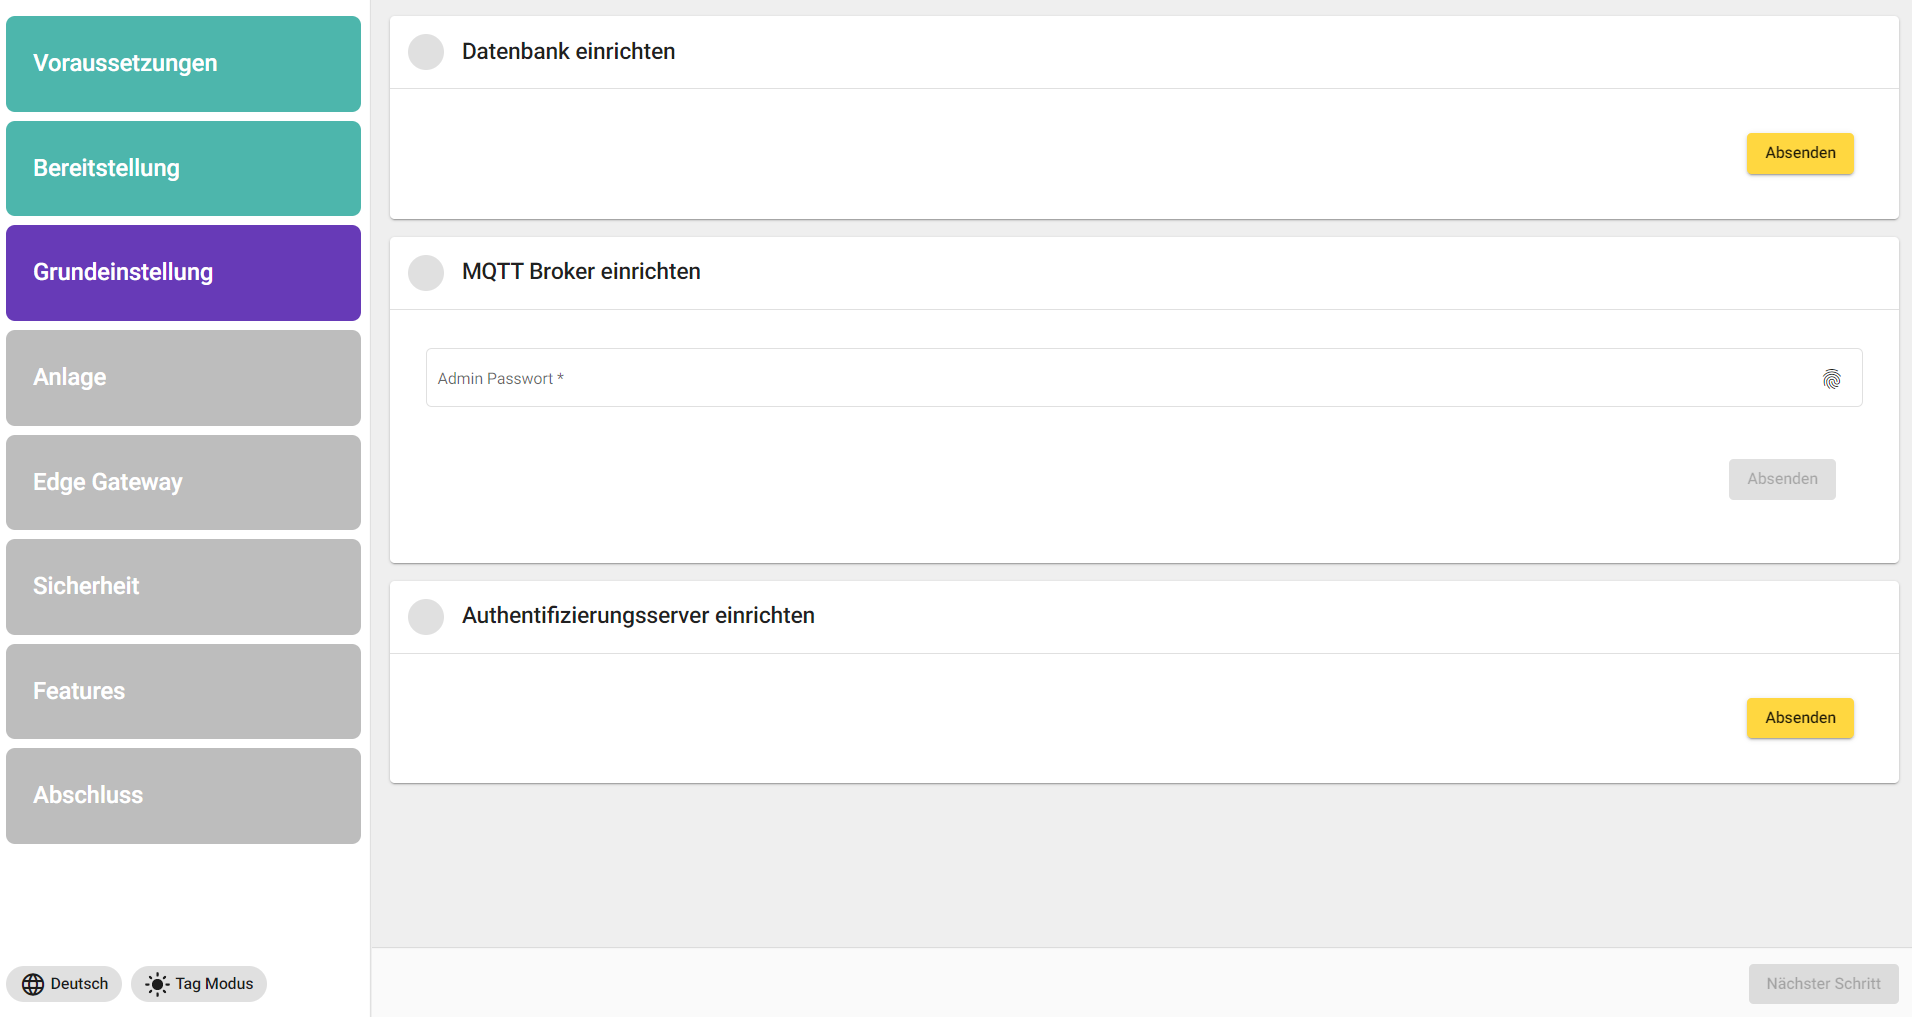
|
|
Plant |
A base tenant and an asset tenant must be defined here. Tip: Name the base tenant after your company and the asset tenant after its subject area in which the SCADA is to generate added value. 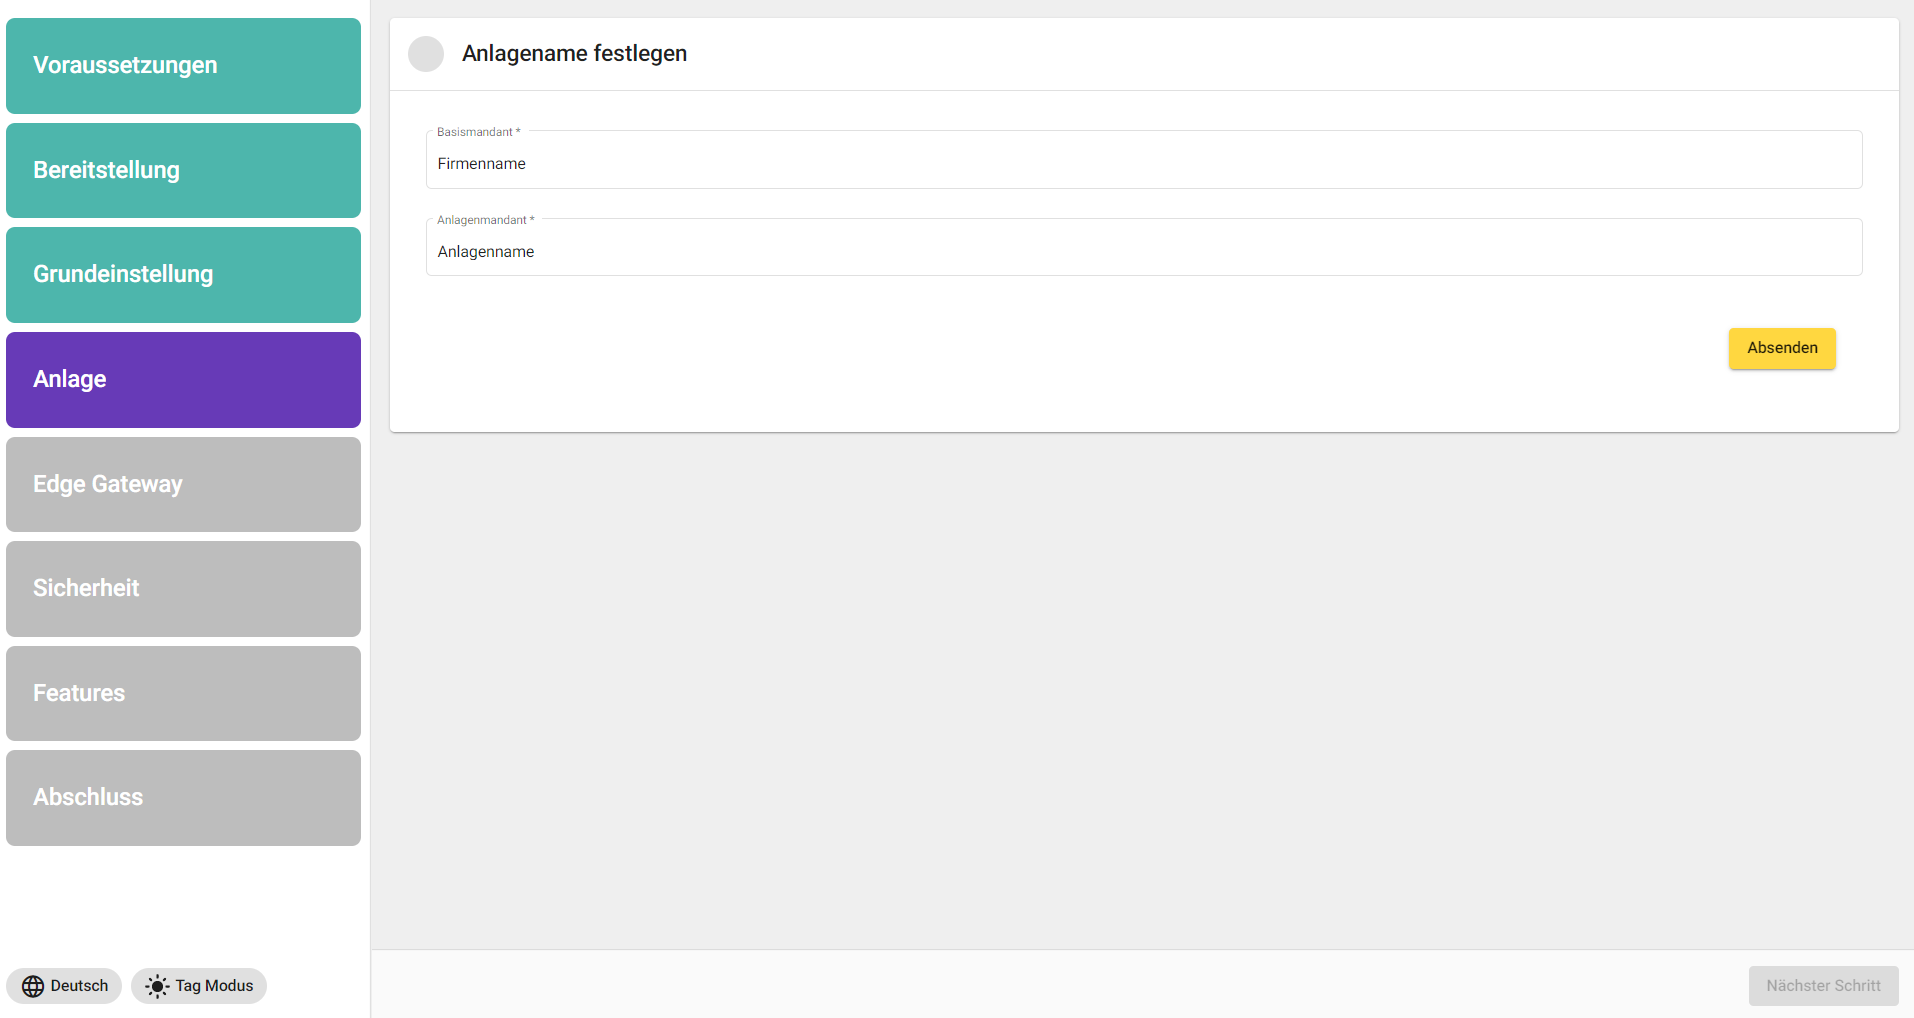
|
|
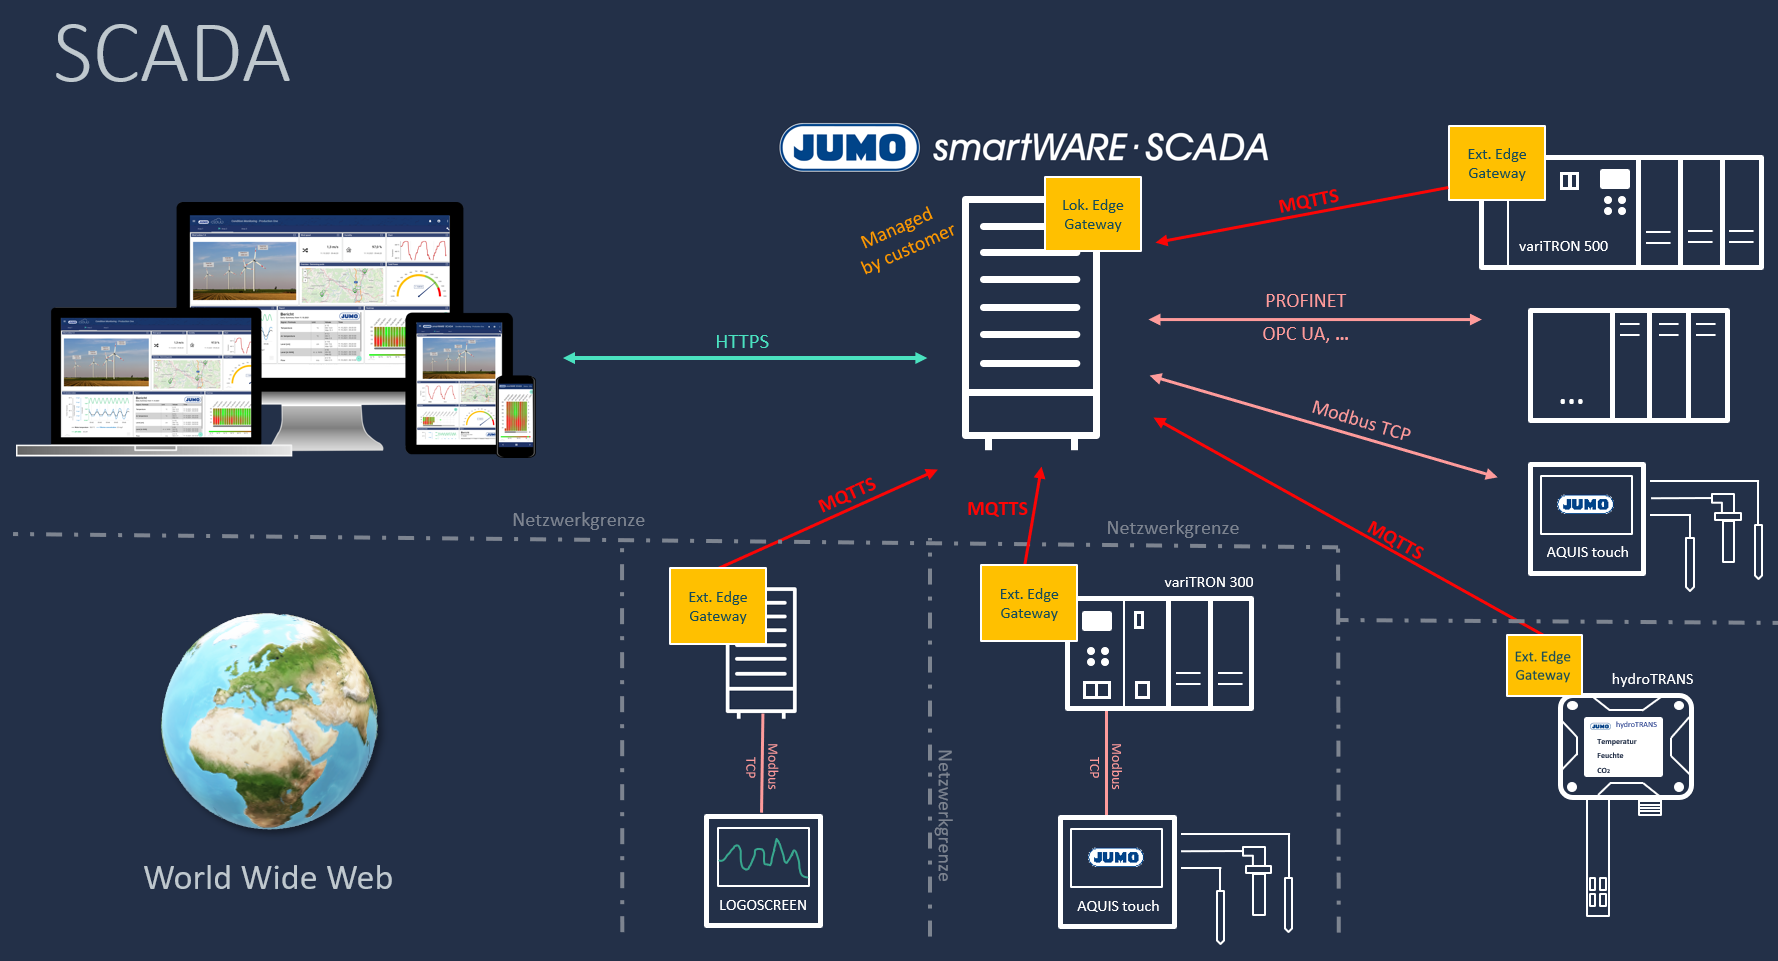
Edge Gateway |
In the "Edge Gateway" area, you are asked whether a local IoT edge gateway should be created or not (usually: "Yes"). You are also asked about external IoT edge gateways. If, in addition to the SCADA main server (local IoT edge gateway), other networks or JUMO variTRON devices (external IoT edge gateways) are to be connected via MQTTS, click "Yes" (can also be changed subsequently). Under "Data source name", the name is assigned to the first data source. It is recommended to use "Local edge gateway". External edge gateways must be purchased per license. The internal edge gateway is always included. 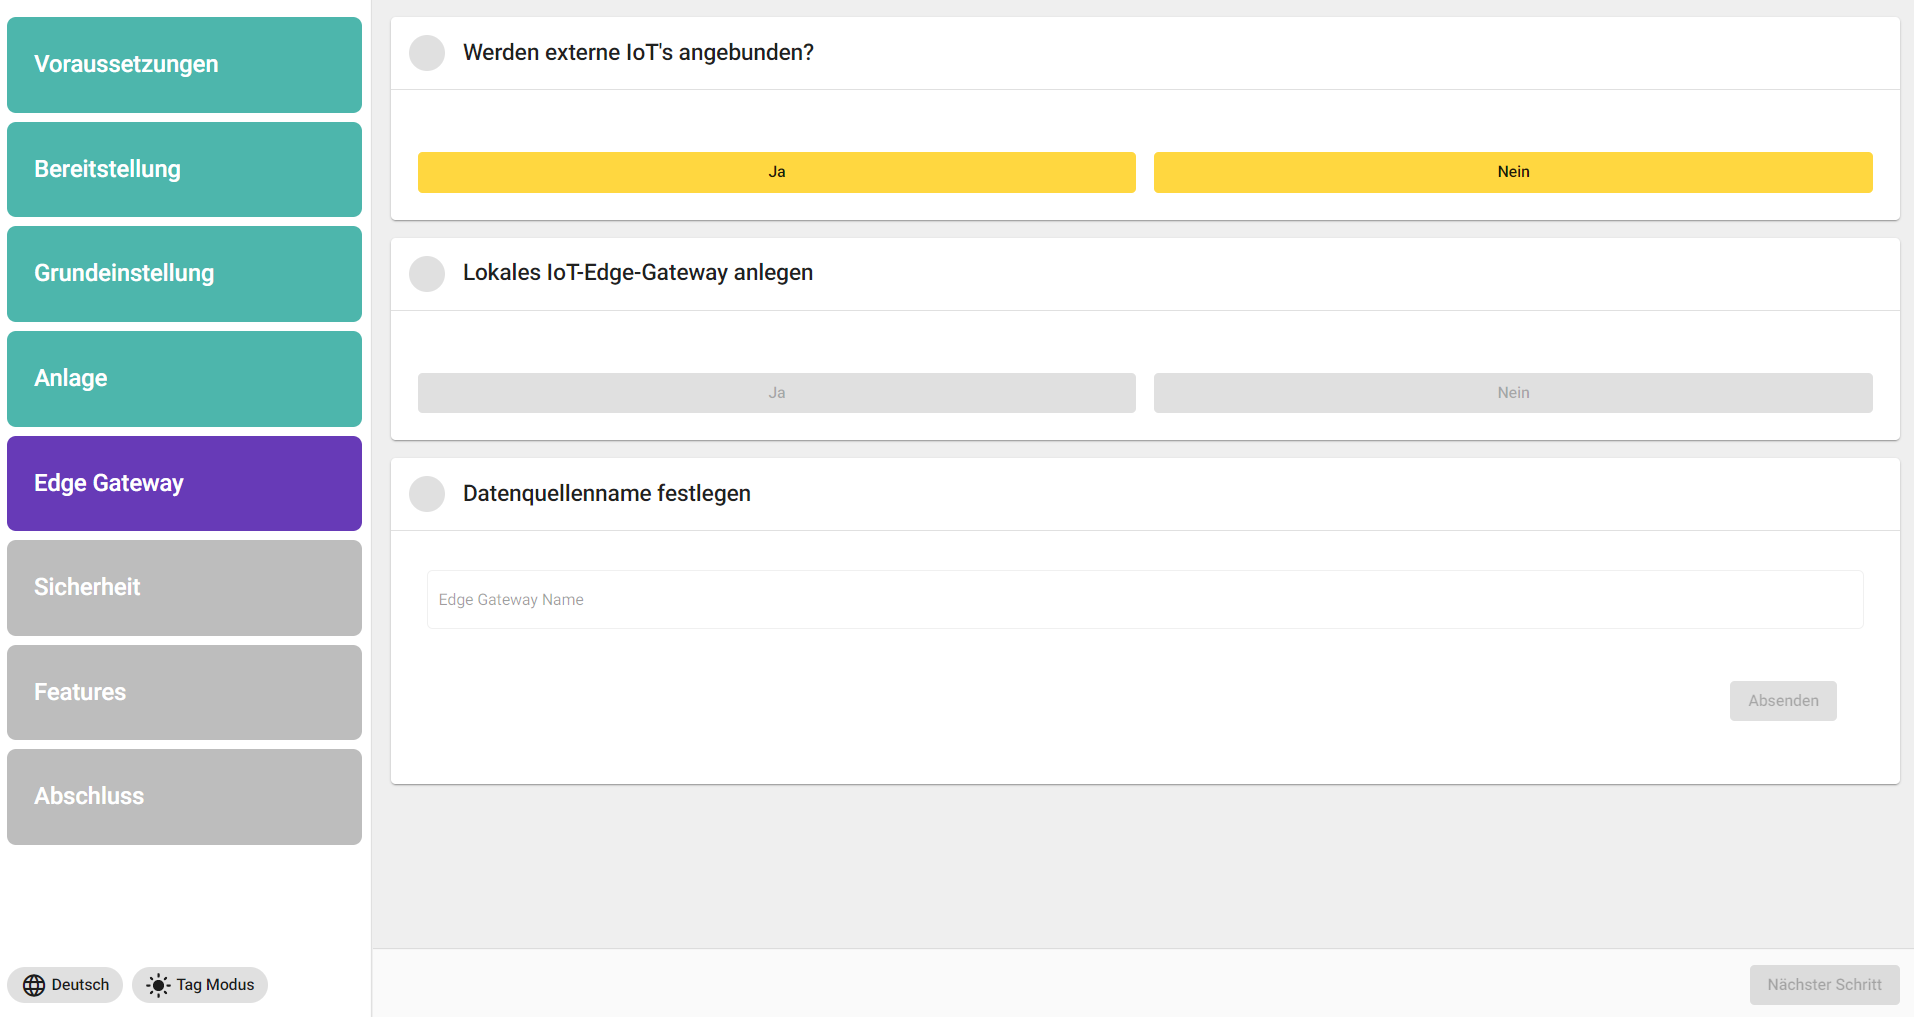
|
|
Security |
In the security settings, a password is set or generated for the database and authentication server respectively. Passwords can be randomly generated here via the fingerprint icon (recommended). In the "Redis" tab, simply click on "Submit". 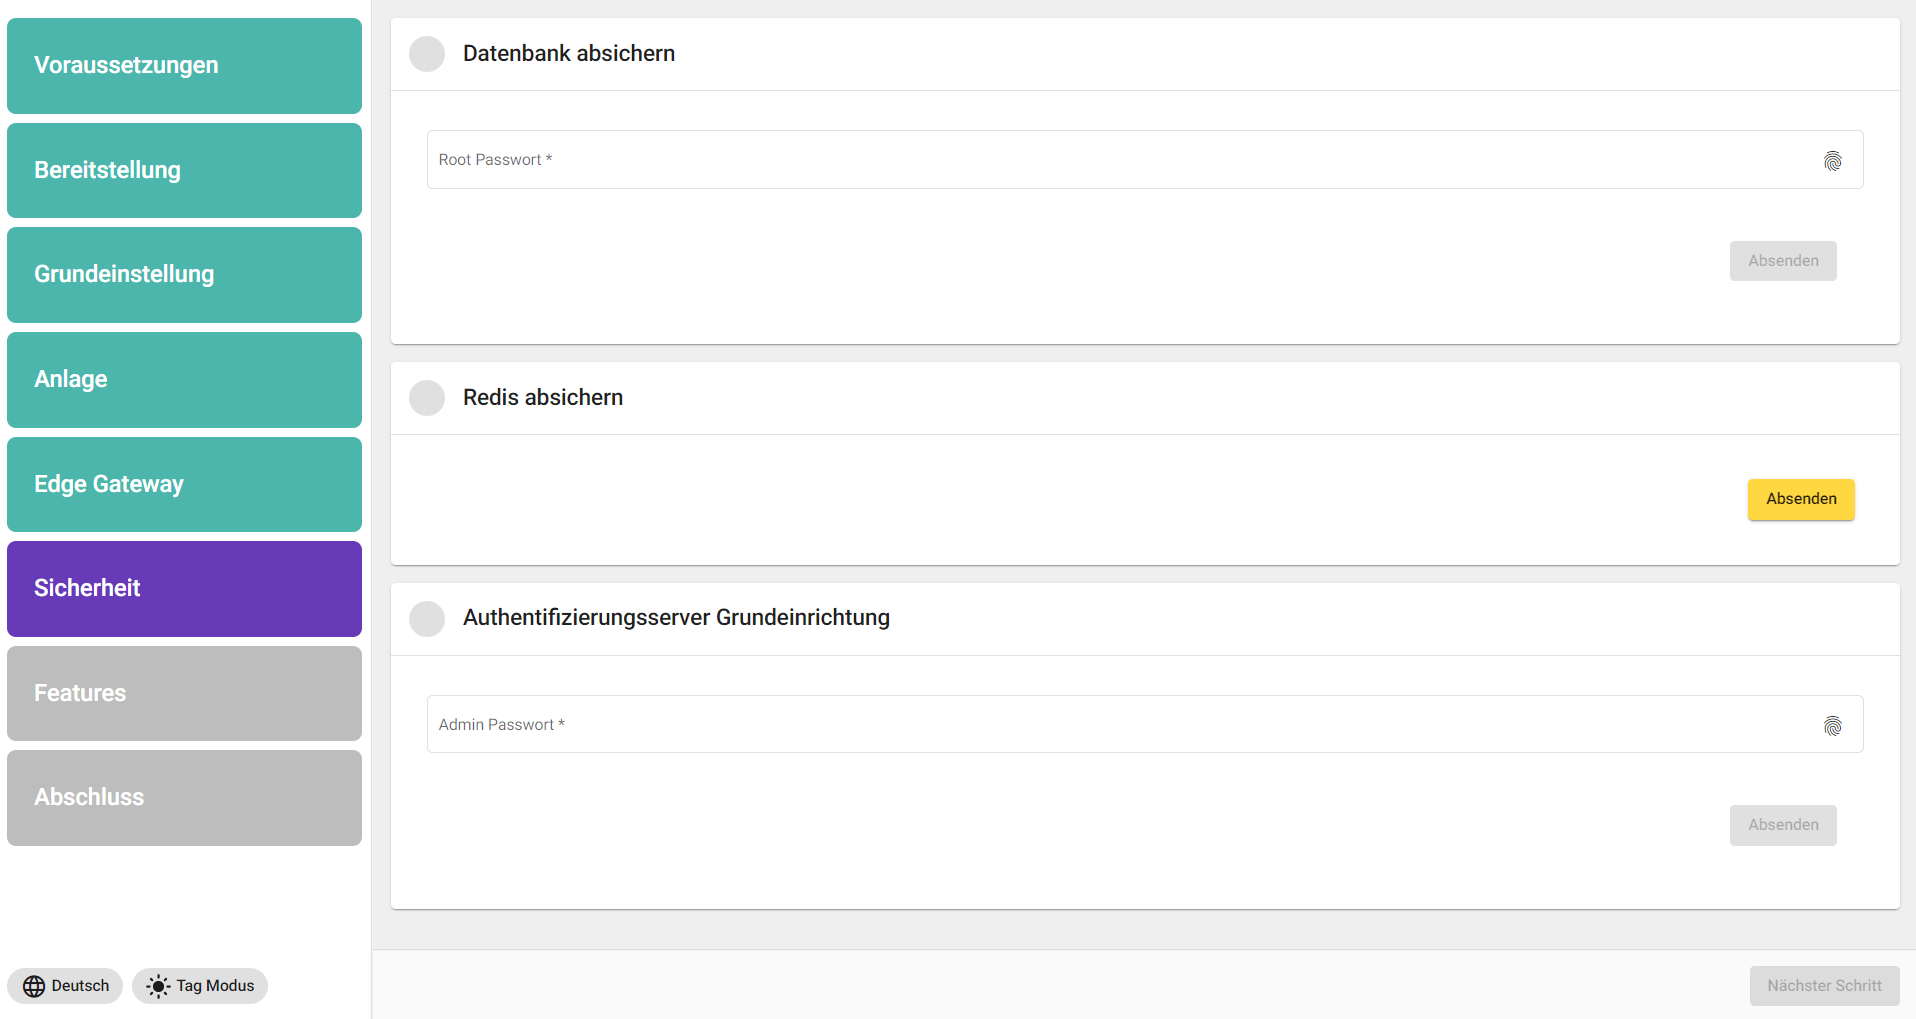
|
|
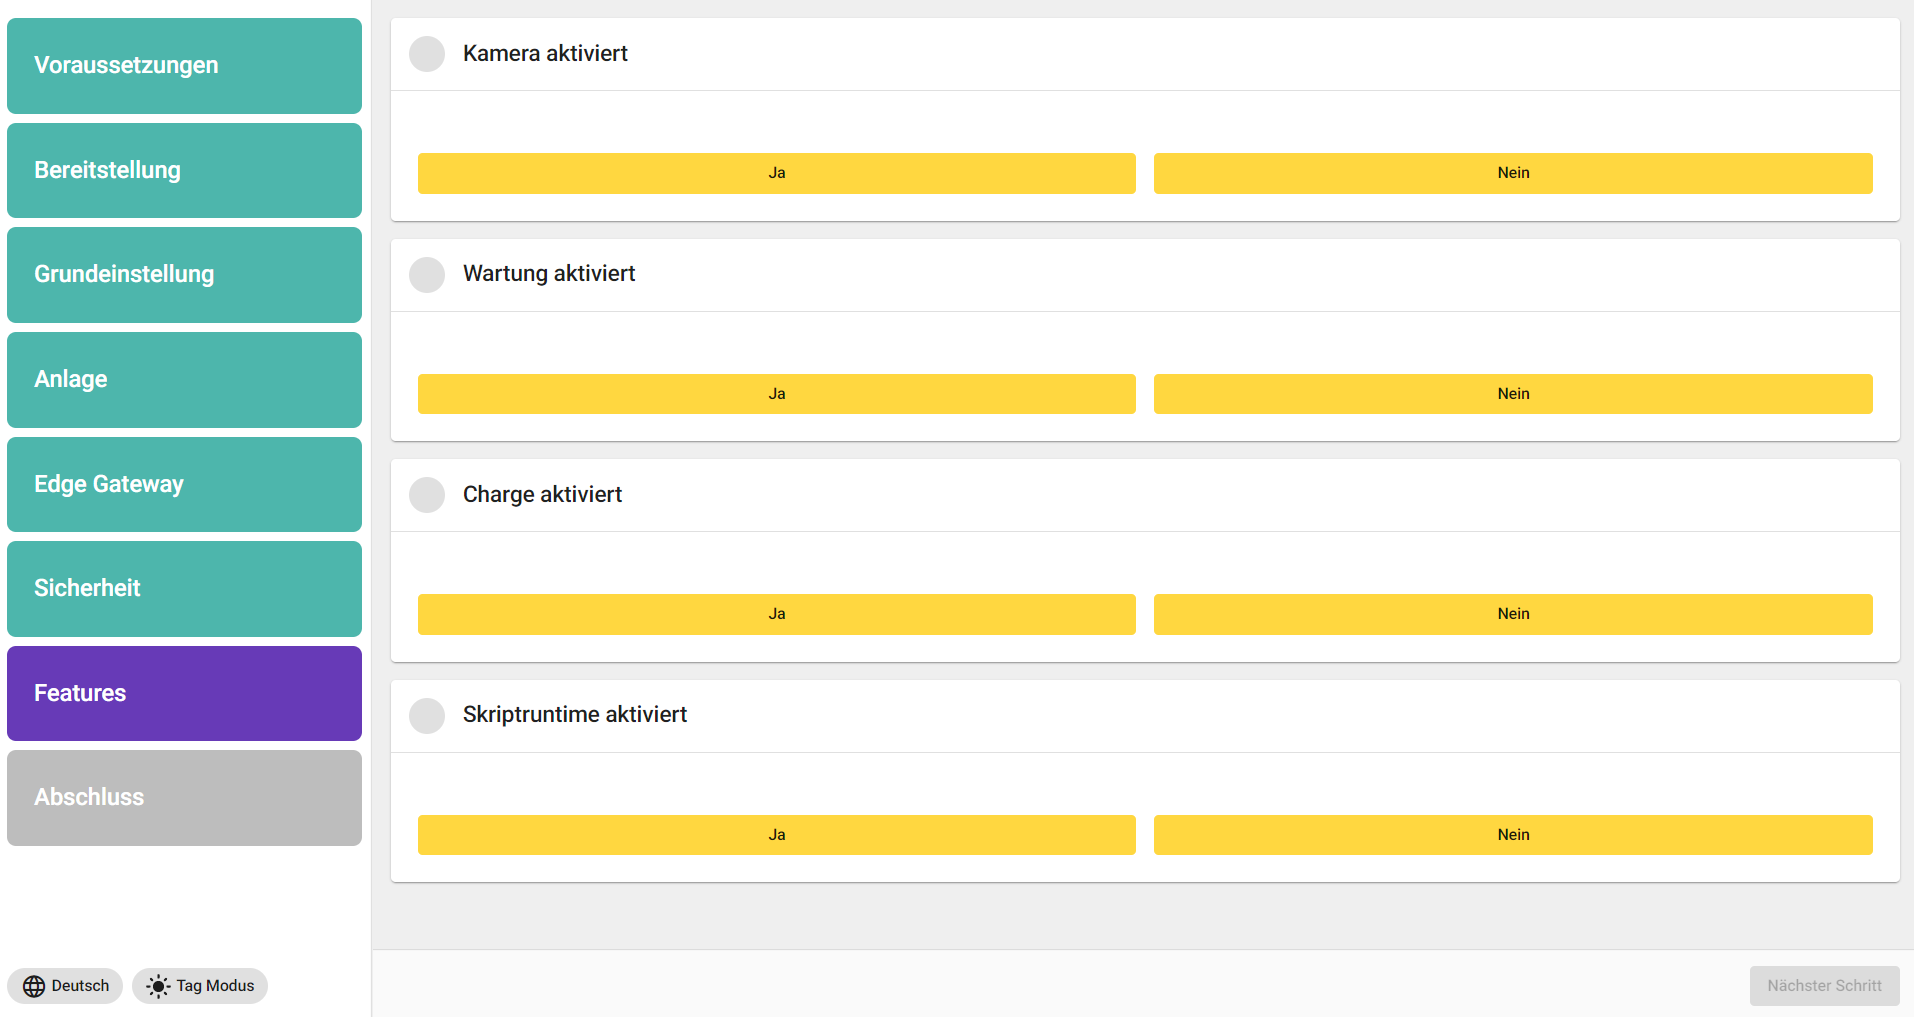
Features |
Depending on which feature or module is required, it can be decided here whether it will be implemented or not. Please follow the purchased licensing here. Modules that are not required consume unnecessary server power.
|
|
Conclusion |
The Closing window shows an overview of all user names and passwords that should be printed or saved as a PDF. The root password is especially important. 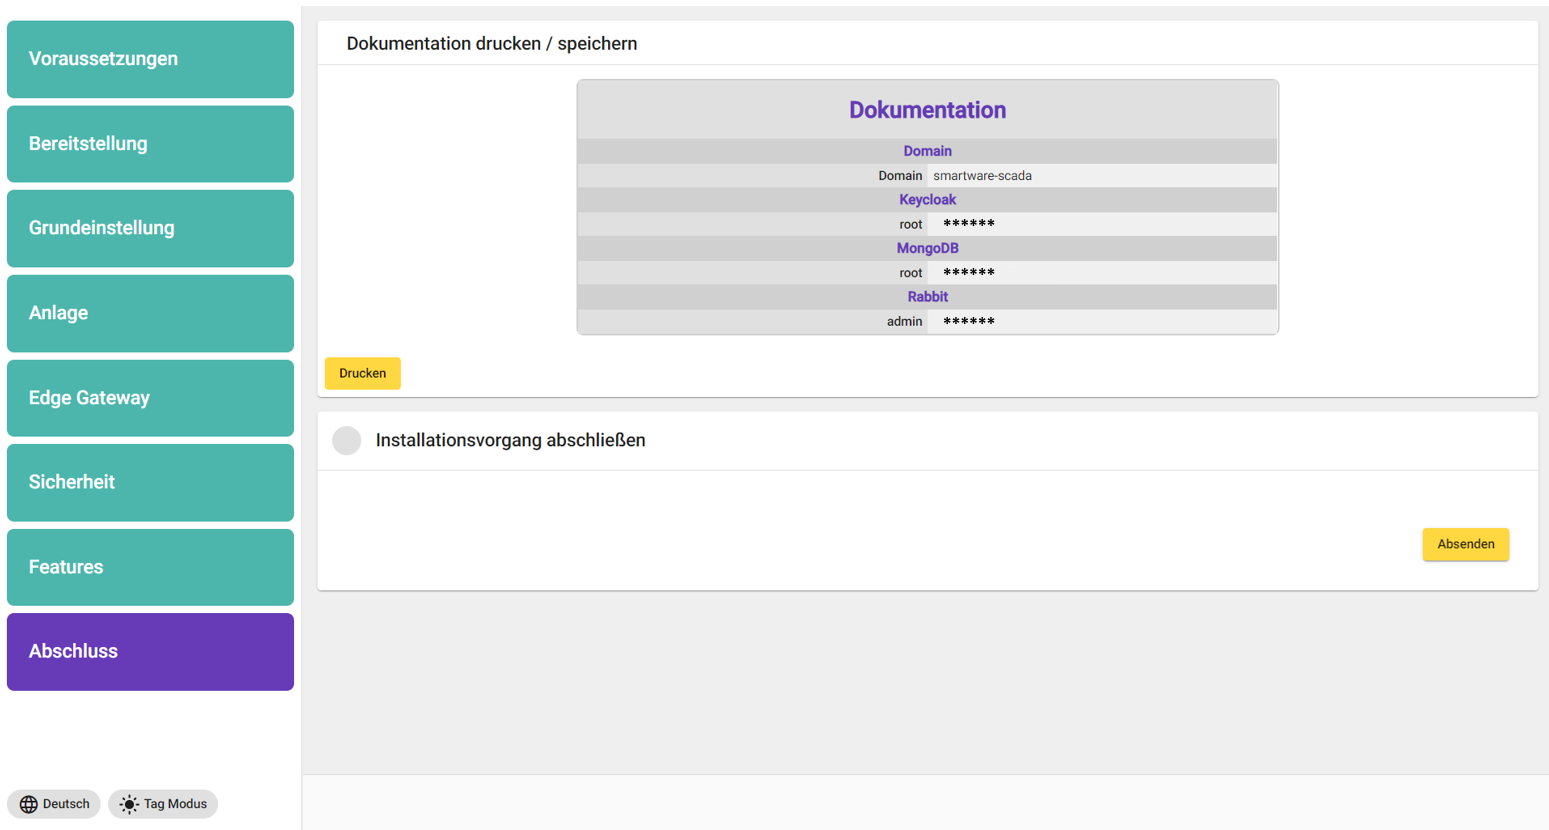
|
-
After pressing the "Submit" button in the "Finish" menu item, the following commands must be executed in the shell. See again the last point of this page "Additional information".

docker-compose down --remove-orphans
docker-compose pull
docker-compose up -d
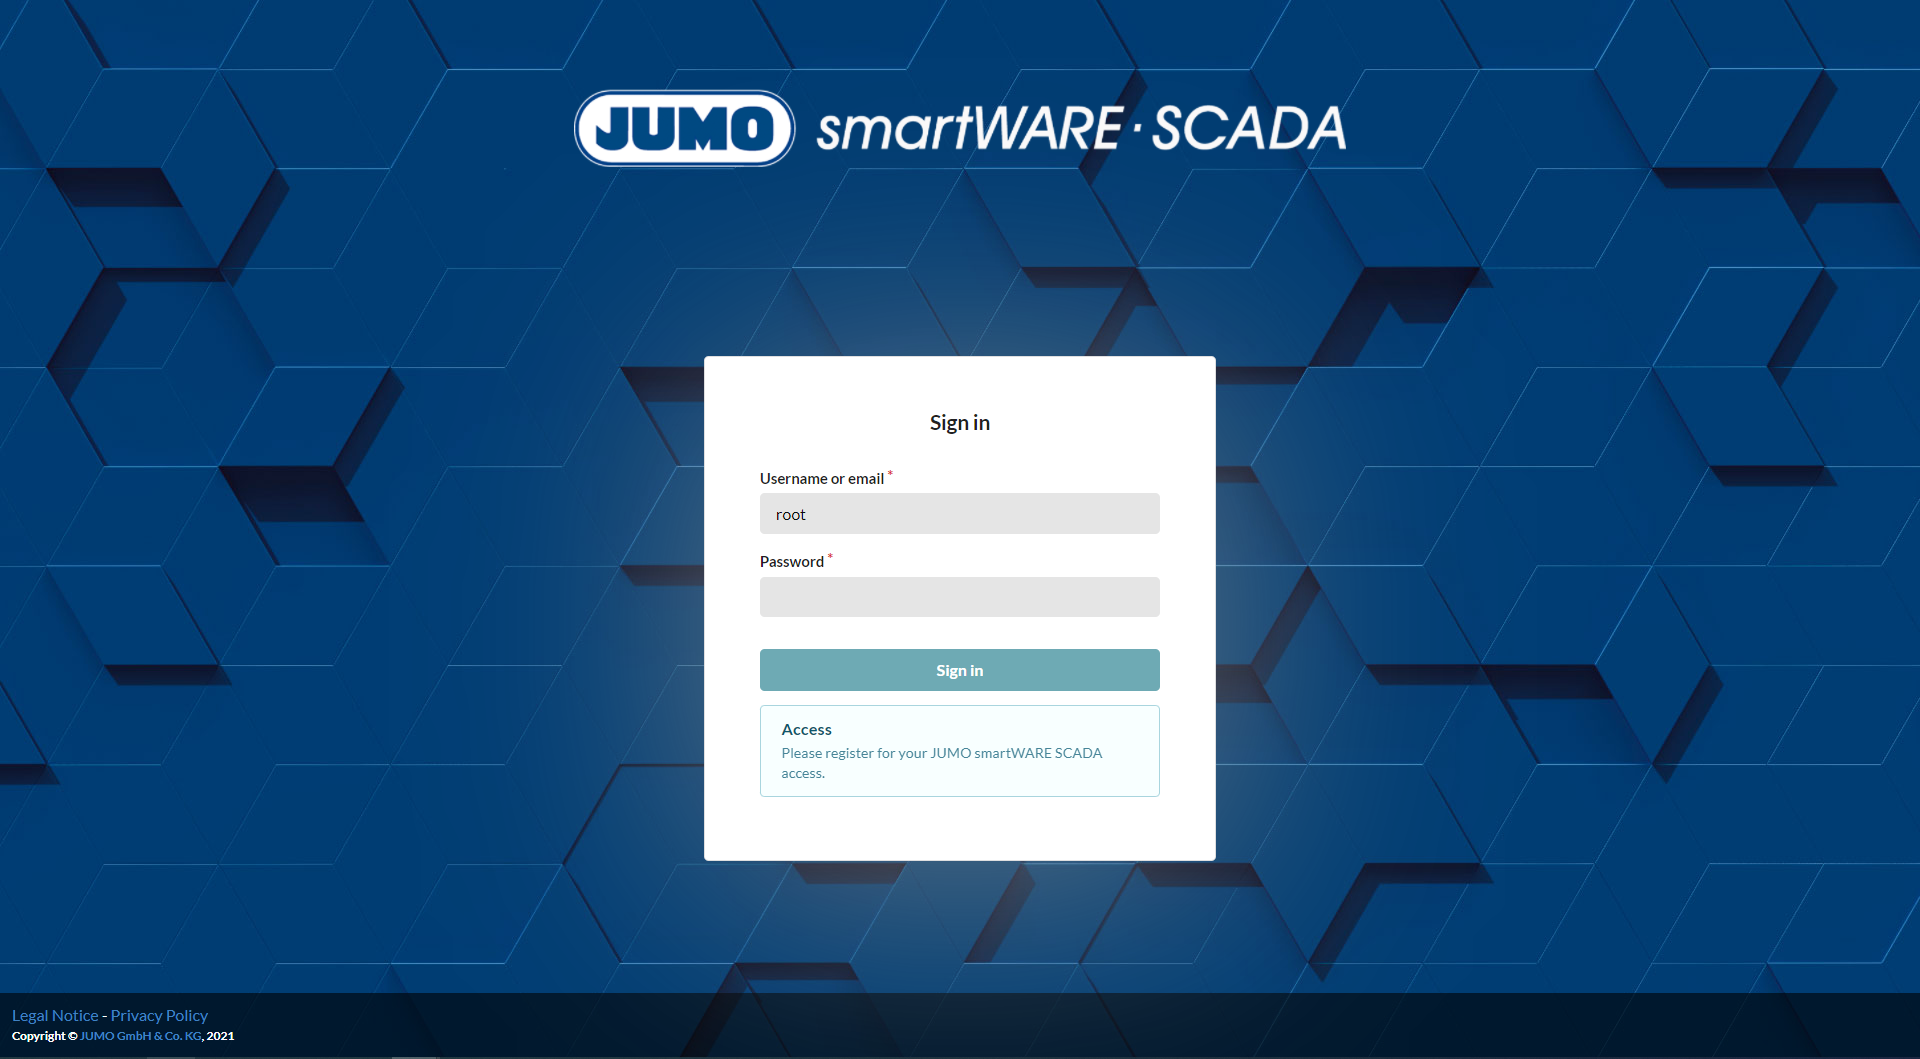
Activation JUMO smartWARE SCADA license
The homepage of the JUMO smartWARE SCADA can now be called up in the browser via the host or DNS name. The login works with the user "Root" and the corresponding password from the password list of the last step.
To customize the login topics (SSO, Security, Registration, LDAP, etc) please refer to the User Management Keycloak (IAM) chapter
-
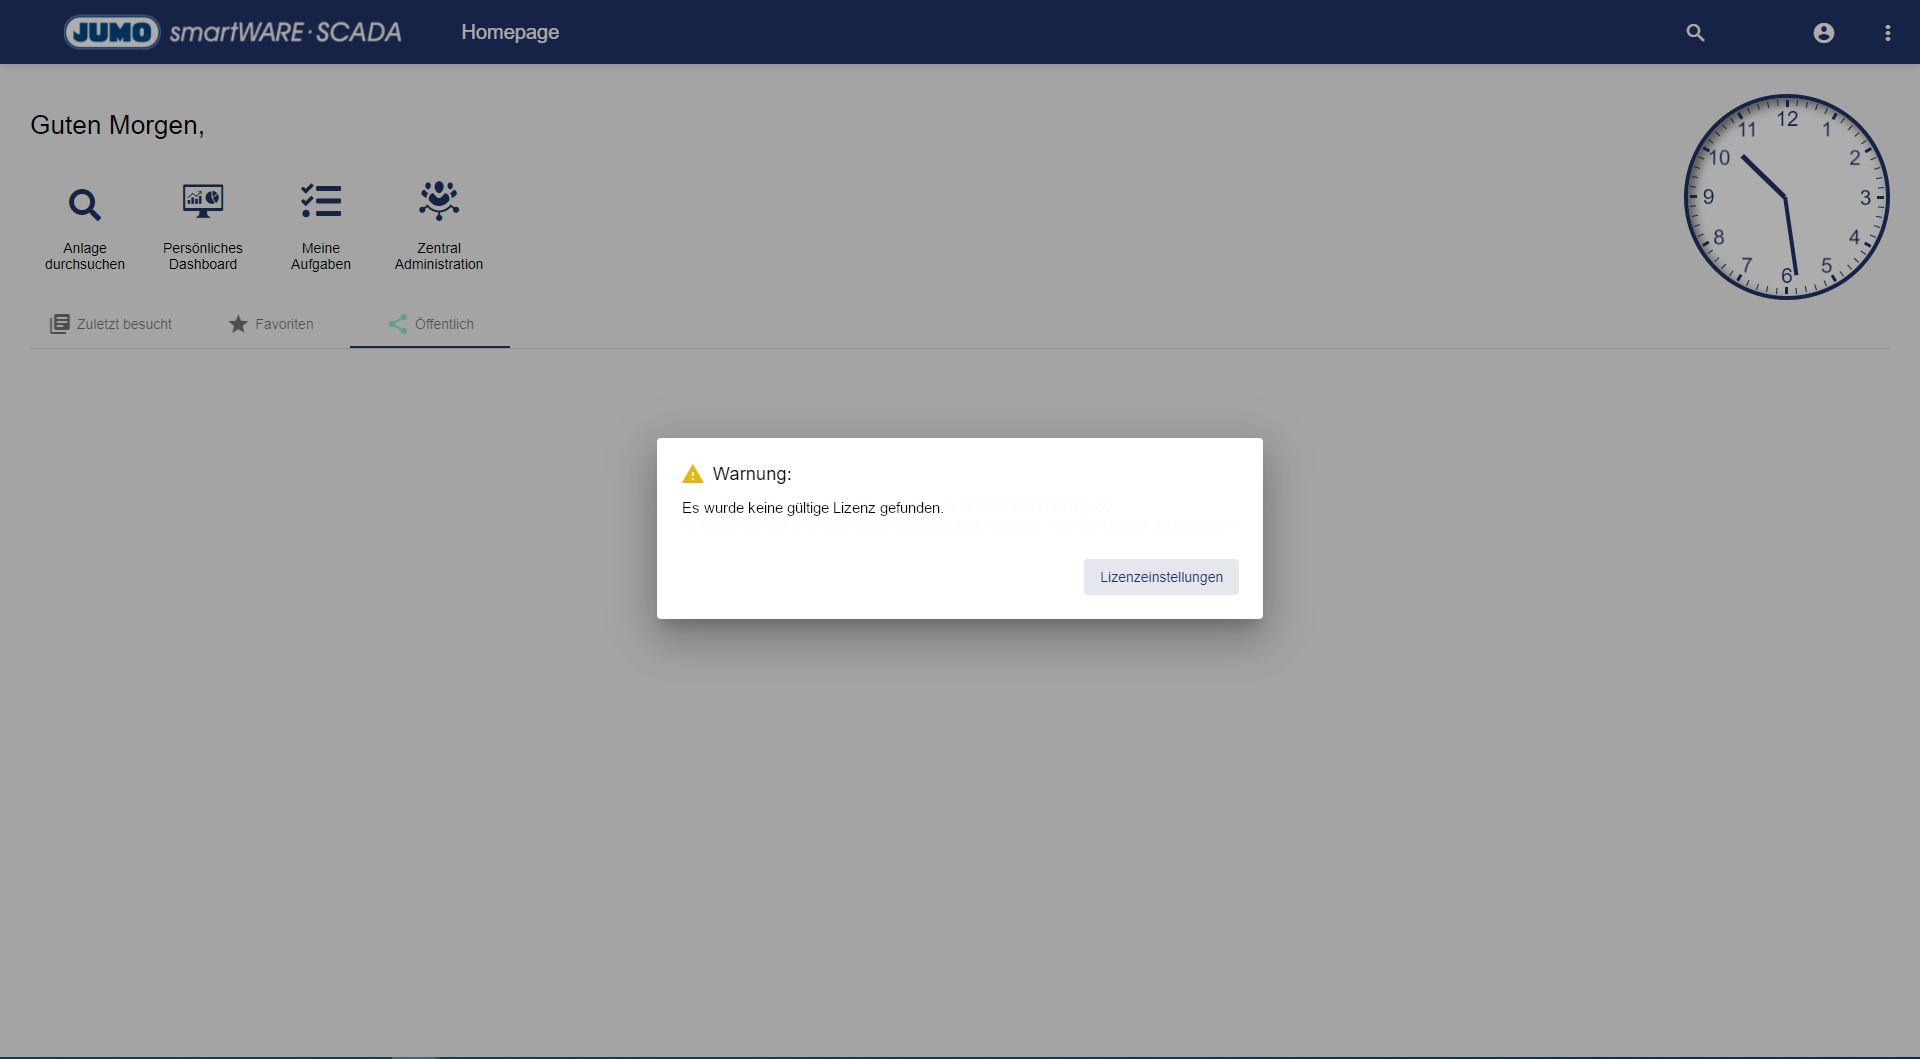
Open license settings
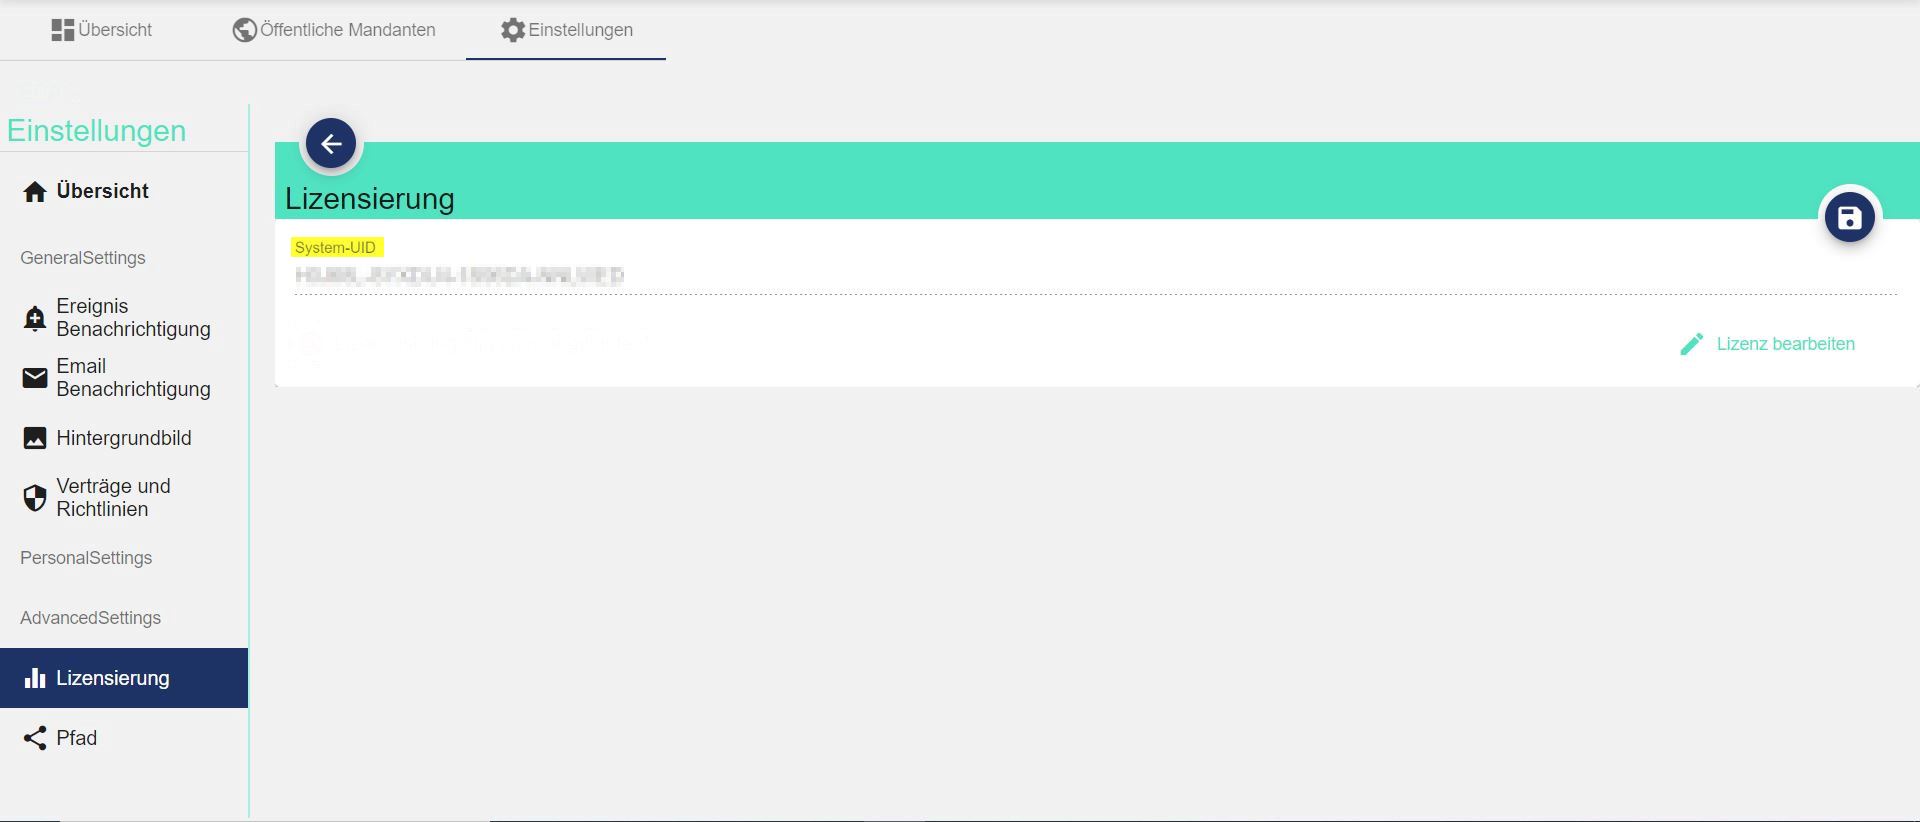
As soon as the JUMO application has been started, a warning message appears that no valid license was found. Click on License settings within this warning window to open the license settings. Copy the system UID here.
The UID of the respective SCADA installation can be read out from the central administration under Settings and Licensing. This settings view with “Licensing” can only be viewed in the top root tenant.
-
Activation SCADA license
To use the SCADA application, a valid license must be stored in the system. If no valid license is stored, only the central administration can be accessed.
In order to be able to store a license in the system, it must first be activated in the JUMO license portal at https://portal.jumo.digital using the license key sent to you and the system-specific UID (identification number of the SCADA installation). You will receive the license key by mail as soon as you have purchased the JUMO smartWARE SCADA.
If you want to activate the software offline, contact JUMO.
JUMO smartWARE SCADA License Portal:
After activating/creating the license, it can be downloaded as a file or copied directly.
Before you leave the website, be sure to save the license after activation (copy it to a text file or use the download button), because it is a one-time activation. The license key cannot be used for another license!
-
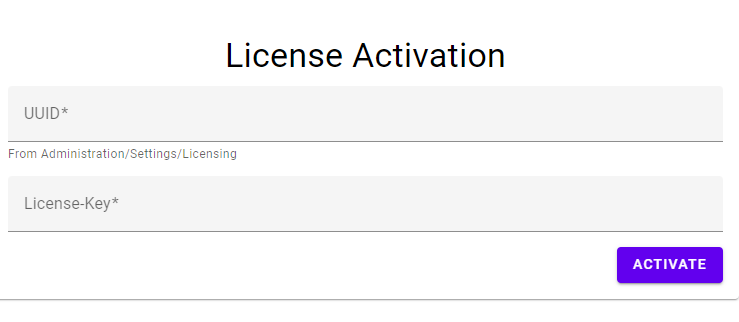
Unlocking the SCADA software
The activation of SCADA with the activated license is done via the settings for licensing in the central administration. The activated license must be inserted there under LicenseKey and saved.

Congratulations! You have successfully commissioned your SCADA.
If you would like to add other users in addition to the root user, please refer to the chapter User Management Keycloak (IAM).
Additional information:
-
The operating system of the IPC is https://releases.ubuntu.com/jammy/
-
It is recommended to change the master password after setup.
-
IPC's username jumo and password jumo
-
Execution of server commands on the IPC:
To use server commands like
docker-compose kill docker-compose down docker-compose up -dor
docker-compose down --remove-orphans docker-compose pull docker-compose up -dthe following steps must be followed:
Open PowerShell or a similar tool on the local machine that is on the same network as the IPC and enter the following line:
Instead of the term "IP-address", the IP address or the DNS name or host name must be entered in the following step. The "jumo" in front of the @ sign corresponds to the IPC user name, which is "jumo" by default.
ssh jumo@IP-adress
Afterwards the following command can be used to change to the SCADA folder of the IPC.
cd /opt/jumo_scada
After this, the Docker commands can be executed as shown in the instructions.
______________